$55 Facebook Marketplace Nightstand Makeover
I found these nightstands for $55 on Facebook Marketplace and gave them a simple makeover using paint, wood filler, and updated hardware. This step-by-step furniture flip breaks down what actually matters — prep, painting, and small design choices that make secondhand pieces look modern and intentional.
How I Gave These $55 Facebook Marketplace Nightstands a Modern Makeover
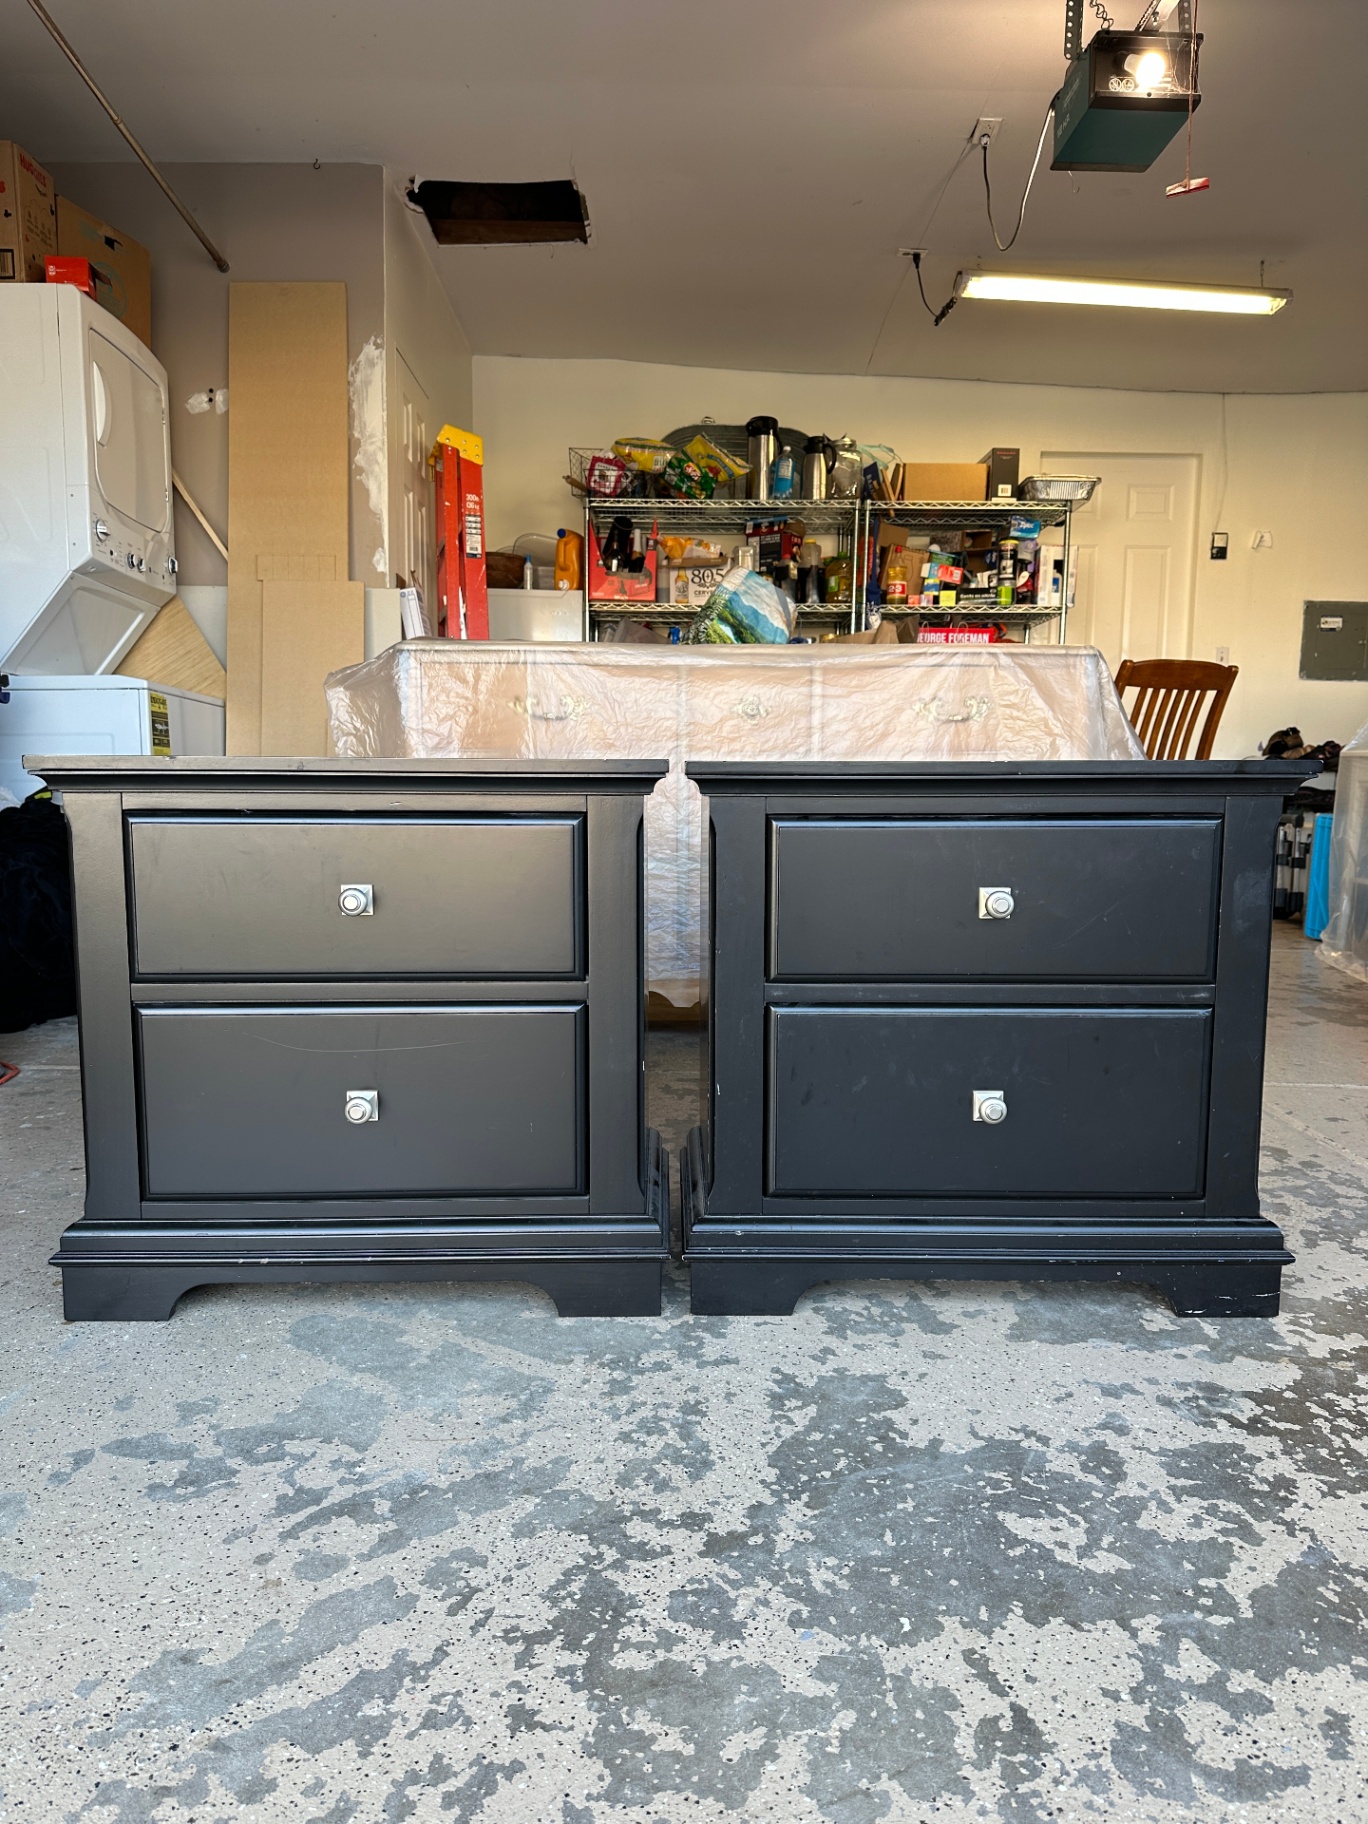
I grabbed this pair of nightstands for $55 on Facebook Marketplace, and while they were definitely dated, they honestly weren’t in bad shape at all. They were sturdy, heavy, and the drawers worked perfectly — which is really what I care about most when shopping secondhand.
And this is exactly why I love furniture makeovers. We throw away so much furniture that still has plenty of life left, when in reality, a few simple updates can completely change how a piece looks and feels.
If you’ve ever scrolled Facebook Marketplace and wondered how to make a dated piece feel more modern, or even just update it to fit your style, this project walks through exactly how to do it step by step.
You Don’t Have to Use Solid Wood (But It Does Help)
Quick clarification before we dive in:
Solid wood — or solid wood with veneer — is absolutely preferable when you’re shopping for furniture to update. It’s more durable and generally holds its value better over time.
That said, it’s not the only option.
I work on a mix of:
solid wood
wood with veneer
MDF or other engineered wood pieces
What matters most is less about the label and more about:
overall construction
drawers that open and close smoothly
a piece that feels sturdy and stable
Cosmetic issues like outdated finishes, hardware, or minor wear are usually fixable. Structural problems are rarely worth the effort.
A note on MDF and engineered wood
Furniture made from MDF or particleboard can still be a perfectly fine choice — especially if:
the piece is for your own home
you’re okay with it being non-vintage
resale value isn’t a major concern
Just keep in mind that engineered wood pieces typically hold less value if you plan to resell, and they don’t have the same longevity as solid wood. As long as you go into it with realistic expectations, there’s no reason to rule them out completely.
Step 1: Remove Hardware + Clean Everything
Start by removing all the hardware. This makes sanding and painting easier and gives you a clean slate for layout changes later.
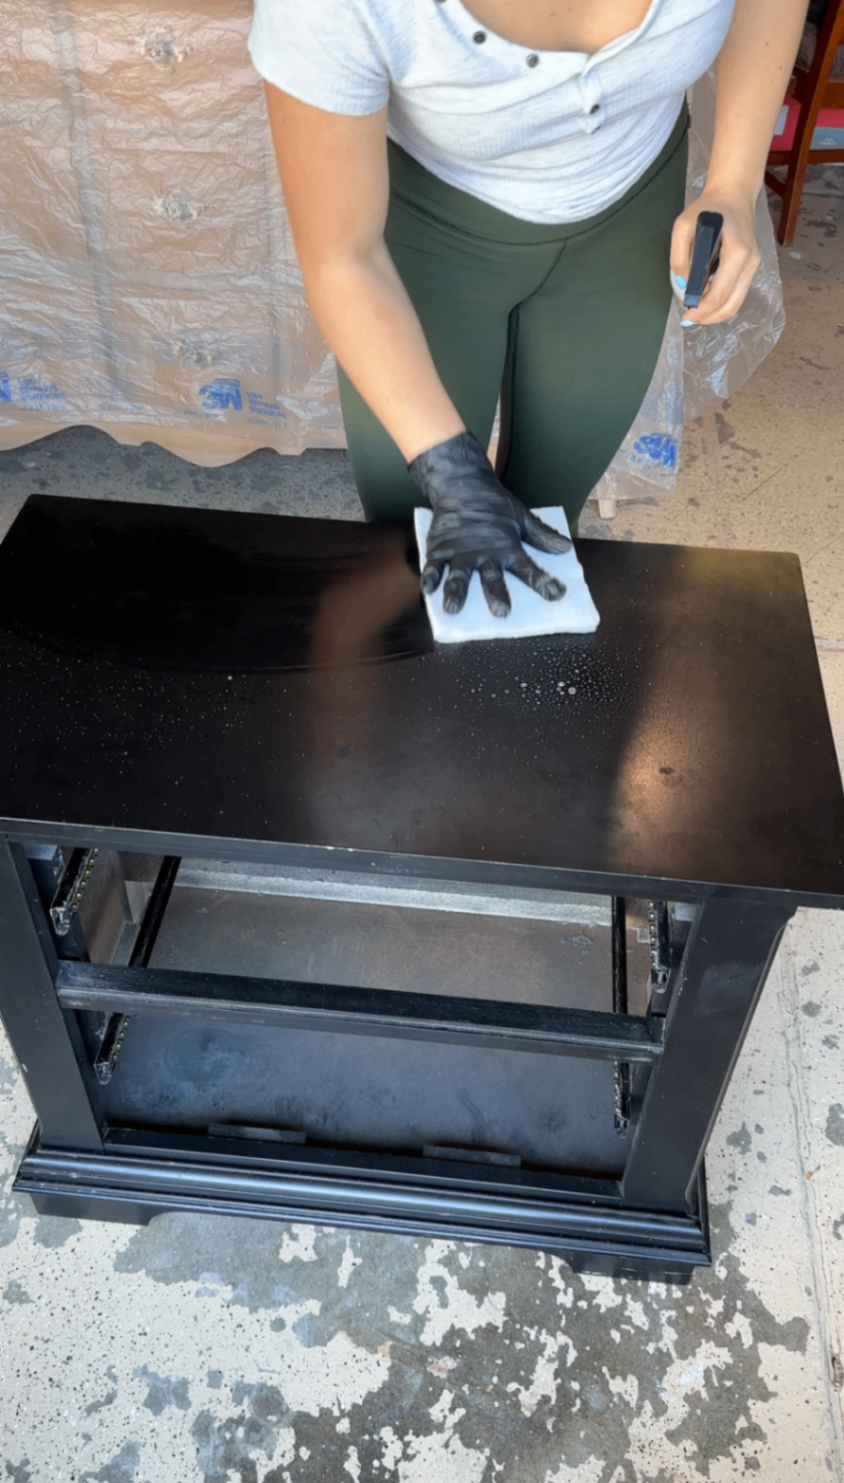
Then clean the entire piece thoroughly. Even furniture that looks clean can have oils, dust, or residue that mess with paint adhesion. A simple degreasing clean makes a big difference before moving on to prep work.
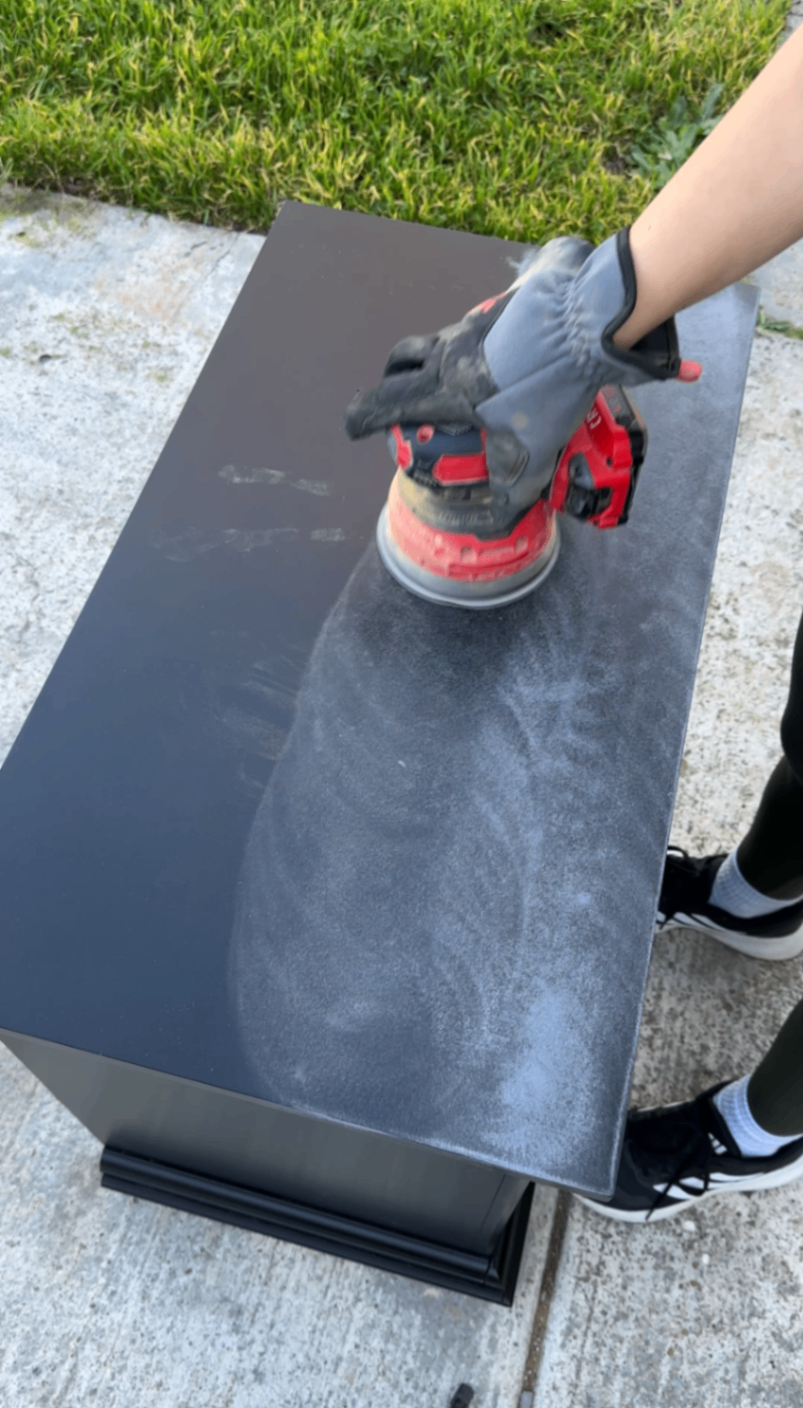
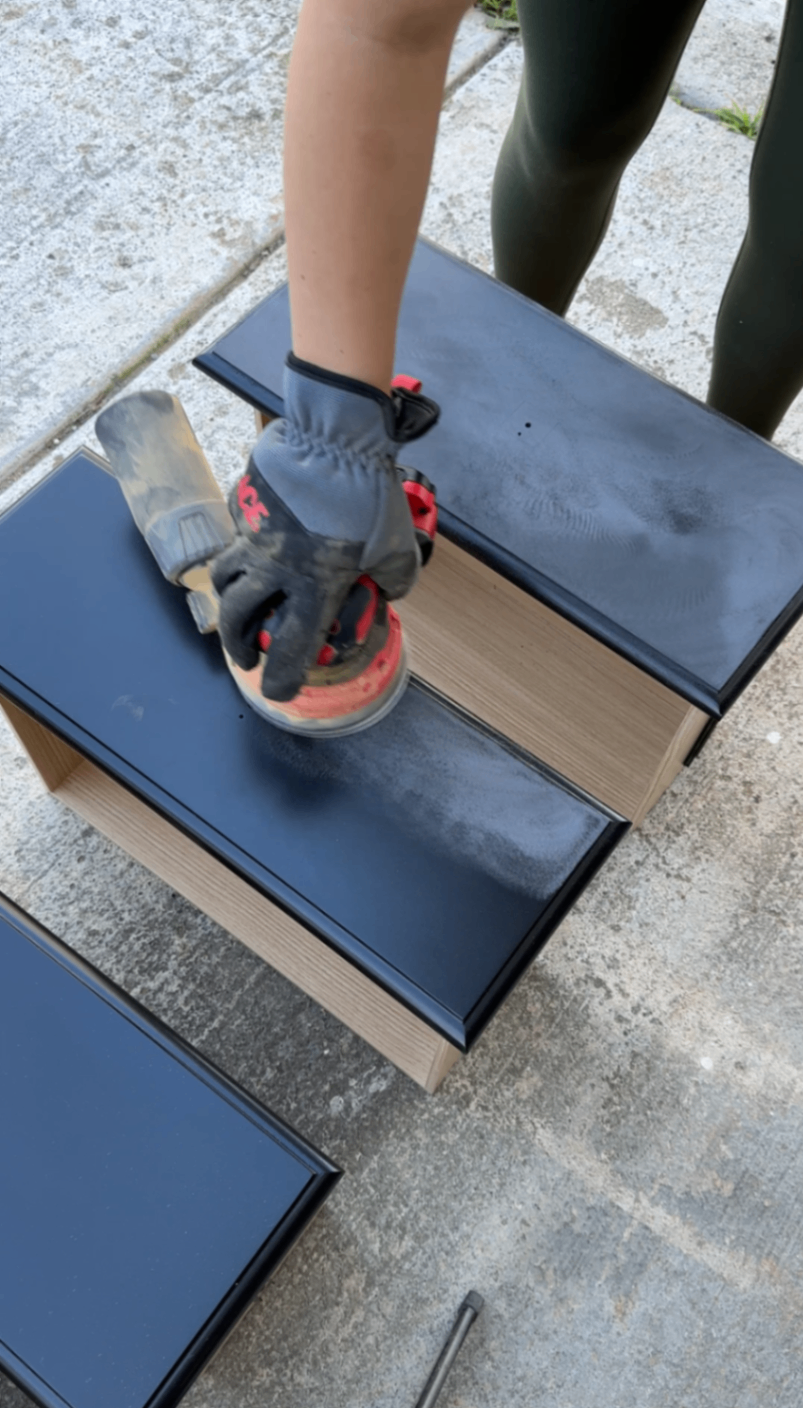
Step 2: Scuff Sand
You don’t need to sand down to bare wood.
I scuff sand with 220-grit sandpaper, which is perfect for dulling the finish so primer can stick properly.
Use an orbital sander on flat surfaces
Hand sand edges, corners, and details
Step 3: Fill Old Hardware Holes + Imperfections
Before priming, fill:
old hardware holes
dents
chips
seams you don’t want visible
Apply wood filler, let it dry fully, then sand smooth.
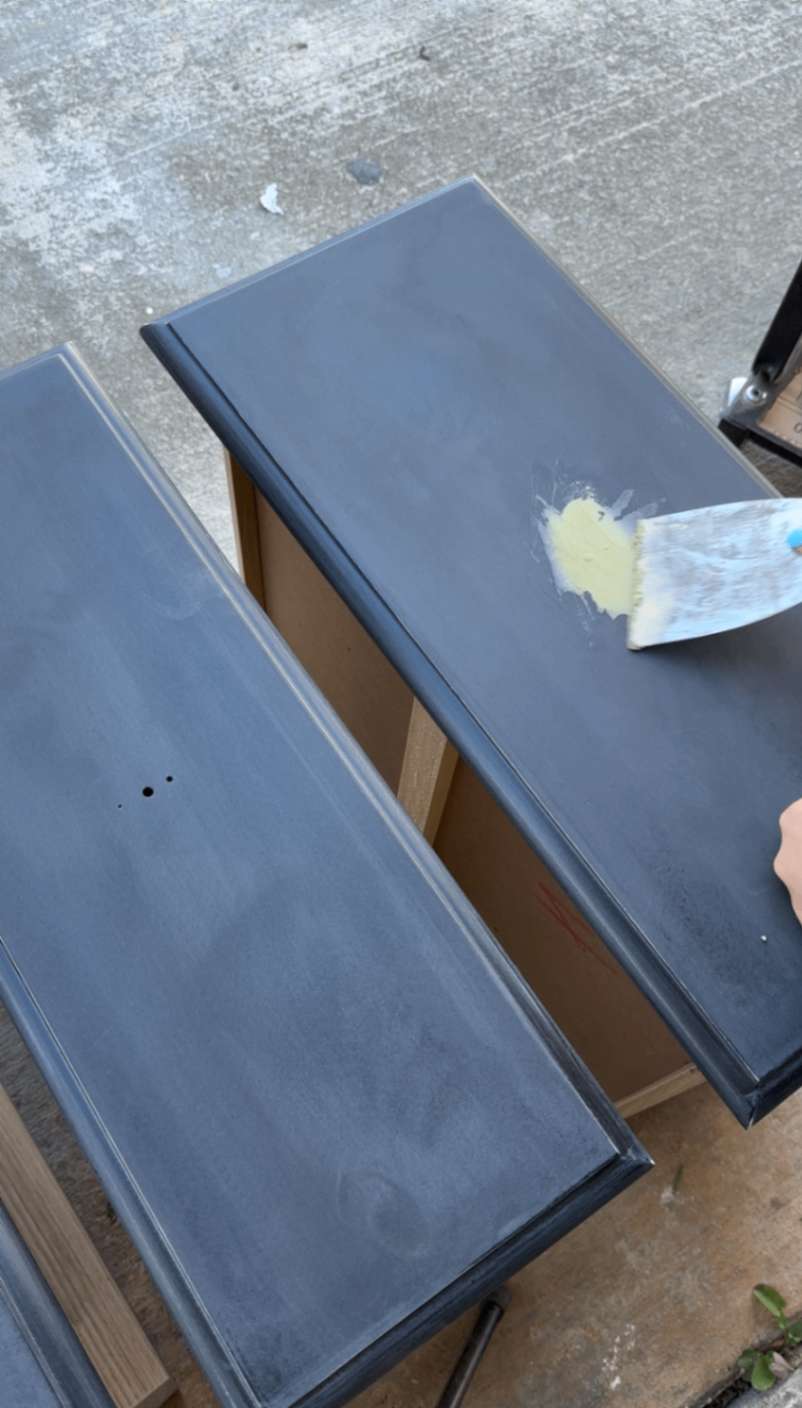
Pro tip (don’t skip this):
After priming, do another round of wood filler.
It’s way easier to spot tiny dings and imperfections on a white or light primer than on raw wood. This second pass is one of the biggest differences between an “okay” finish and a really polished one.
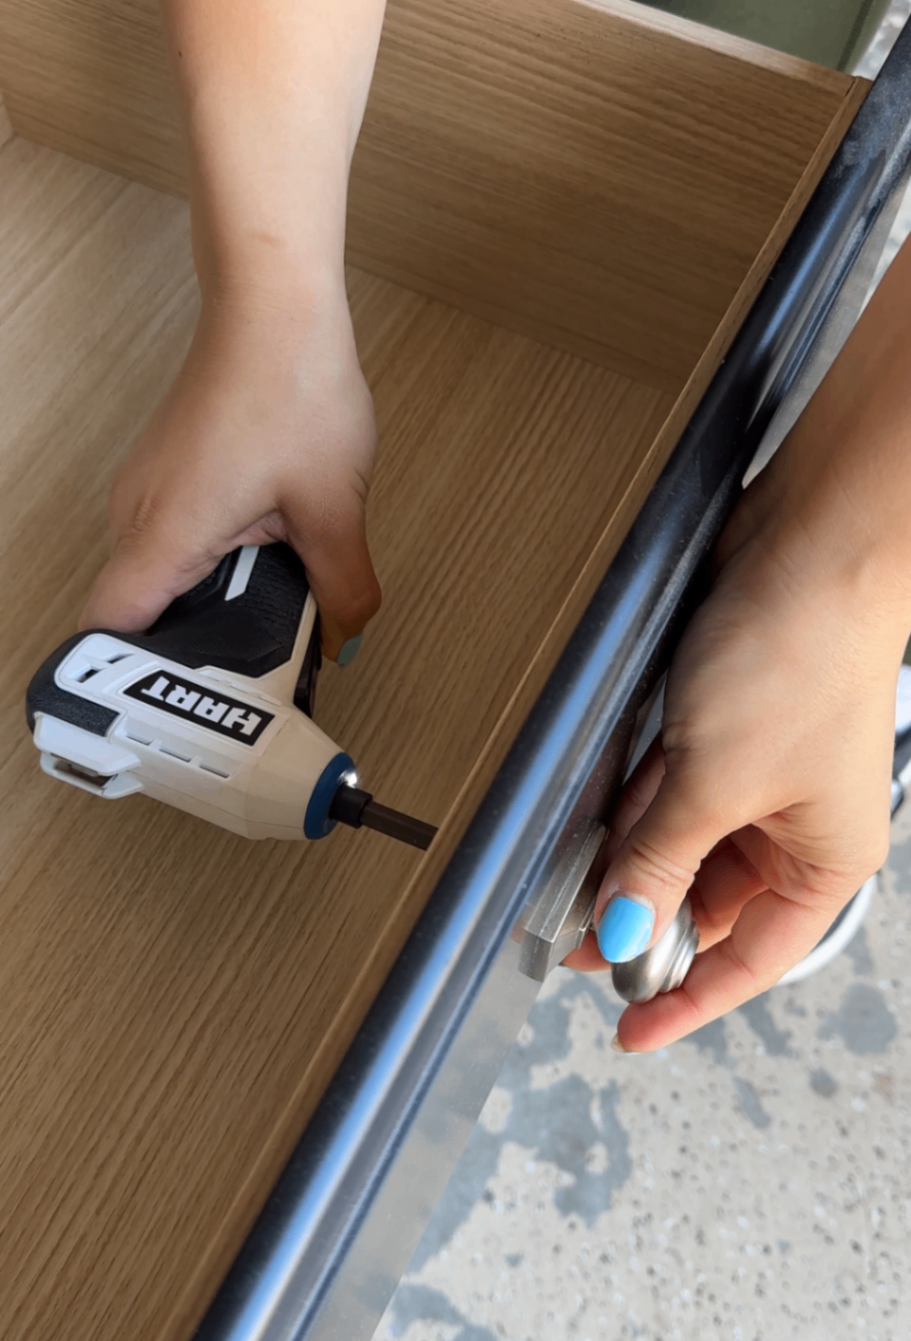
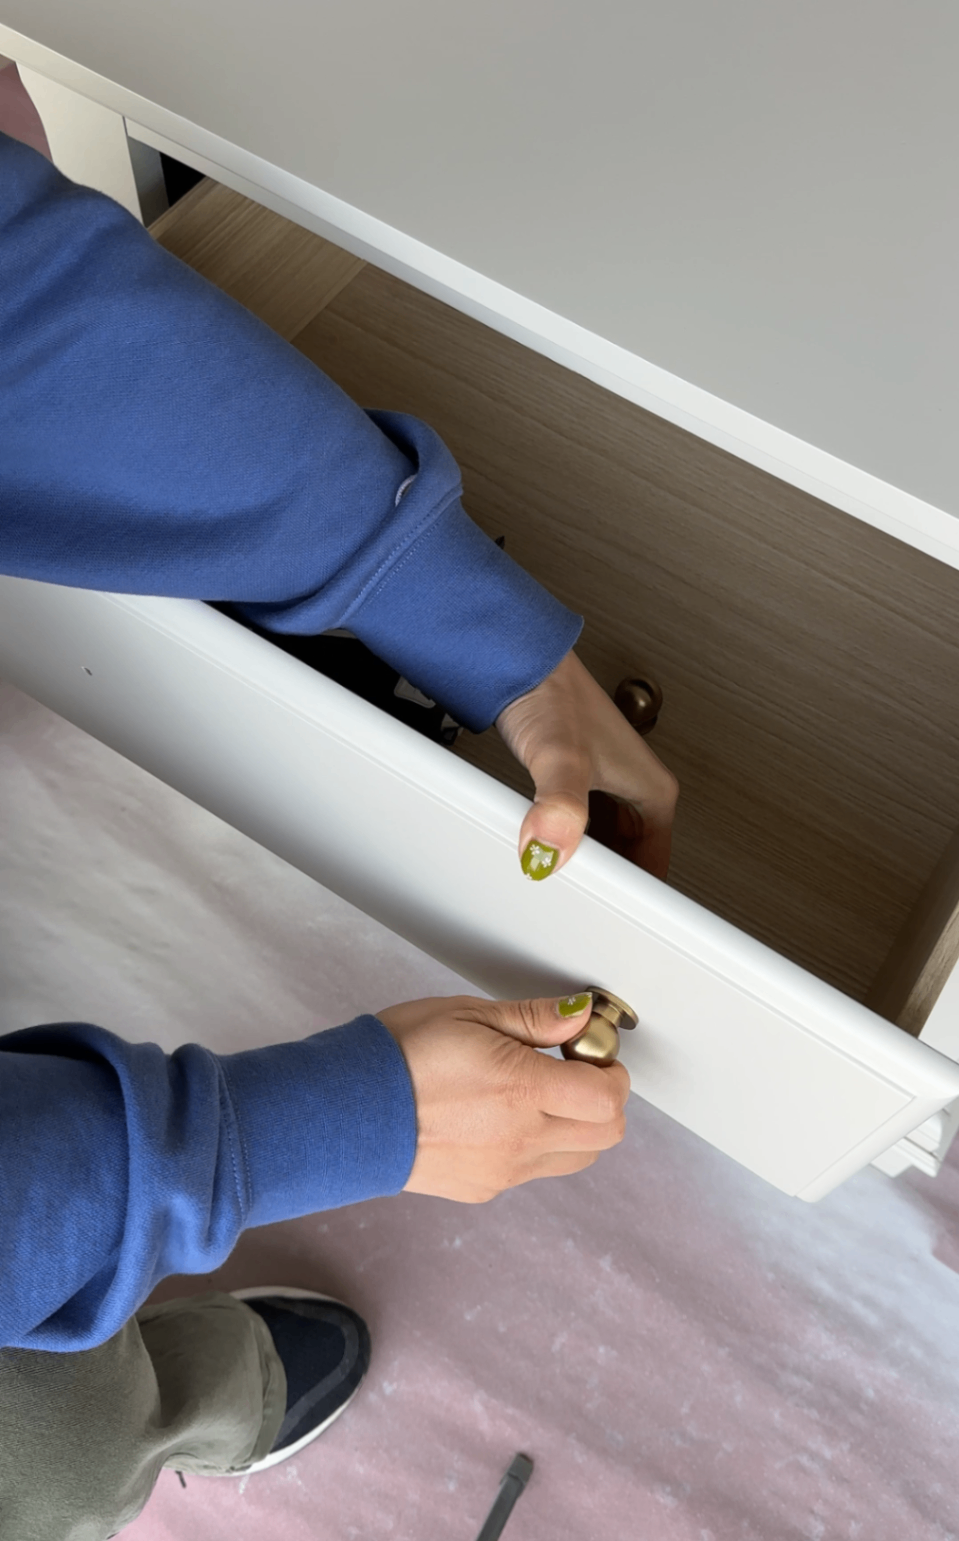
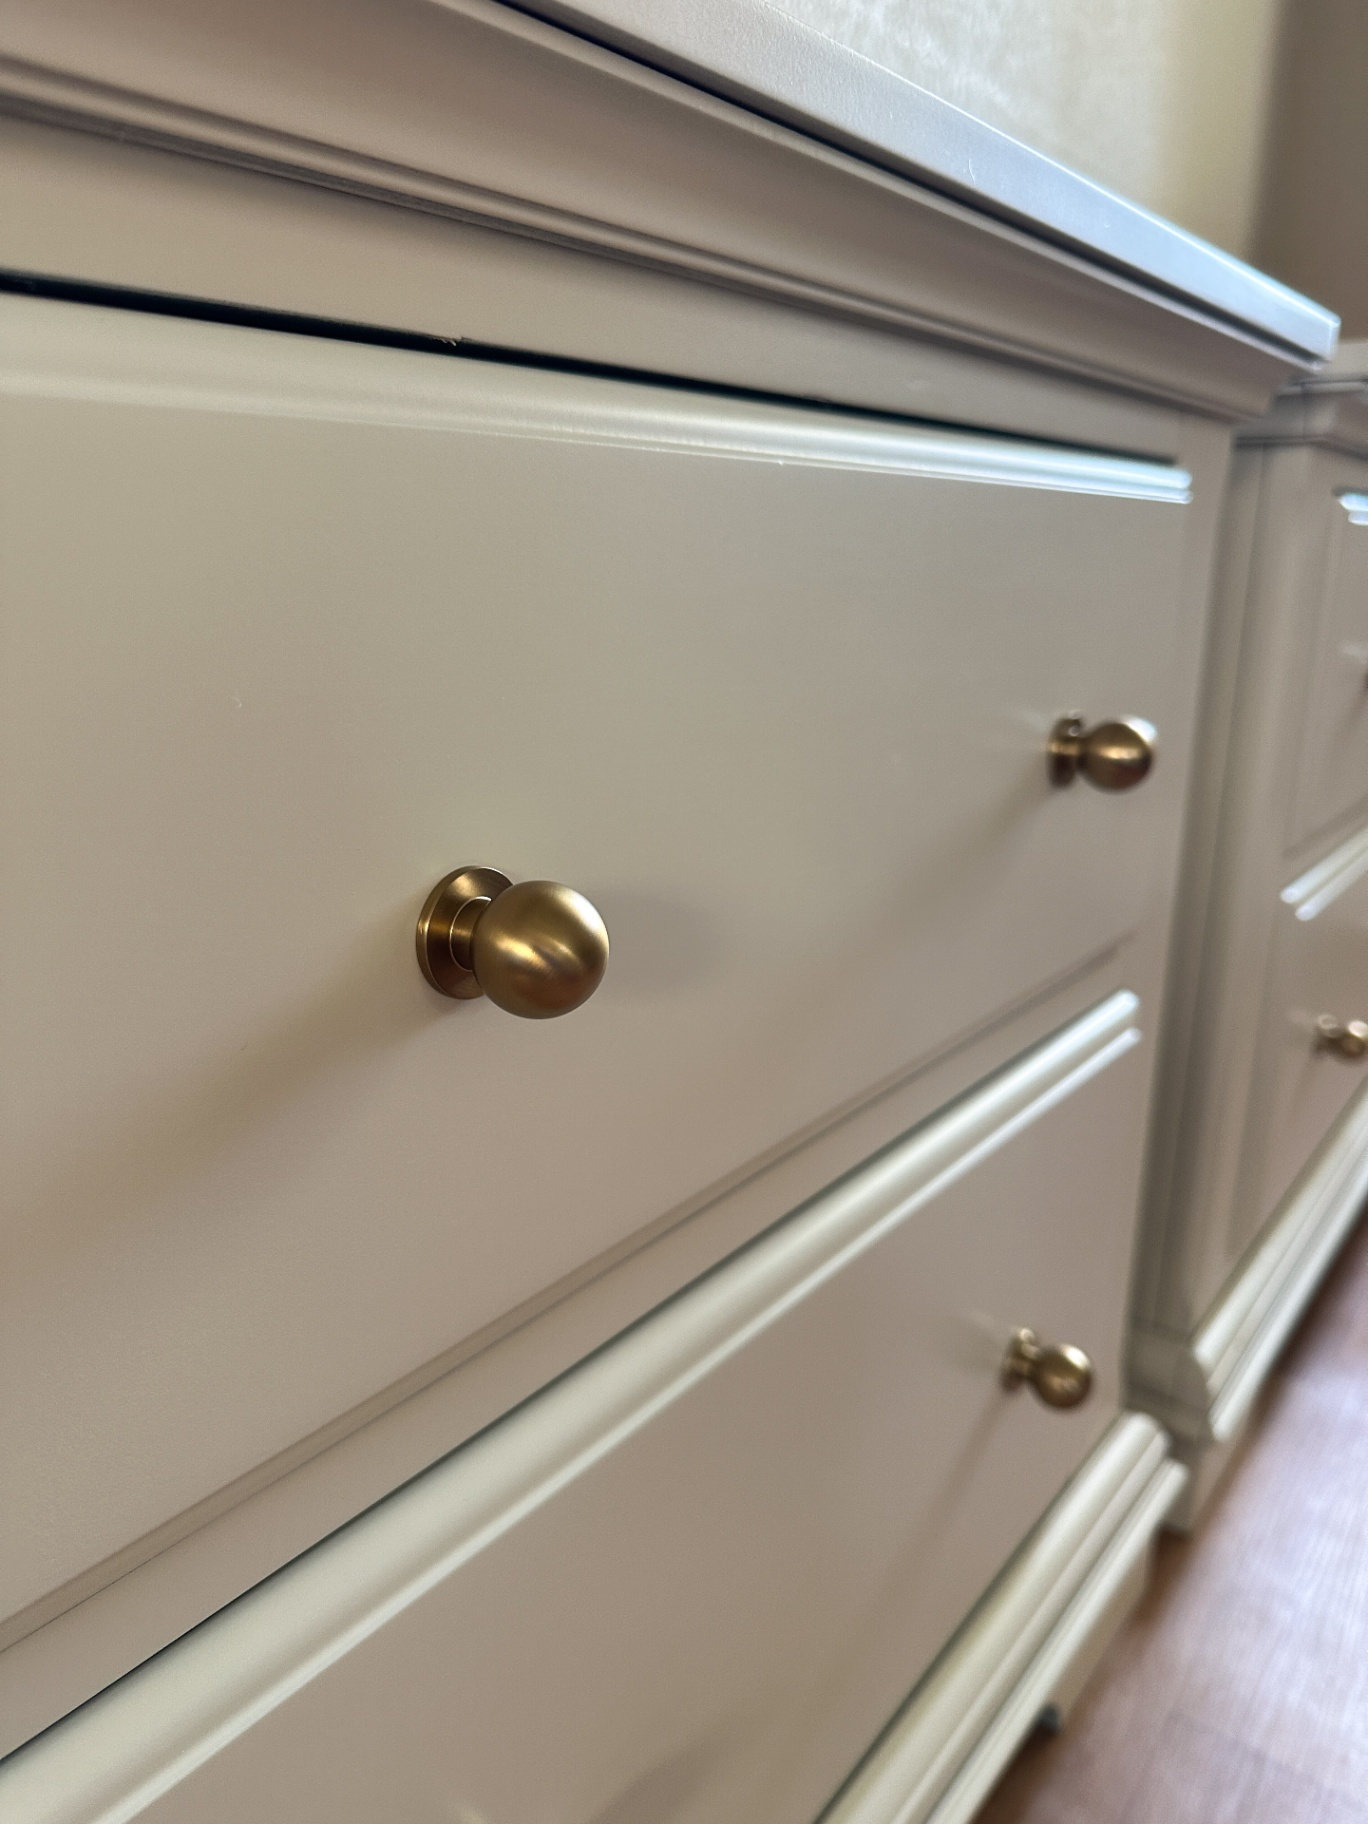
Hardware Pro Tip: Double Knobs > Single Knob
Instead of reinstalling one knob in the center of each drawer, I drilled new holes to fit two knobs per drawer.
Why this works:
looks more balanced
actually pairs really well with vintage or modern style furniture
instantly elevates the piece without much cost
If a drawer is wide enough, double knobs almost always look better than a single centered one (imho).
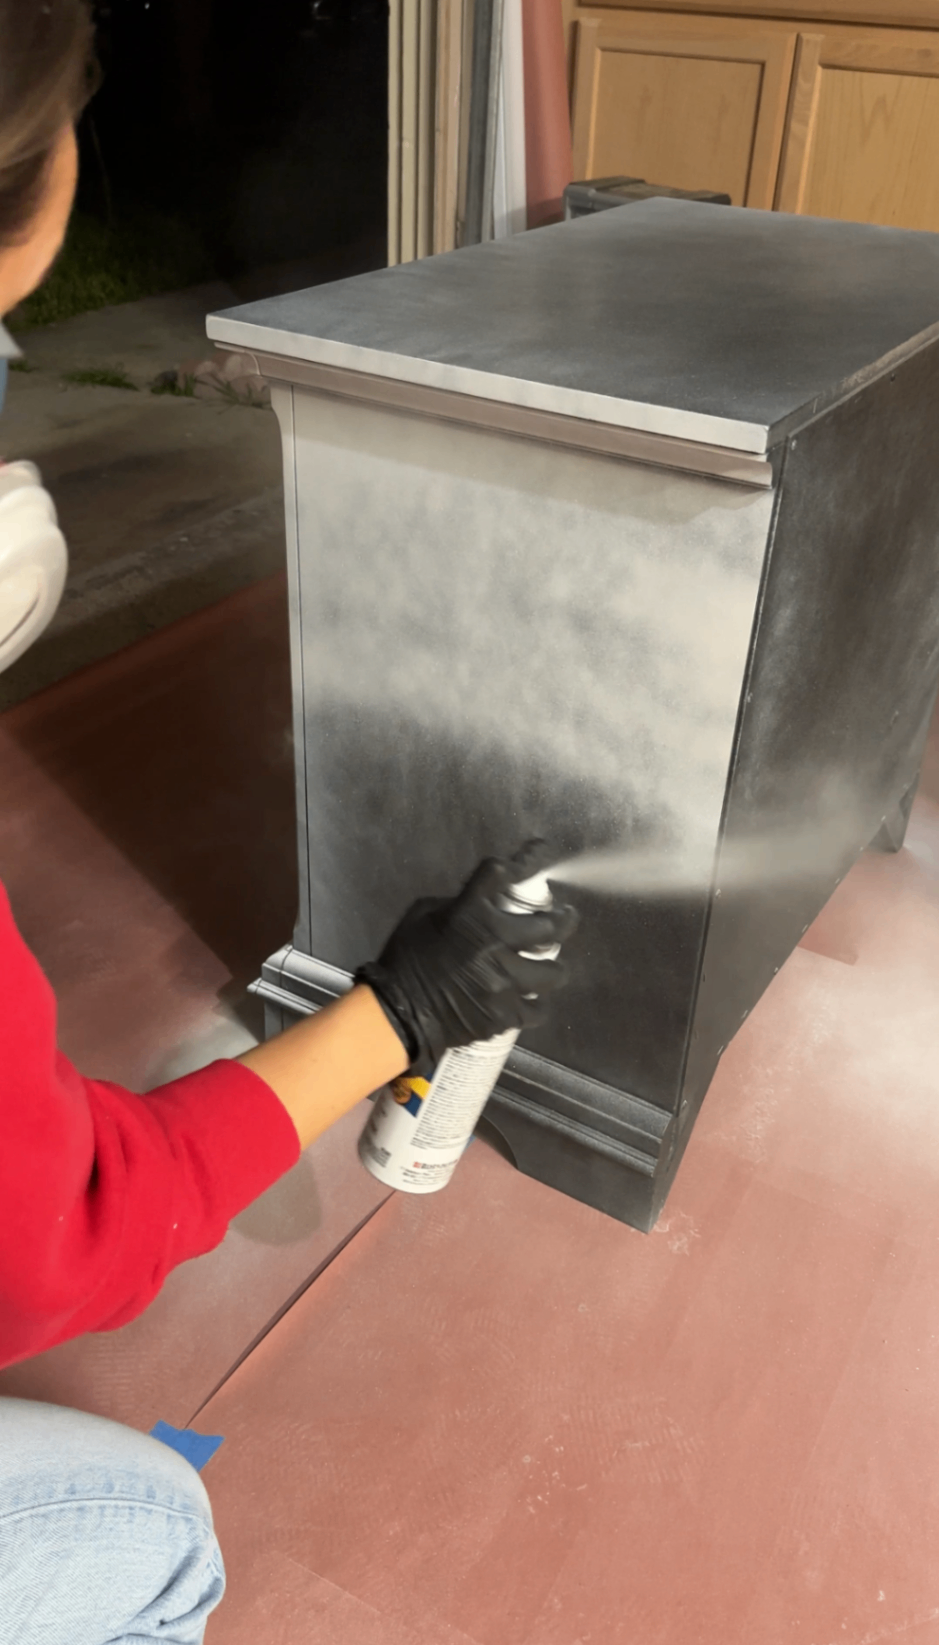
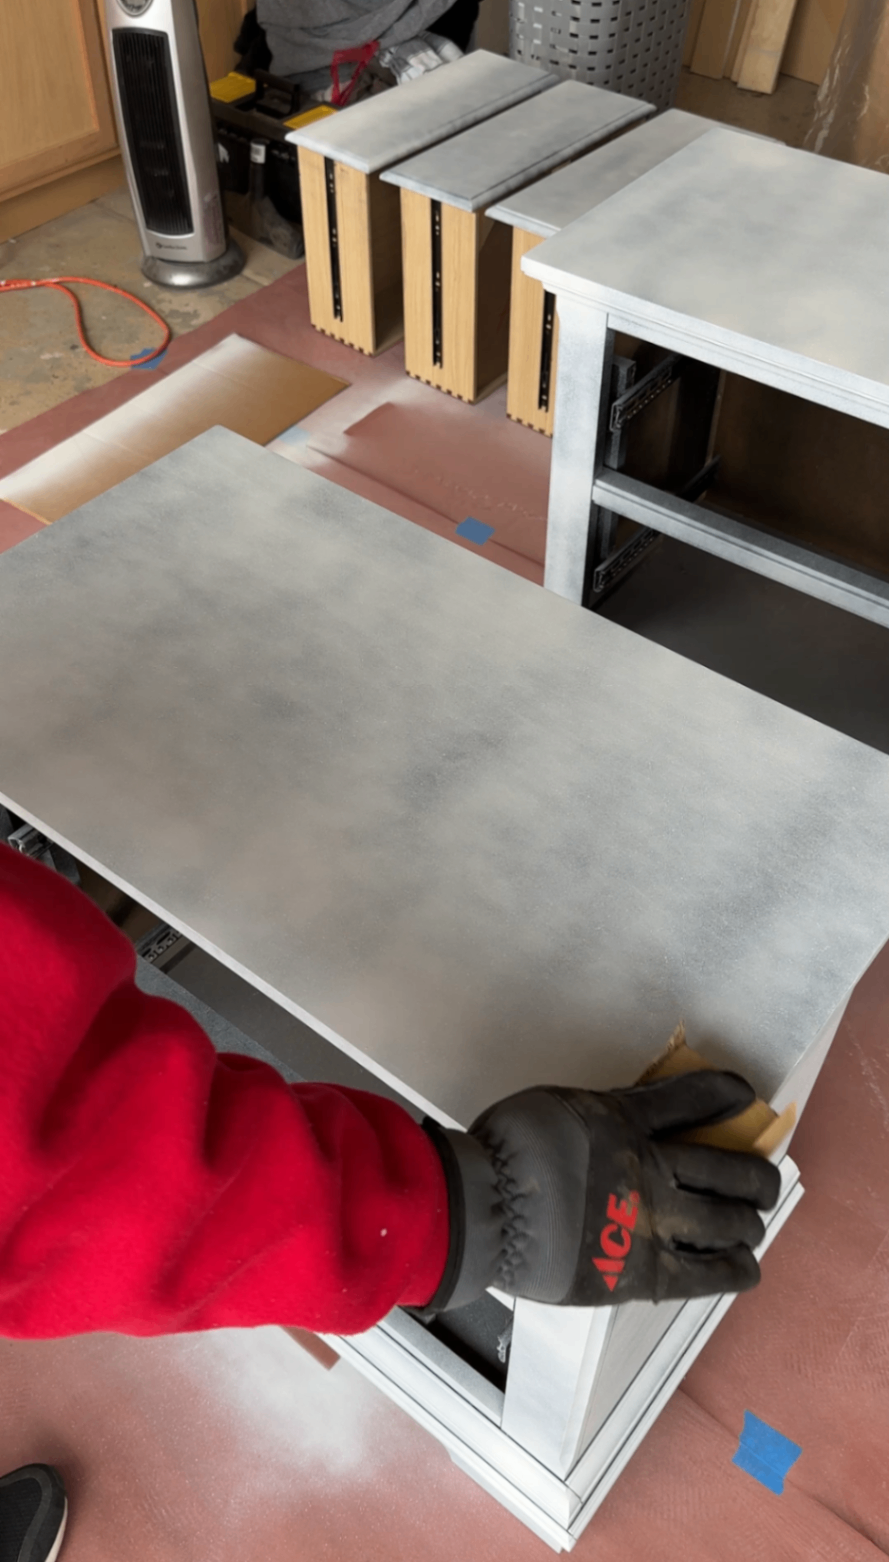
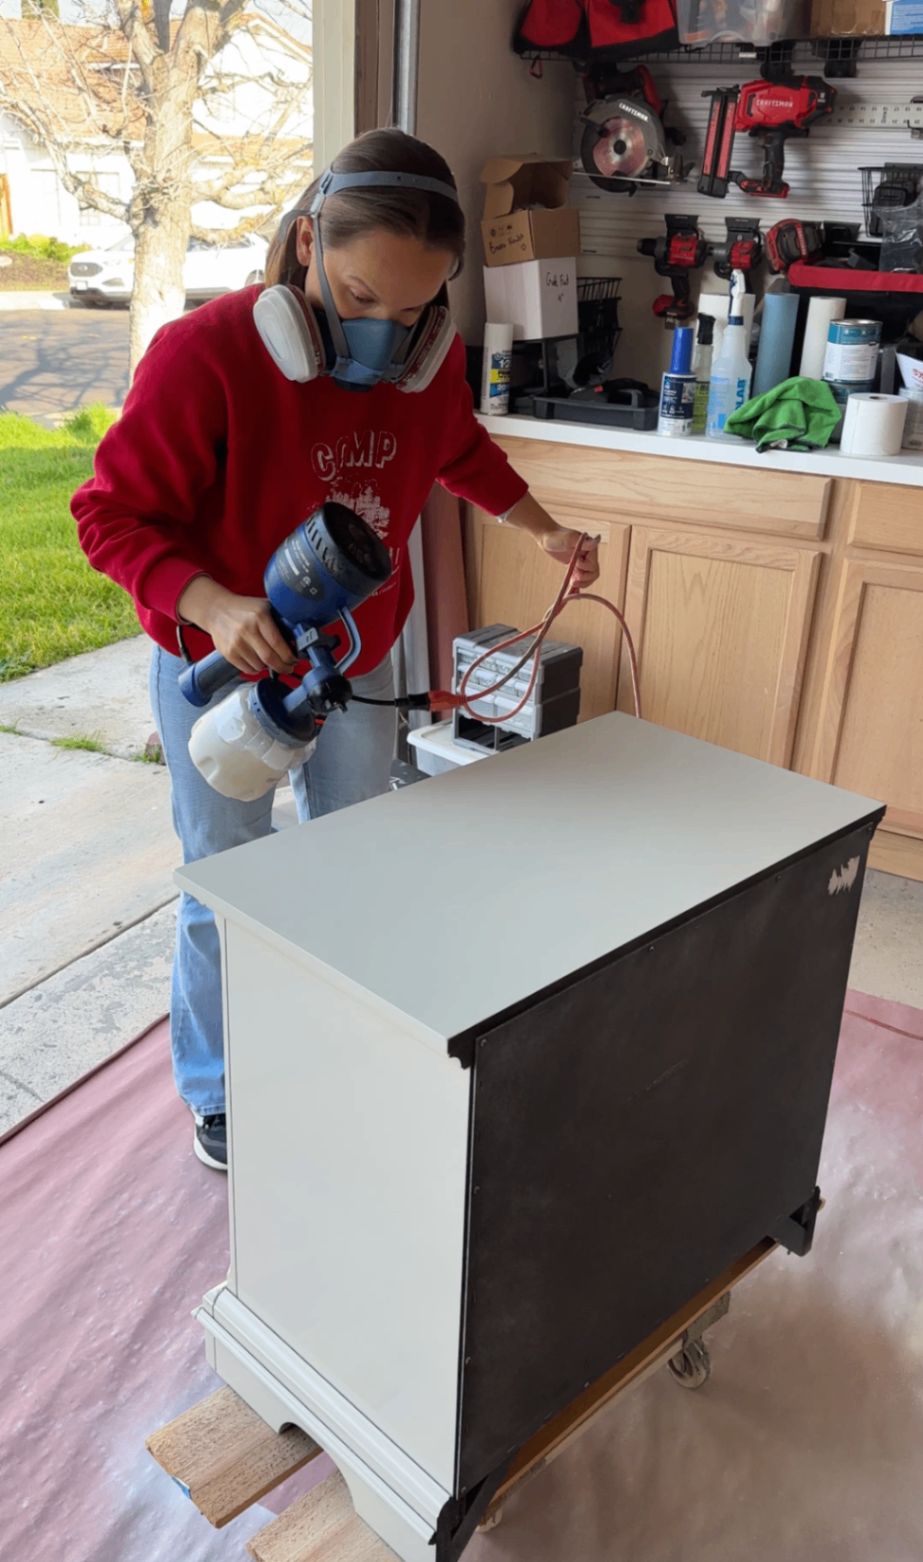
Step 4: Prime
After sanding and filling, I primed everything using my favorite spray primer. If primer feels intimidating, don’t worry — this step is very doable as long as you go in prepared.
Because spray primer is pretty fumey, this is one of those steps where safety really matters:
Wear a proper respirator (not just a dust mask)
Make sure you have good ventilation — I open my garage door and the side door for airflow

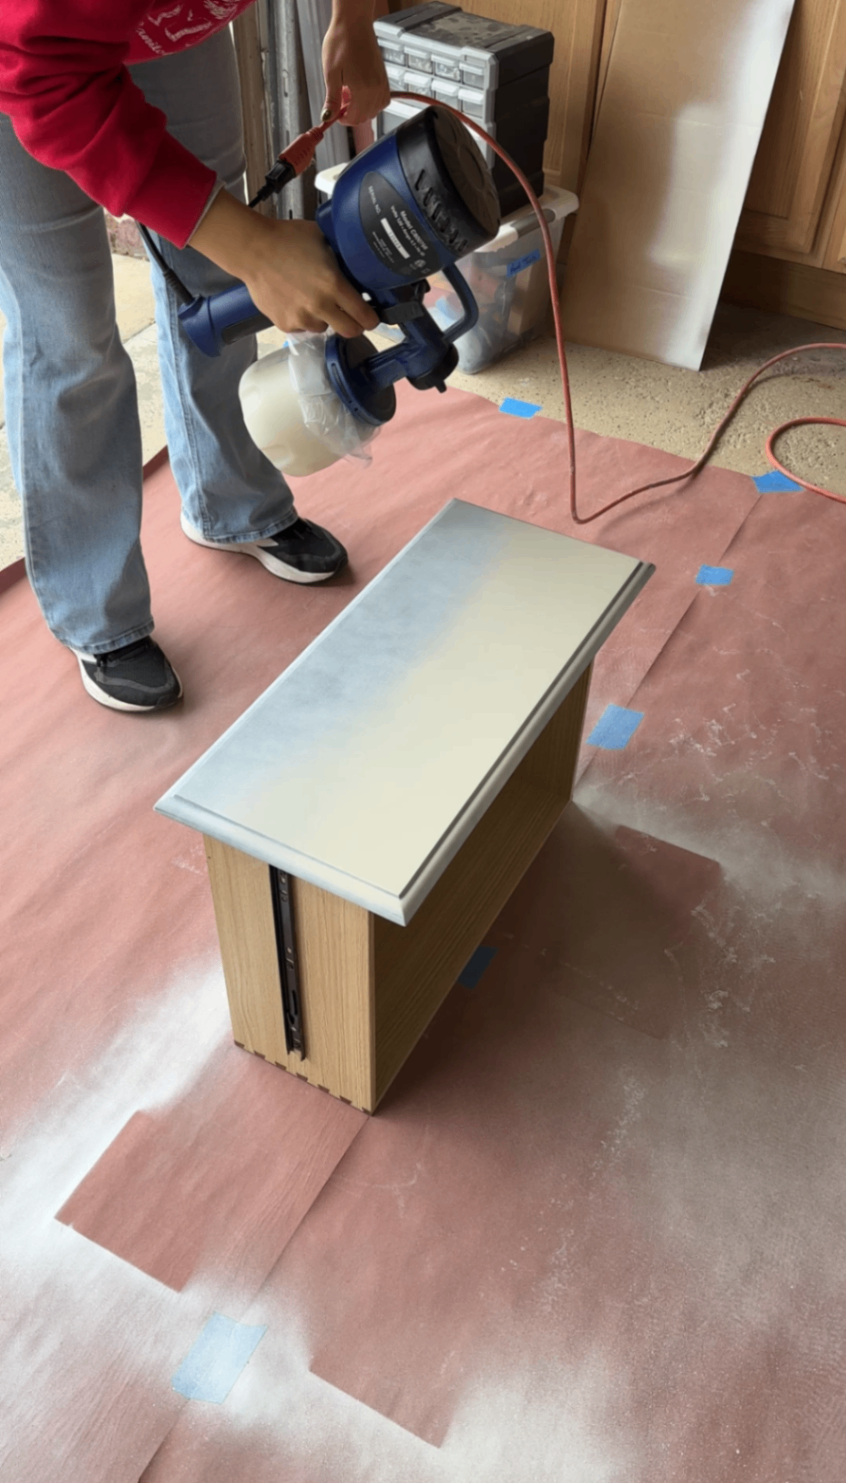
Pro tip for spraying drawers (and avoiding overspray)
When spraying drawers outside of the piece, I like to hold or place a piece of scrap cardboard under the edges of the drawer as I spray. This lets you:
spray the drawer fronts evenly
keep them out of the furniture frame
avoid overspray drifting onto the inside of the drawer
It’s a simple trick, but it makes spraying drawers so much cleaner and easier — and you can see exactly what I mean in the photo.
Once the primer dried, I gave everything a light sand to smooth things out before moving on to paint.
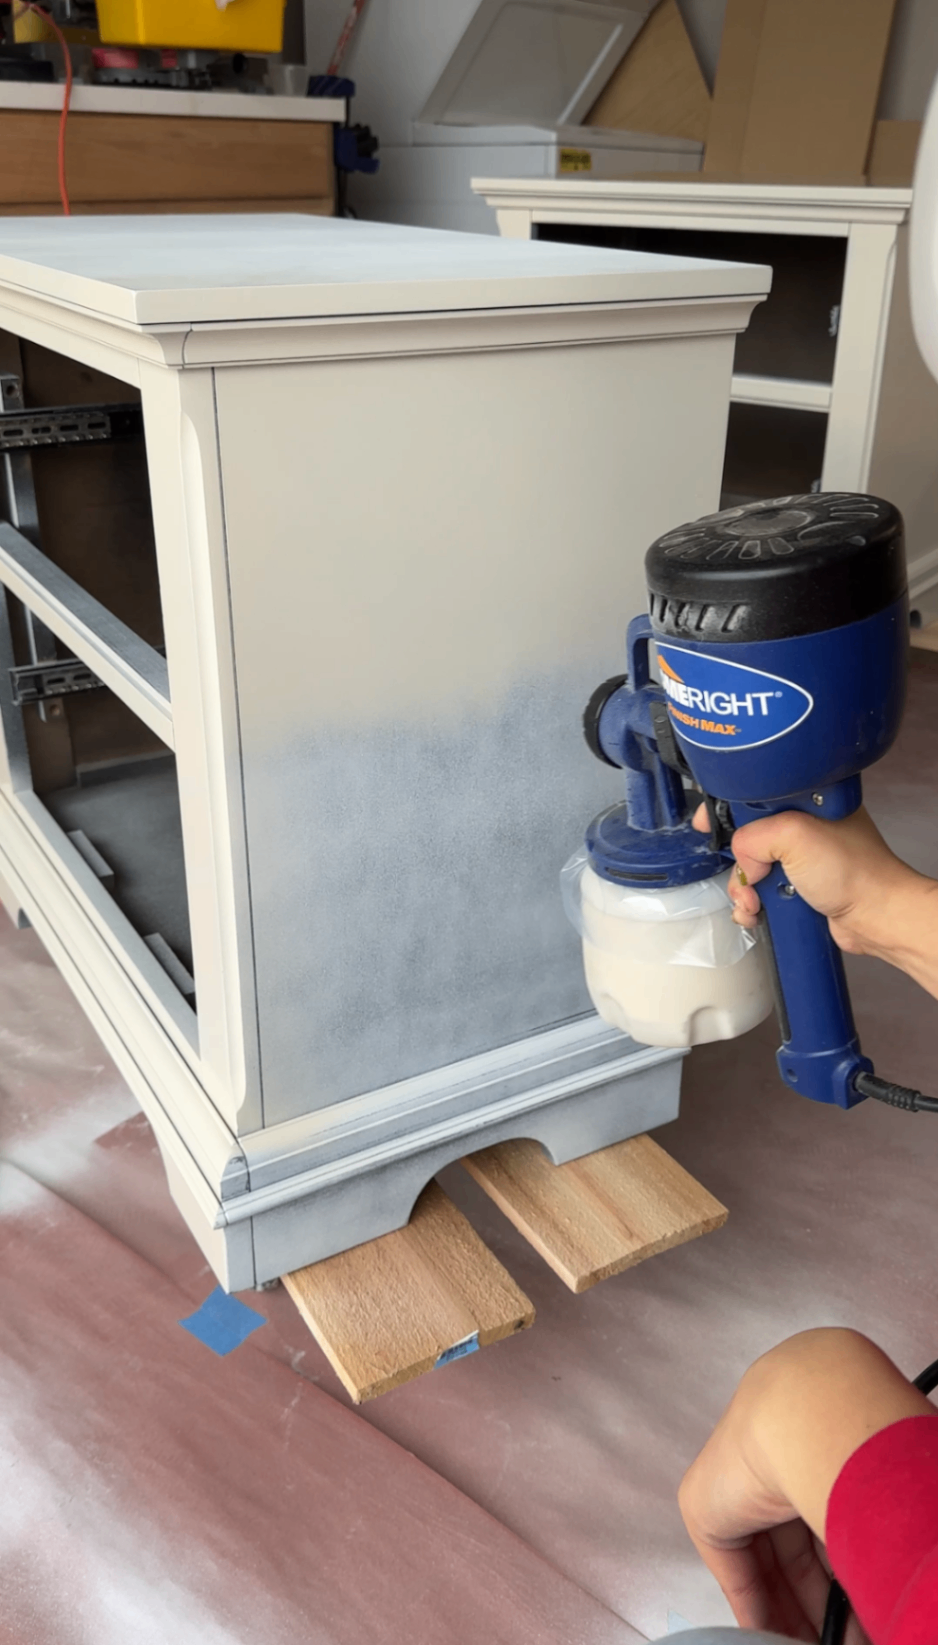
Step 5: Painting (Sprayer Optional, But Worth It)
I chose to spray these in a beautiful neutral beige color (best seller in my area). While spraying does have a bit of a learning curve, it’s significantly faster, easier overall, and gives a much more professional-looking finish than brushing or rolling once you get the hang of it.
If you don’t have a sprayer or don’t want to use one, brushing or rolling will still work totally fine — it just takes more patience and careful technique.
I’ll link the exact sprayer I’m using here, since it’s affordable and a great option if you’re curious about trying spraying for the first time.
No matter which method you choose, the biggest factors for a good finish are:
thin coats
even coverage
light sanding between coats (and wood filling if necessary)
Spraying mistake to avoid:
Spraying too heavy.
Heavy coats = drips, runs, and frustration. Build coverage slowly.
Mixing Poly Into Paint (How I Actually Do It)
I like to mix polyurethane directly into my paint to build durability as I go. It's my personal hack to make any regular paint essentially a paint and sealer in one!
Approximate ratio:
Earlier coats → heavier on paint (to build color)
Later coats → heavier on poly (to build durability)
This approach saves time and works really well for pieces like nightstands and dressers that get daily use. Plus it minimizes having to clean the sprayer between coats, who doesn't love that!
Dry Times + Winter Painting Tips
Dry times vary a lot depending on temperature and humidity. Right now, since it’s winter and cold out, everything takes longer to cure.
One thing that helps massively:
An oscillating heater in the garage
Keeping the space warmer helps paint cure properly and prevents tacky finishes. Just make sure there’s good airflow and you’re not overheating the piece.
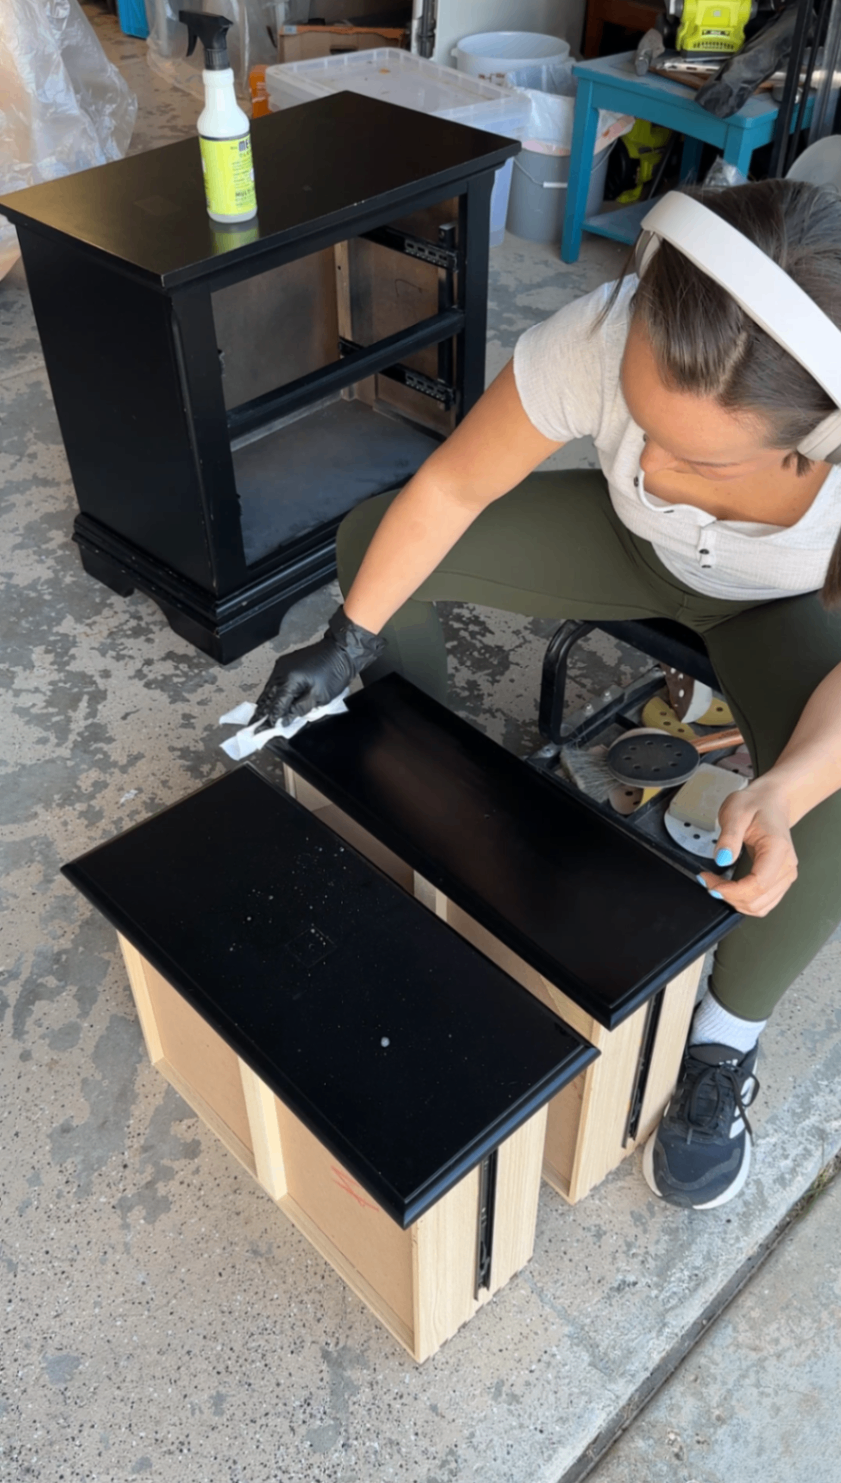
Add the New Hardware + Final Clean
Once the paint has fully cured, it’s time for the finishing touches.
I installed the new hardware (beautiful brass knobs), and gave each drawer a final clean.
Pro tip for a buttery smooth finish
For the final pass, use a piece of a brown paper bag (the non-ink side) as your last “sand.”
Brown paper is roughly equivalent to ~2500 grit, which means it:
smooths out tiny dust nibs
knocks down texture
most importantly, won’t leave visible scratches!
Gently rub it over the fully dried paint before installing hardware or putting drawers back in. It’s one of my favorite tricks for getting that soft, professional feel without risking the finish.
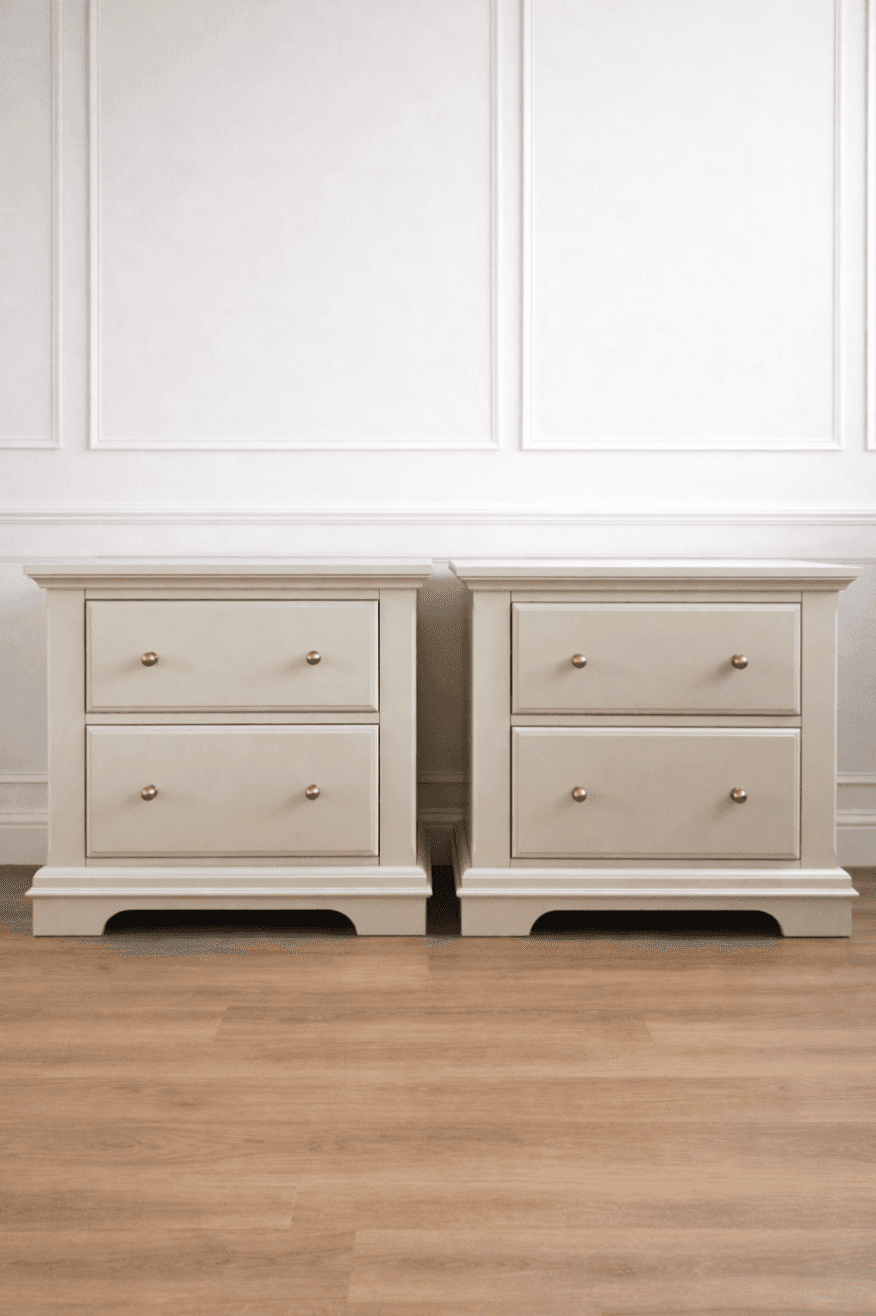
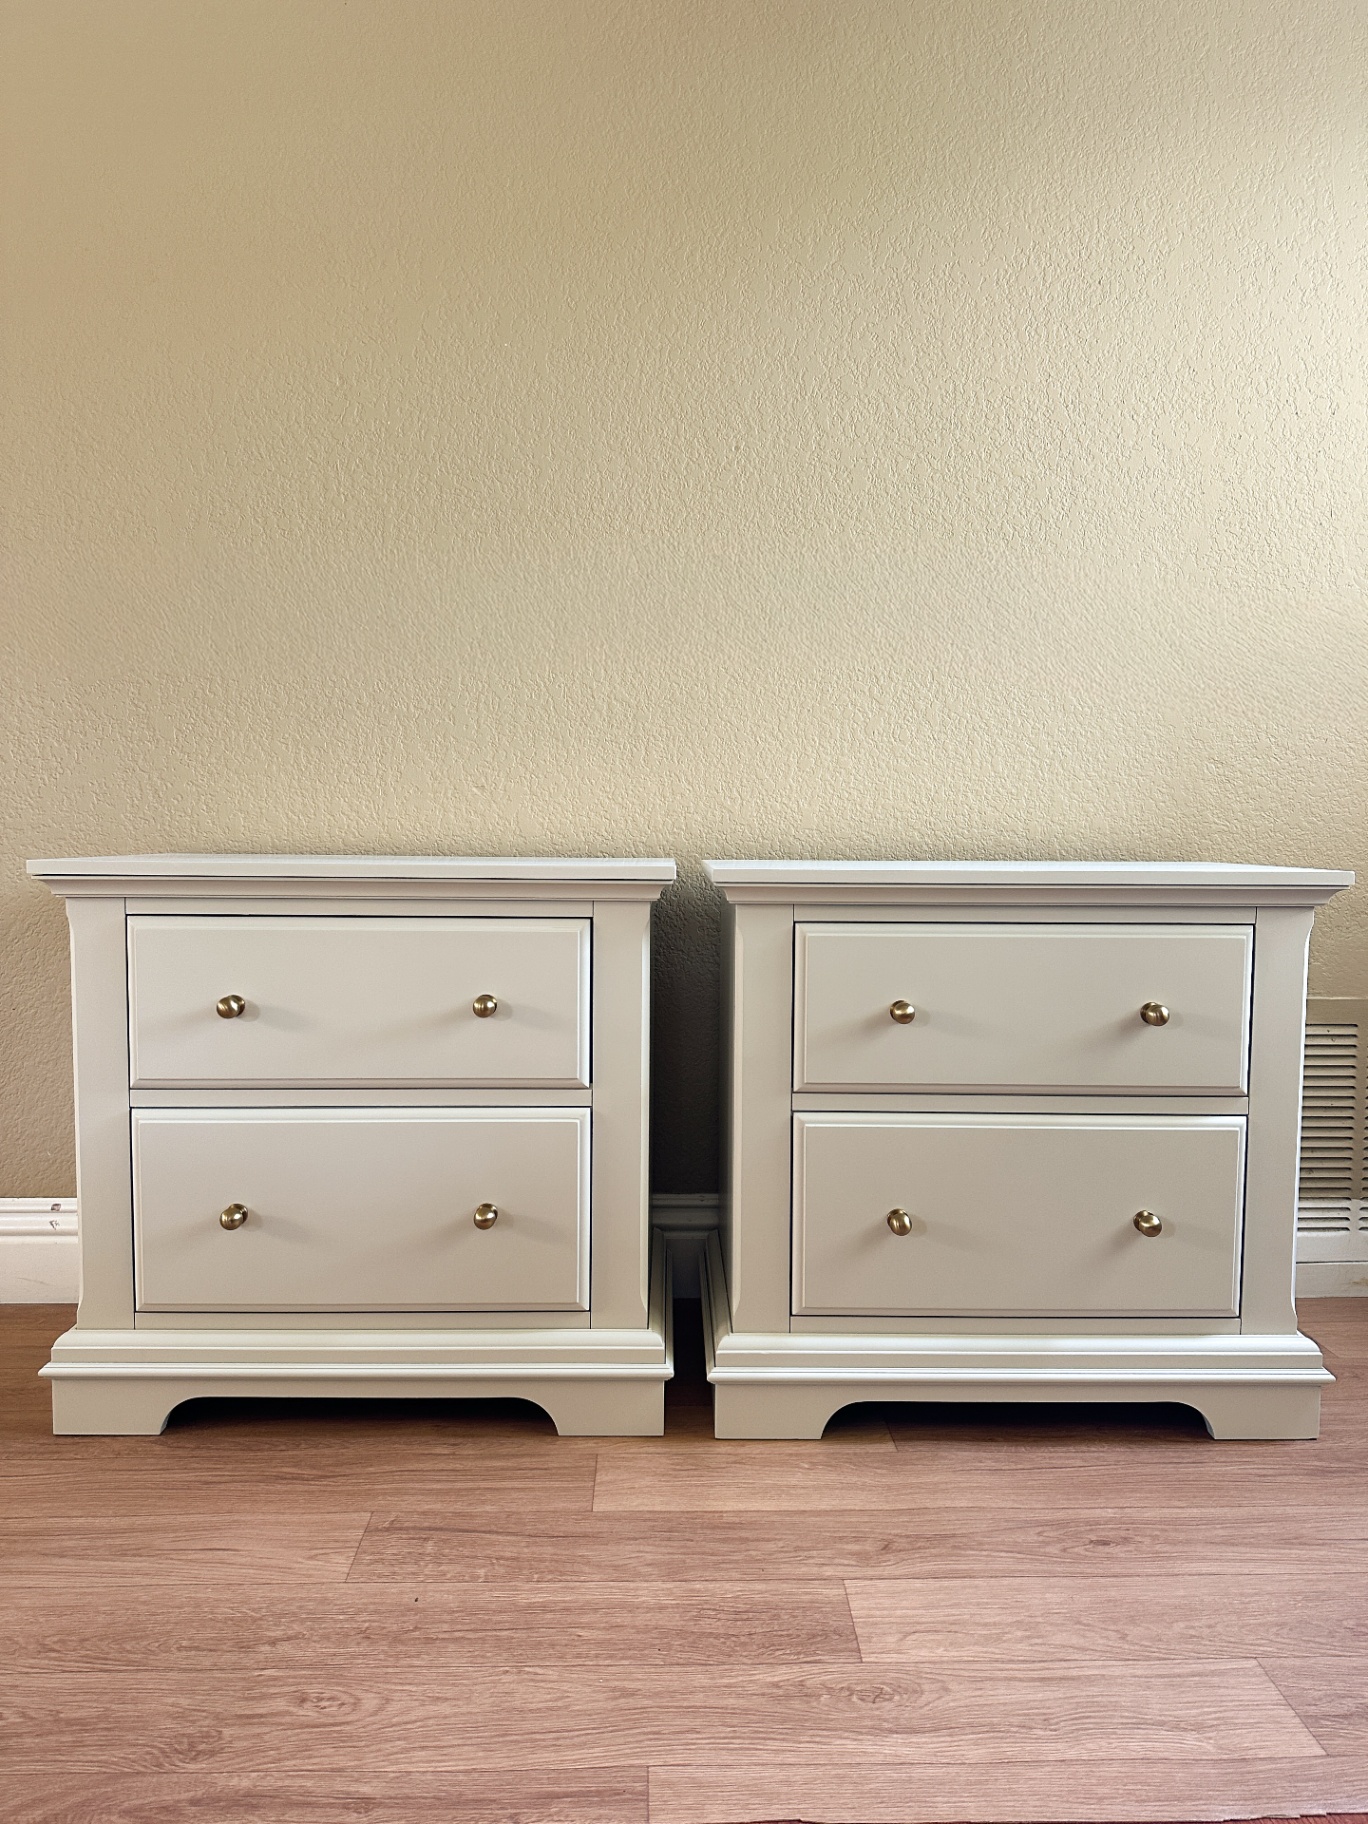
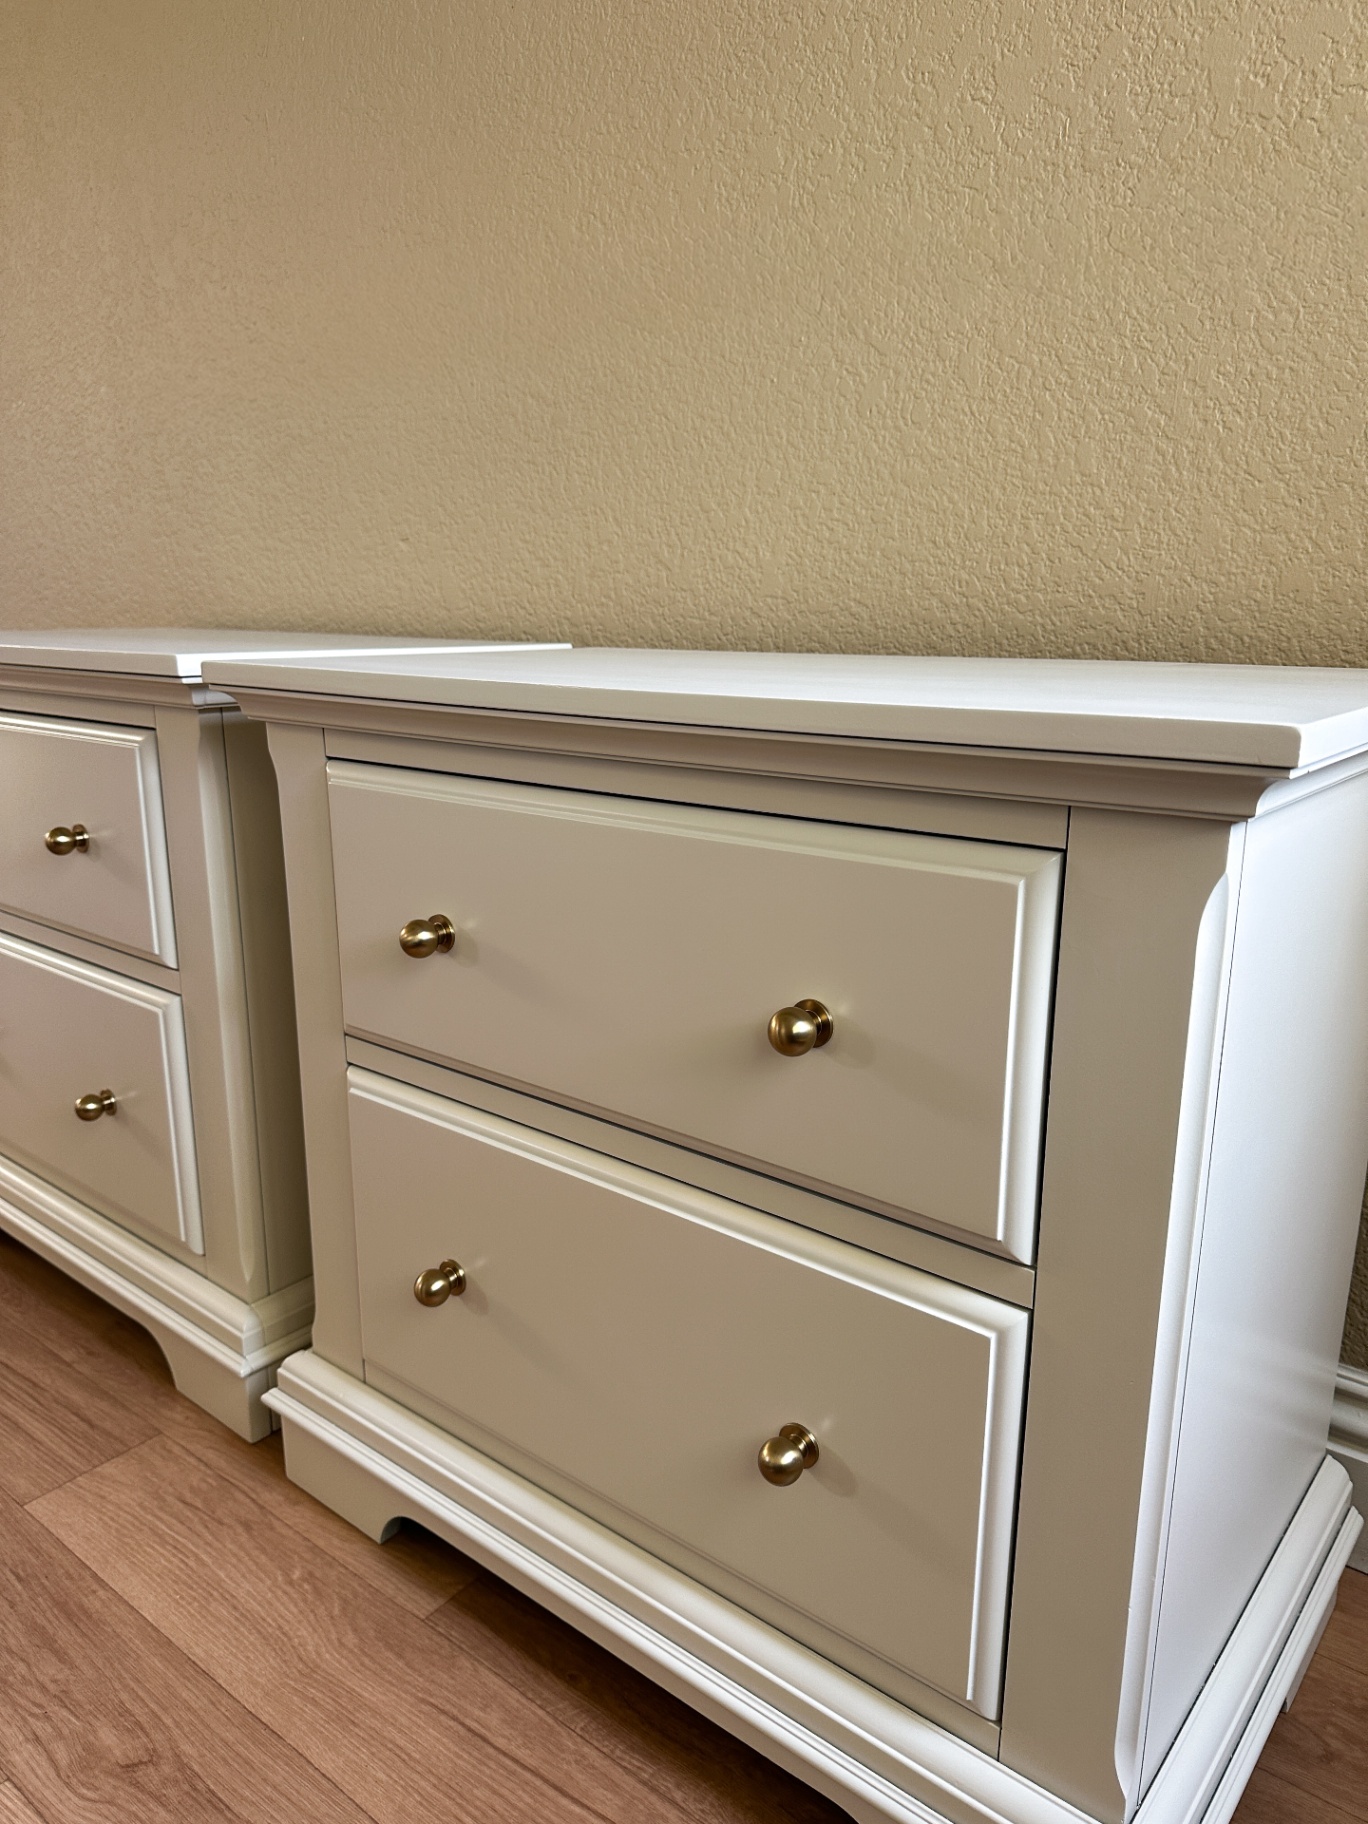
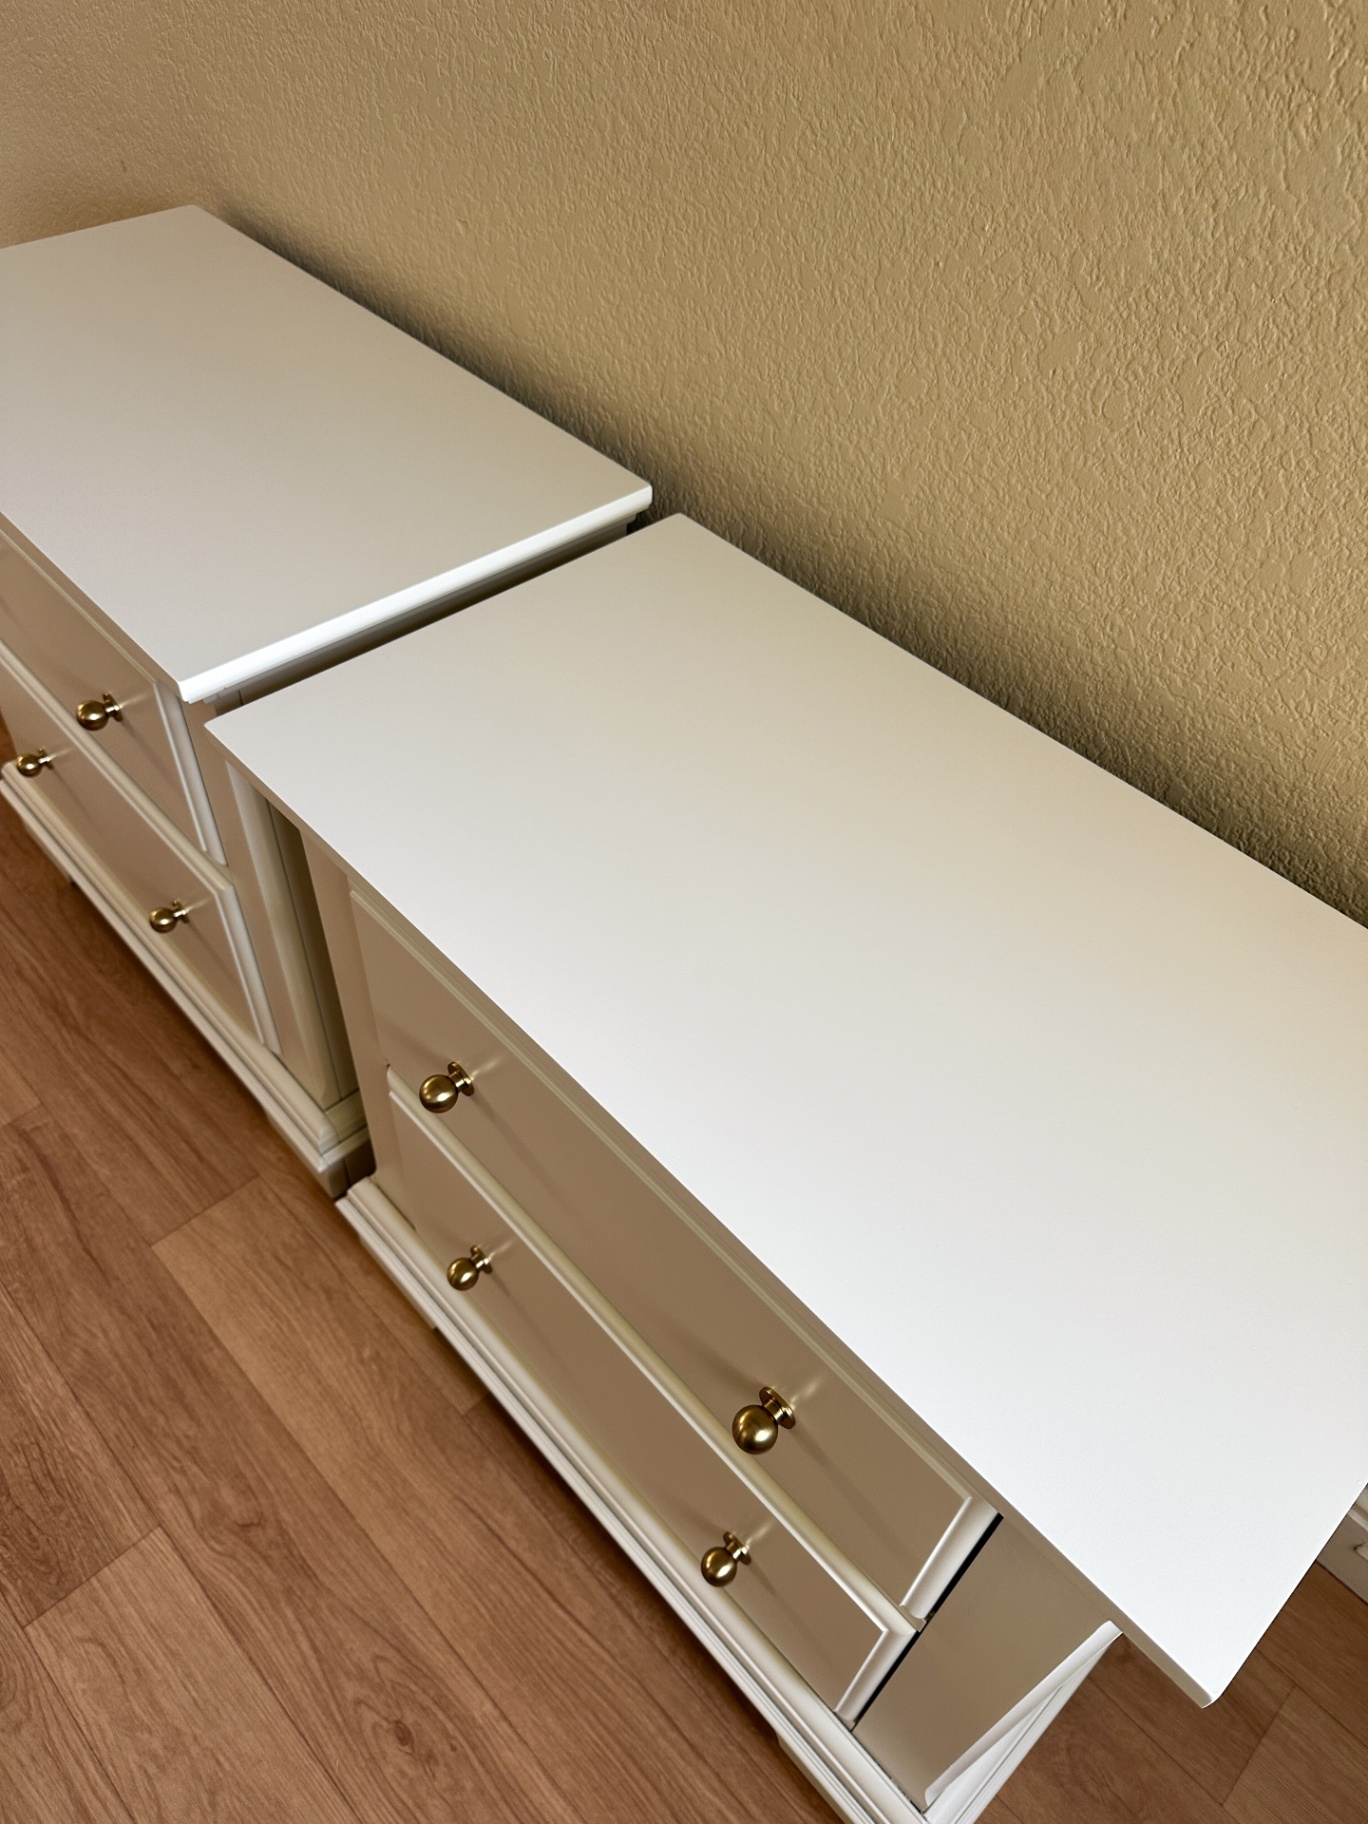
Final Result: Simple Changes, Big Difference
With just:
prep
paint
updated hardware
These nightstands went from dated to warm, versatile, and modern — without replacing them or spending a ton of money.
They no longer feel stuck in a specific era, and they could work in so many different spaces.
Common Furniture Painting Mistakes to Avoid
If you’re trying this yourself, watch out for these:
Over- or under-sanding
Not filling imperfections enough
Skipping a second wood fill after primer
Spraying paint too heavily
Rushing dry times, especially in cold weather
Avoiding these will make the biggest difference in your final result.
Final Thoughts
Furniture flipping doesn’t require fancy tools or perfect conditions. It just takes a little patience and the confidence to try.
If you’ve been thinking about tackling a piece like this, save this project for later and come back when you’re ready. And if you try it, I’d love to know how it turns out!
📌 Save This for Later
If you found this helpful, make sure to pin it for your next furniture flip — or send it to someone who has a dated bedroom set they’ve been meaning to update!
More DIY Projects You Might Like
If you’re looking for more furniture flip ideas, dresser makeover inspiration, or furniture refinishing tutorials, you might also like these:
French Provincial Dresser Makeover – the full tutorial on how I restored, paint-washed, and finished this beautiful vintage piece
Mid-Century Modern Dresser Restoration – a full MCM dresser restoration on a genuine tallboy dresser (just wait until you see the wood grain)
These projects are great if you’re looking for more DIY furniture makeover ideas and inspiration for how to flip furniture, refinish old dressers, and restore second-hand pieces.