DIY Garage Workstation Makeover
This garage went from cluttered and unusable to an organized DIY workshop with hidden storage, vertical tool organization, and a custom work surface. I’m sharing the full transformation and exactly how we made it happen on a $750 budget.
How We Turned a Cluttered Space Into an Organized and Functional Workspace
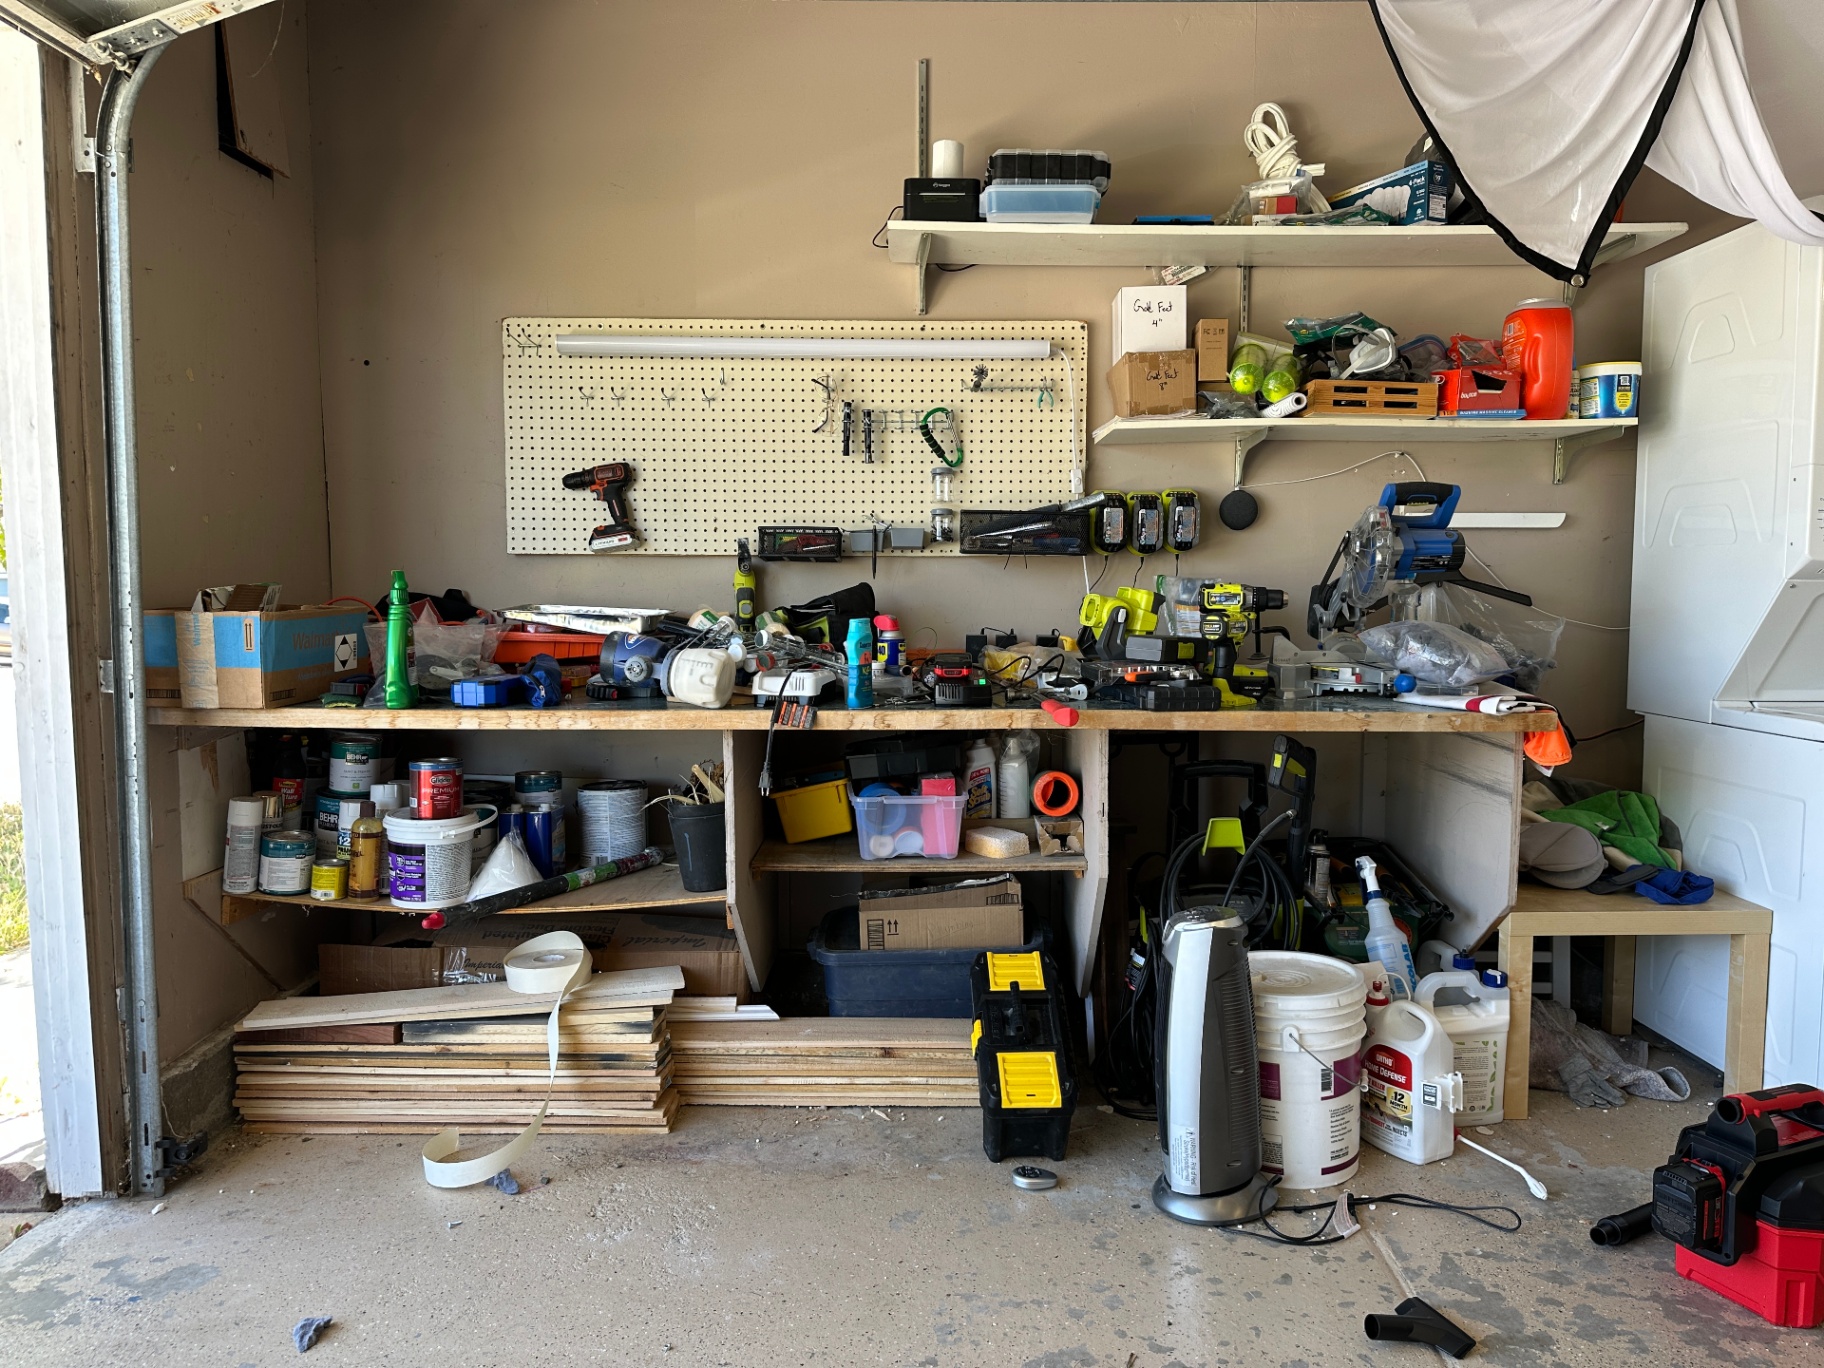
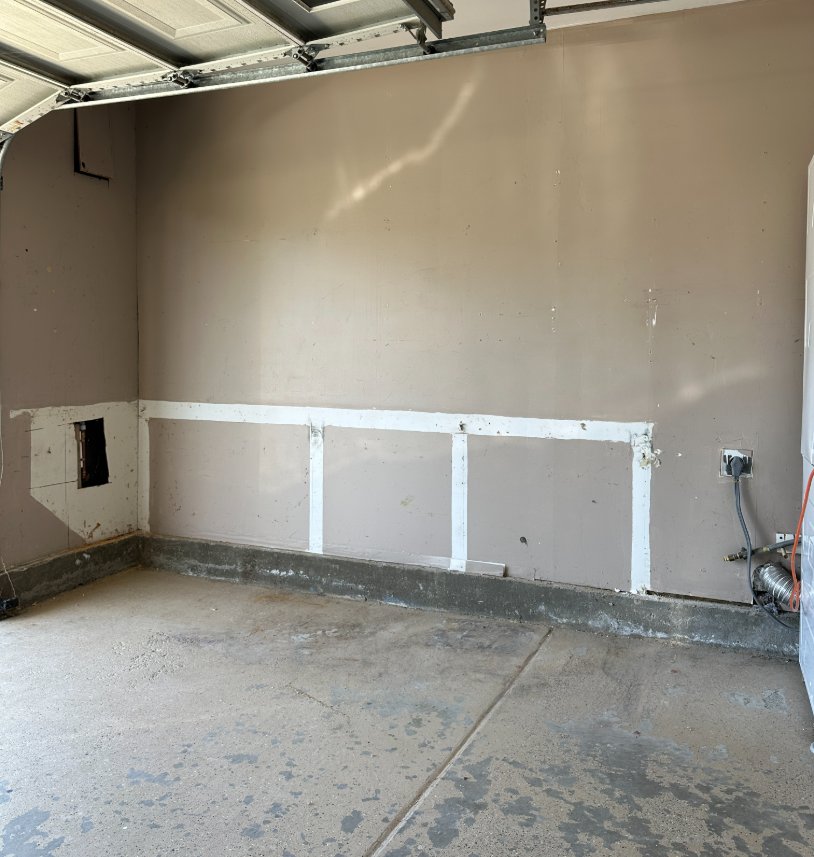
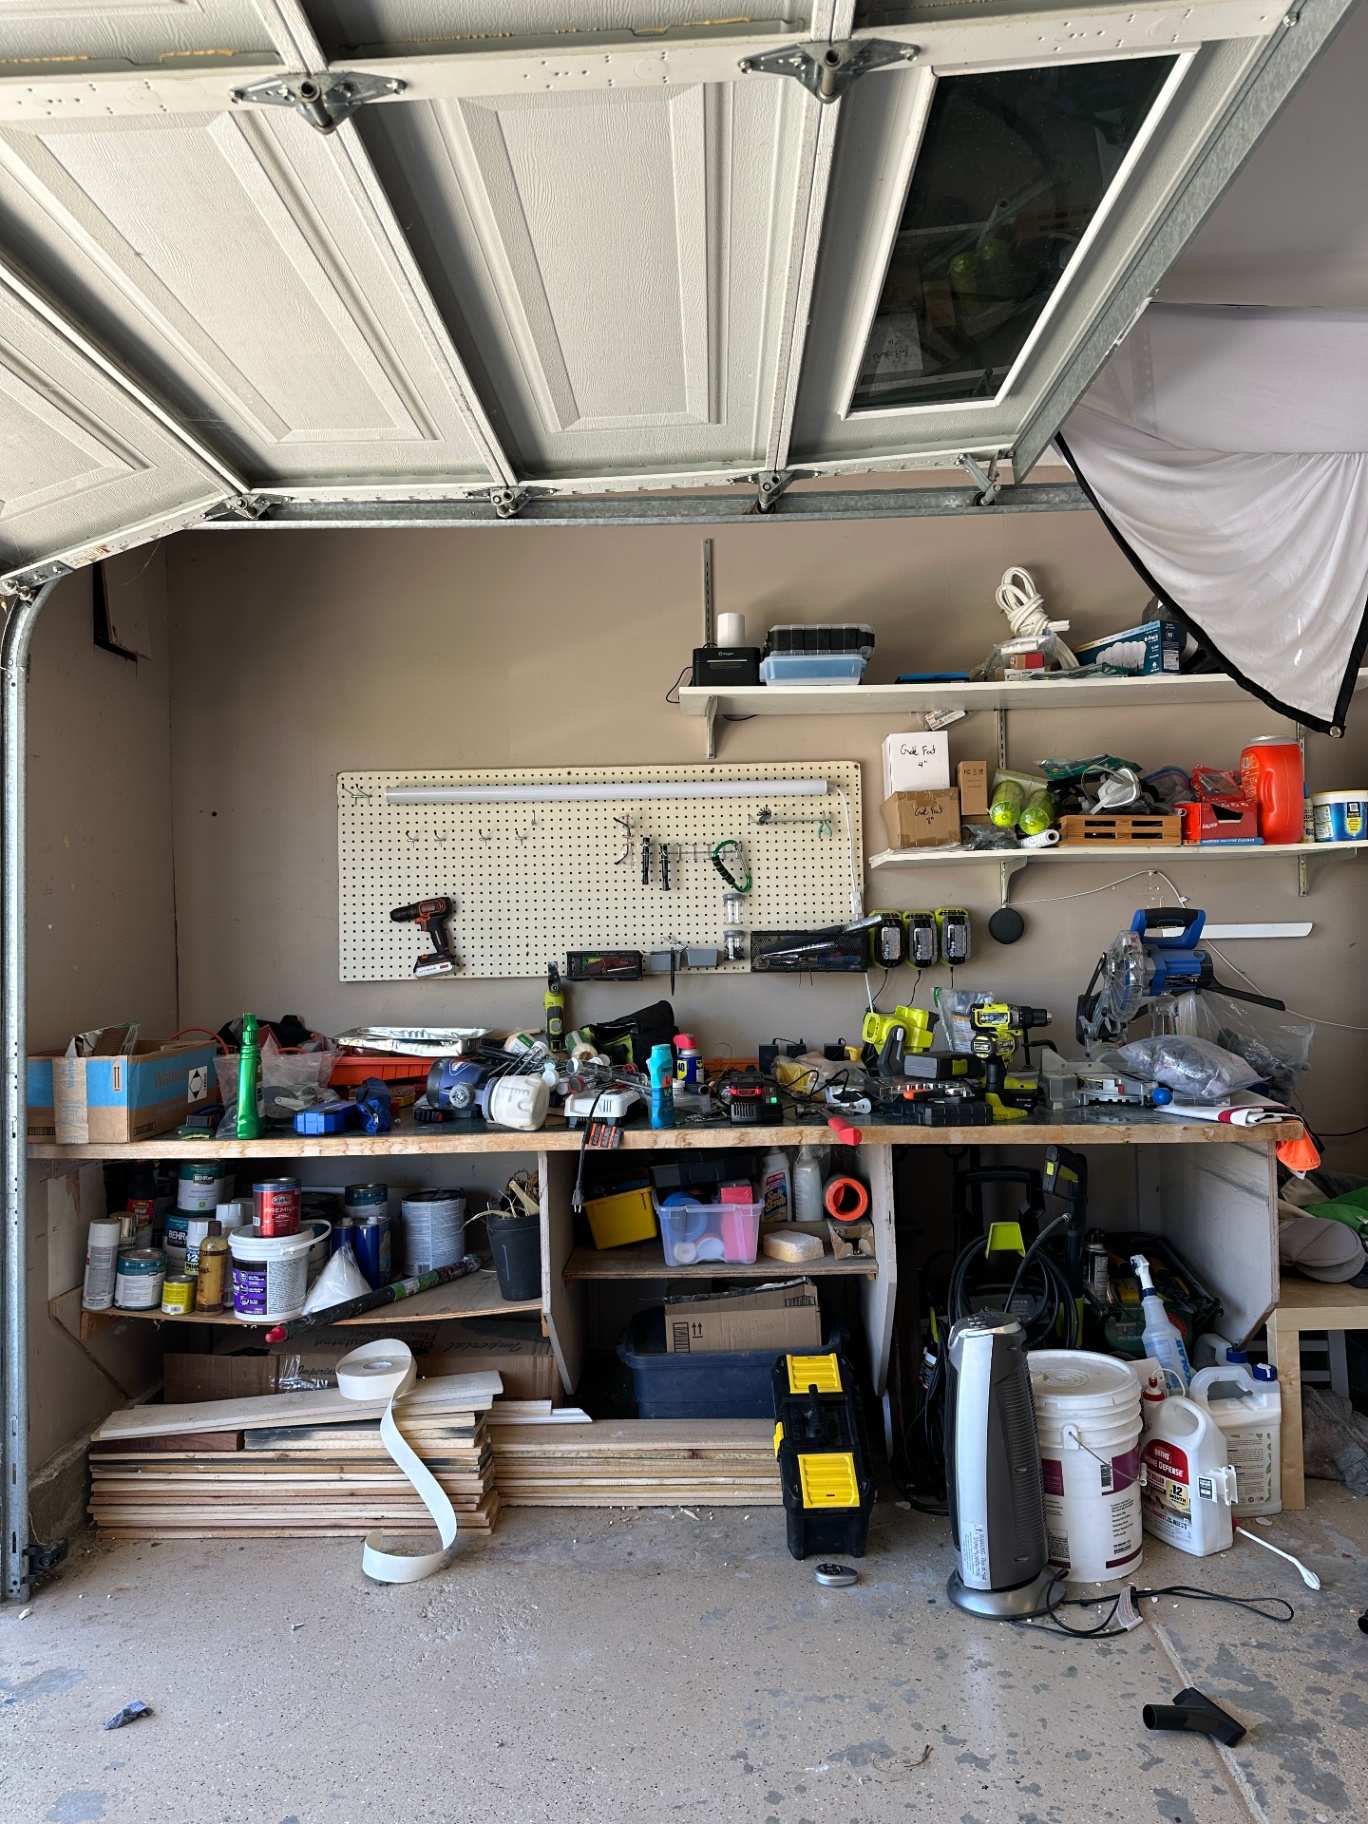
This garage workstation was practically unusable — bowing shelves, an overflowing workbench, and zero functional storage. Since I’ve been doing a lot of projects at my sister and brother-in-law’s house lately, I knew it was time to give this space a full garage organization makeover.
Step 1: Clear Out & Demo
The first step in any garage organization or decluttering project is clearing the space so you can see what you’re actually working with. This garage had become a catch-all for tools, supplies, and random storage, so my siblings came over to help me pull everything out. As we cleared it, we decluttered at the same time — tossing or relocating anything that didn’t need to live in the garage so we weren’t just putting clutter back later.
Once the garage was empty, my brother Cyril and I moved on to demo. We removed the old shelving, pegboard, and tore out the existing workbench. The shelves were bowed and warped from weight over time, and the setup just wasn’t functional — there wasn’t enough real storage for tools, and the work surface didn’t support actual DIY projects.
Clearing everything back to the walls gave us a true blank slate and made it possible to design a functional garage workstation with proper storage, a dedicated work surface, and room to actually work comfortably.
Step 2: Create a Functional Storage Plan
Our new garage layout focused on maximizing storage and workspace:
Bright white paint to freshen up the space
Three large storage cabinets for hidden organization
A new countertop for a dedicated workspace
Vertical and hanging storage to take advantage of wall space
Step 3: Prep & Paint the Walls
Before installing cabinets or building the workstation, we prepped and painted the garage walls. This step makes a huge difference in any garage organization or workshop makeover, instantly making the space feel brighter and more finished.
We started by patching holes left behind from the old shelving, pegboard, and workbench. Once dry, we gave the walls a quick sanding to smooth everything out and help the new paint adhere evenly. It’s a small amount of prep work that goes a long way toward a polished final result.
We painted the entire space in a creamy white using a 5-gallon bucket my brother-in-law already had on hand - the same color used throughout the house and garage. Choosing a light, neutral color in a garage workspace helps reflect light, makes the space feel larger, and creates a clean backdrop for cabinets and wall-mounted storage.
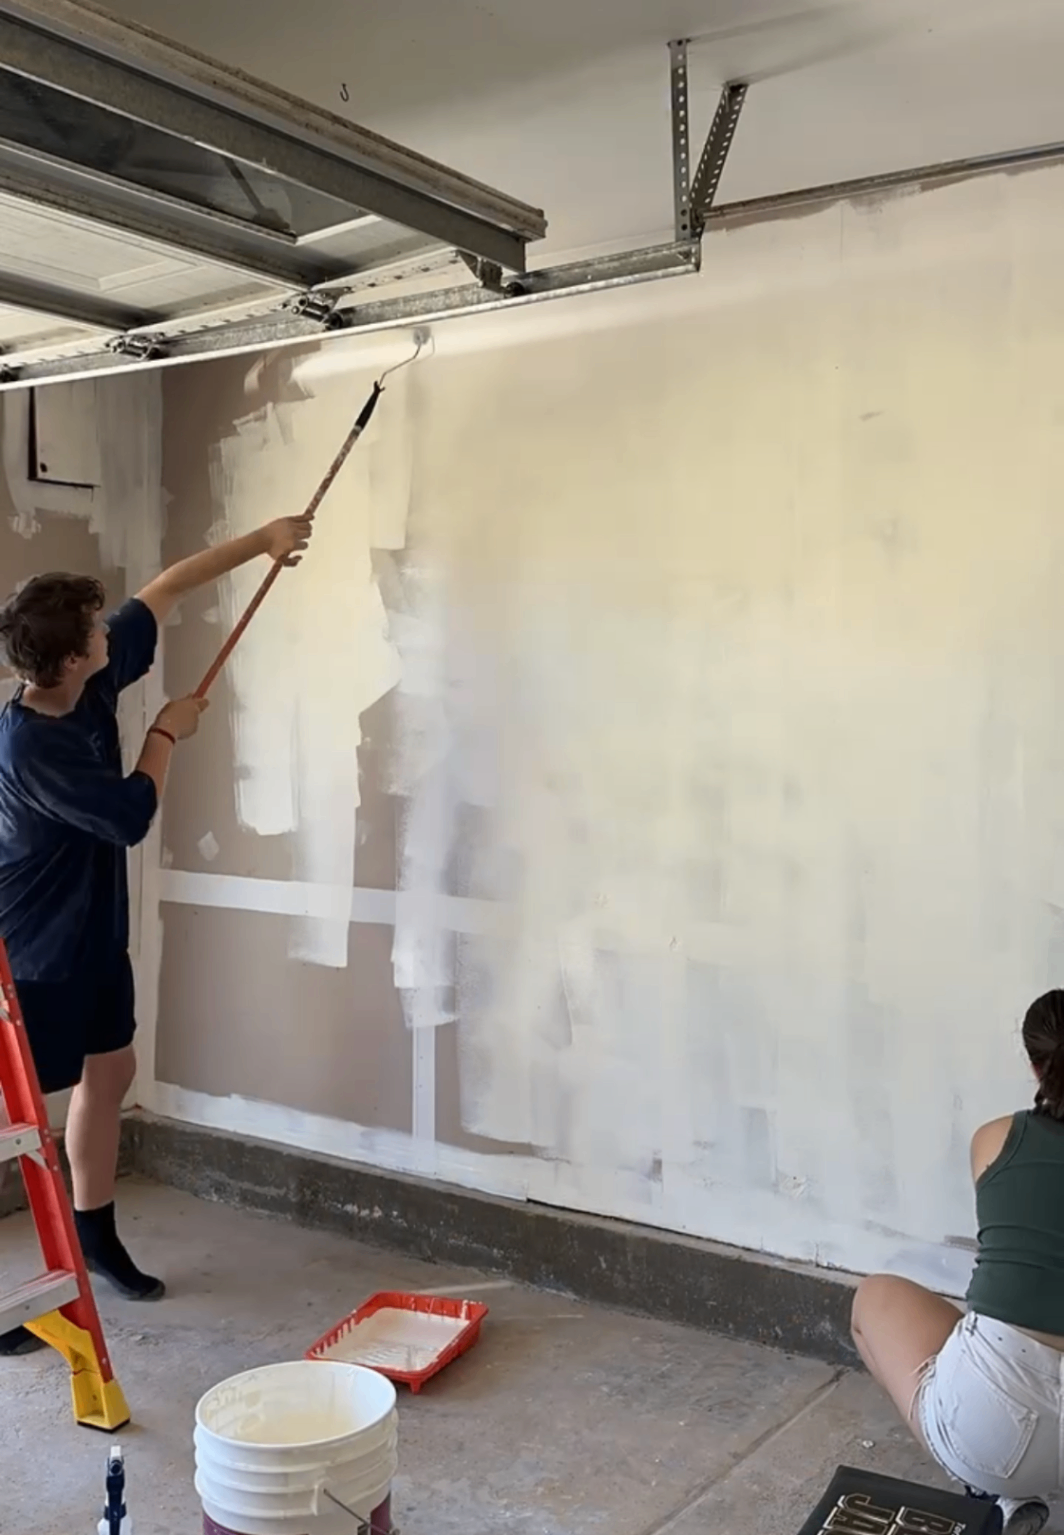
✨ The fresh coat instantly made the garage feel brighter, cleaner, and more open — one of the easiest DIY garage updates you can do.
Step 4: Install Base Cabinets for Hidden Storage
With the walls prepped and painted, it was time to install the base cabinets that would anchor the entire garage workstation. These cabinets provide all the hidden storage for tools and supplies and serve as the foundation for the custom countertop, so getting this step right is key.
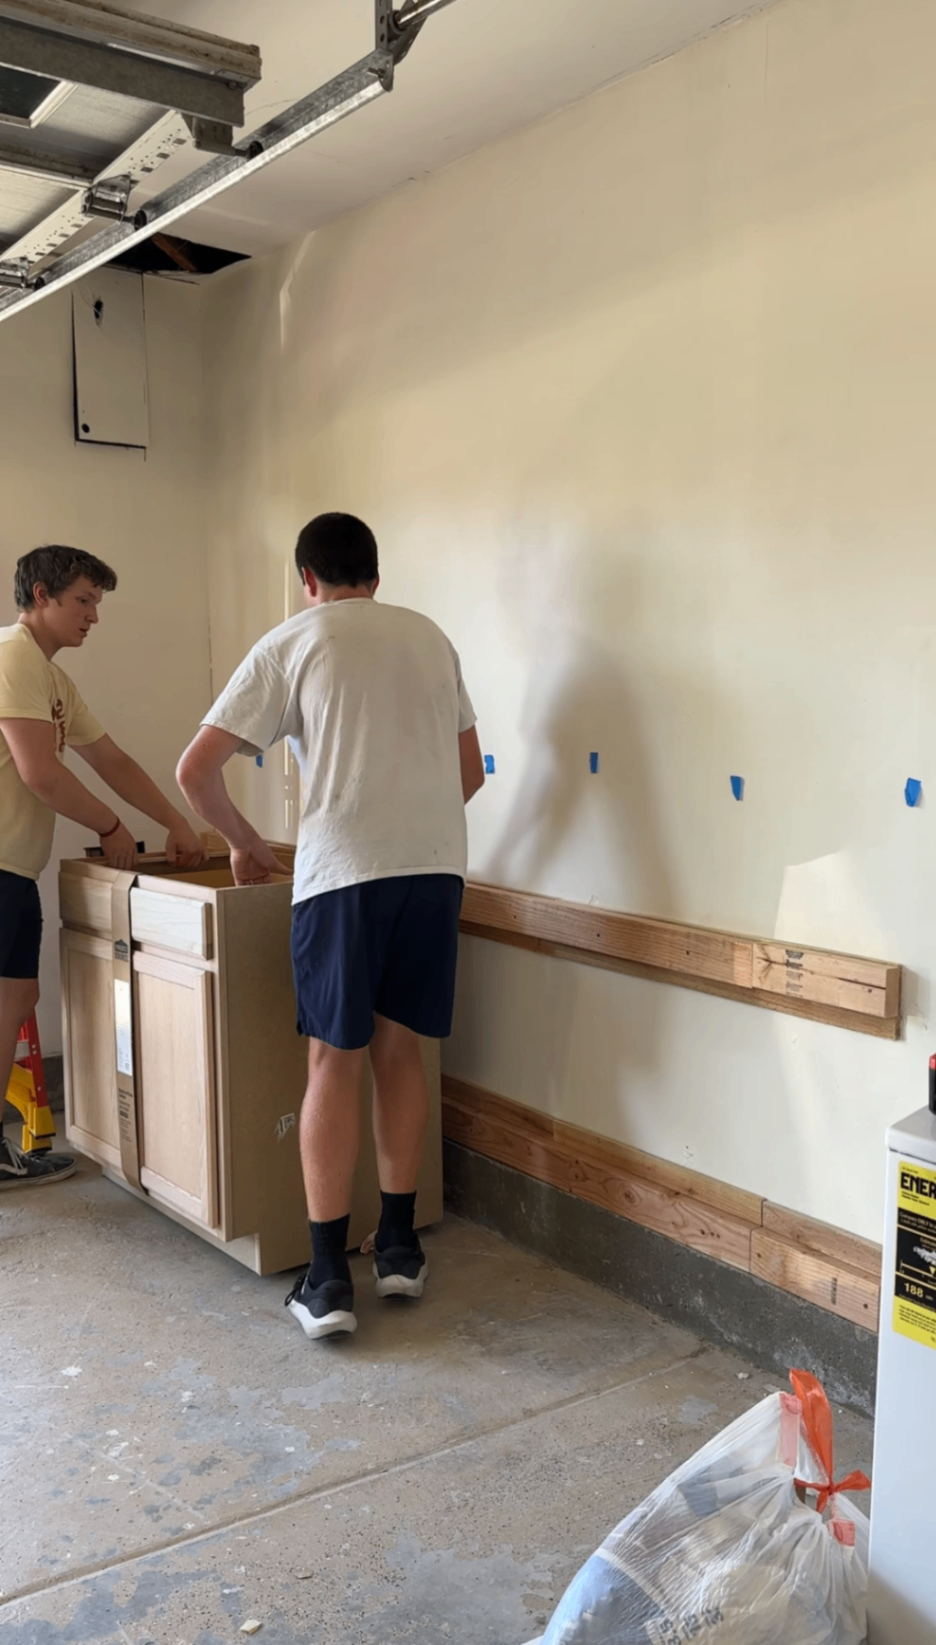
Before installing anything, take a close look at your garage wall. If your wall is flush from top to bottom, you can typically install base cabinets directly against it. But in many garages (including ours), the concrete foundation sticks out slightly at the bottom of the wall — which means the cabinets won’t sit flat without a workaround.
Our foundation extended about 2.25 inches, so we needed to build the wall out before installing the cabinets.
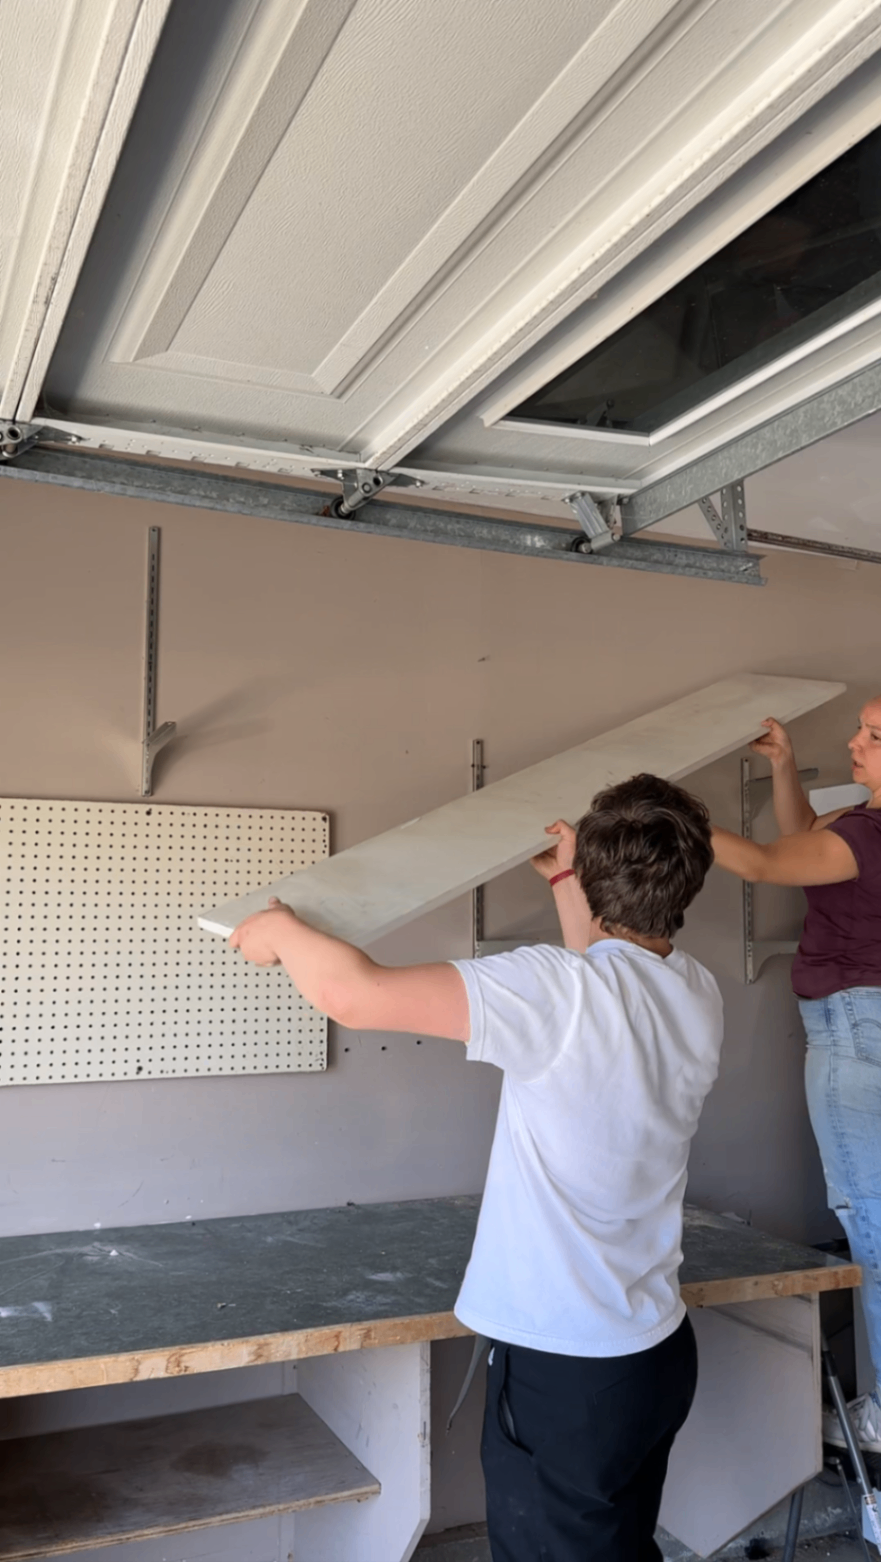
Step 4a: Install Wall Braces (To Clear the Foundation)
To account for the foundation ledge, we created simple wood braces that allowed the cabinets to sit level and fully supported from top to bottom.
Here’s how we did it:
Measured how far the foundation protruded from the wall (2.25")
Cut the boards to run horizontally across the cabinet area
Secured the braces directly into the wall studs using brad nails, and then construction screws
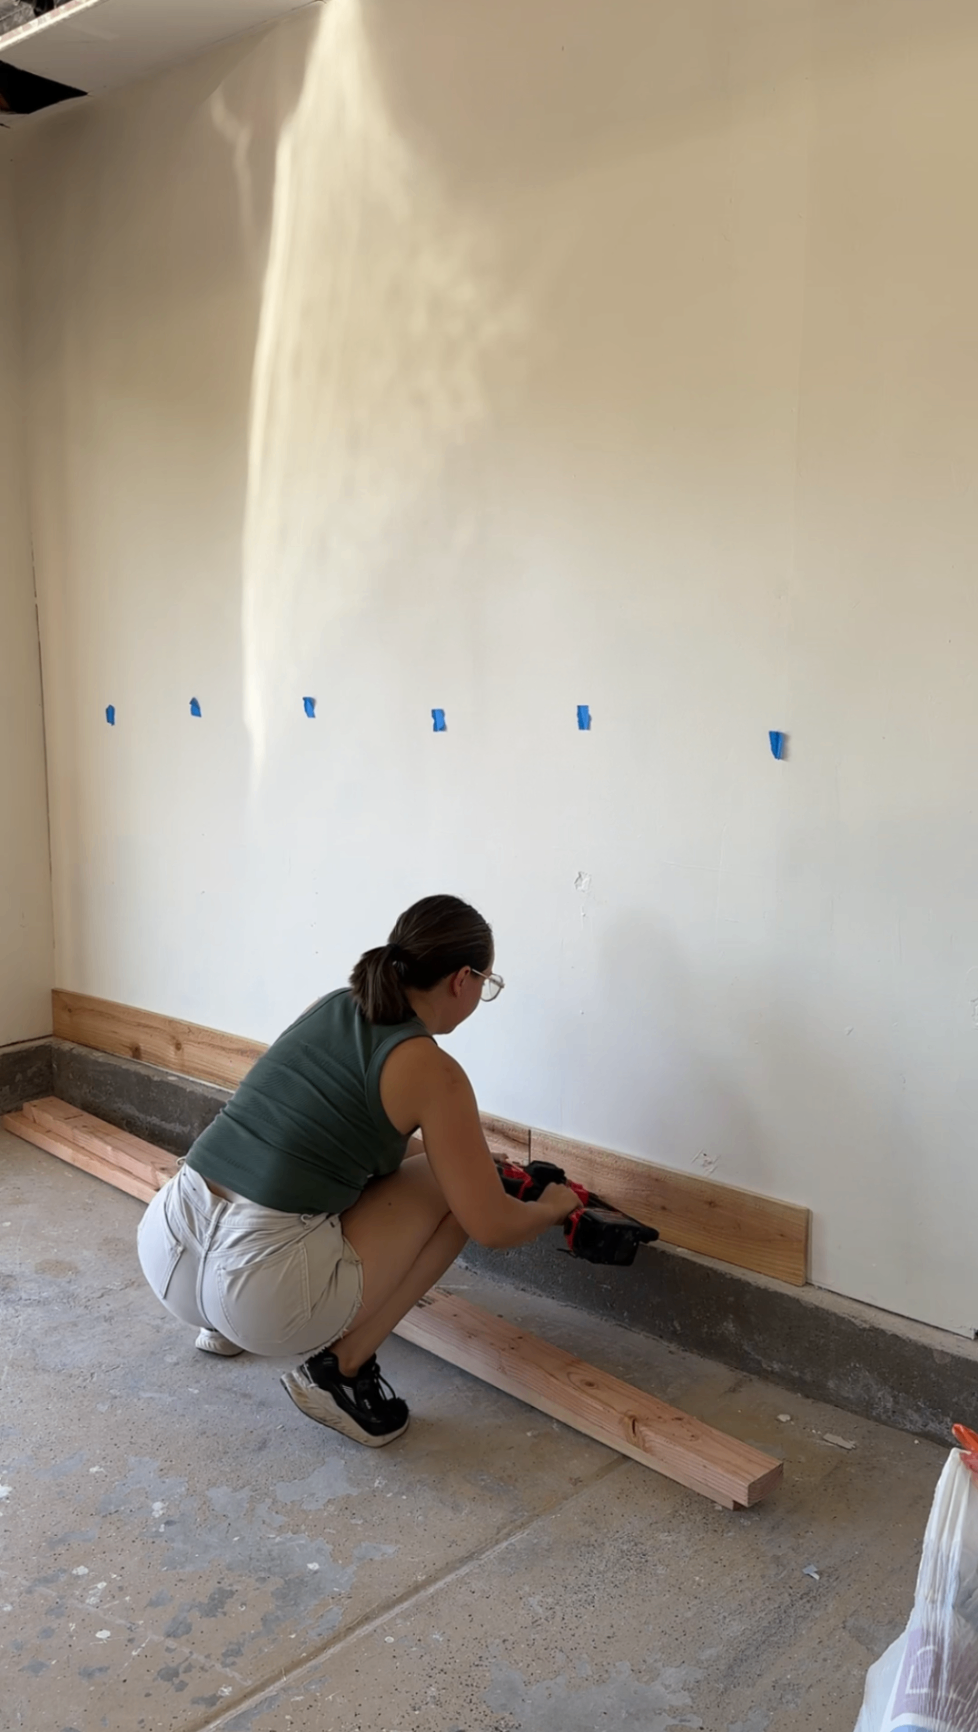
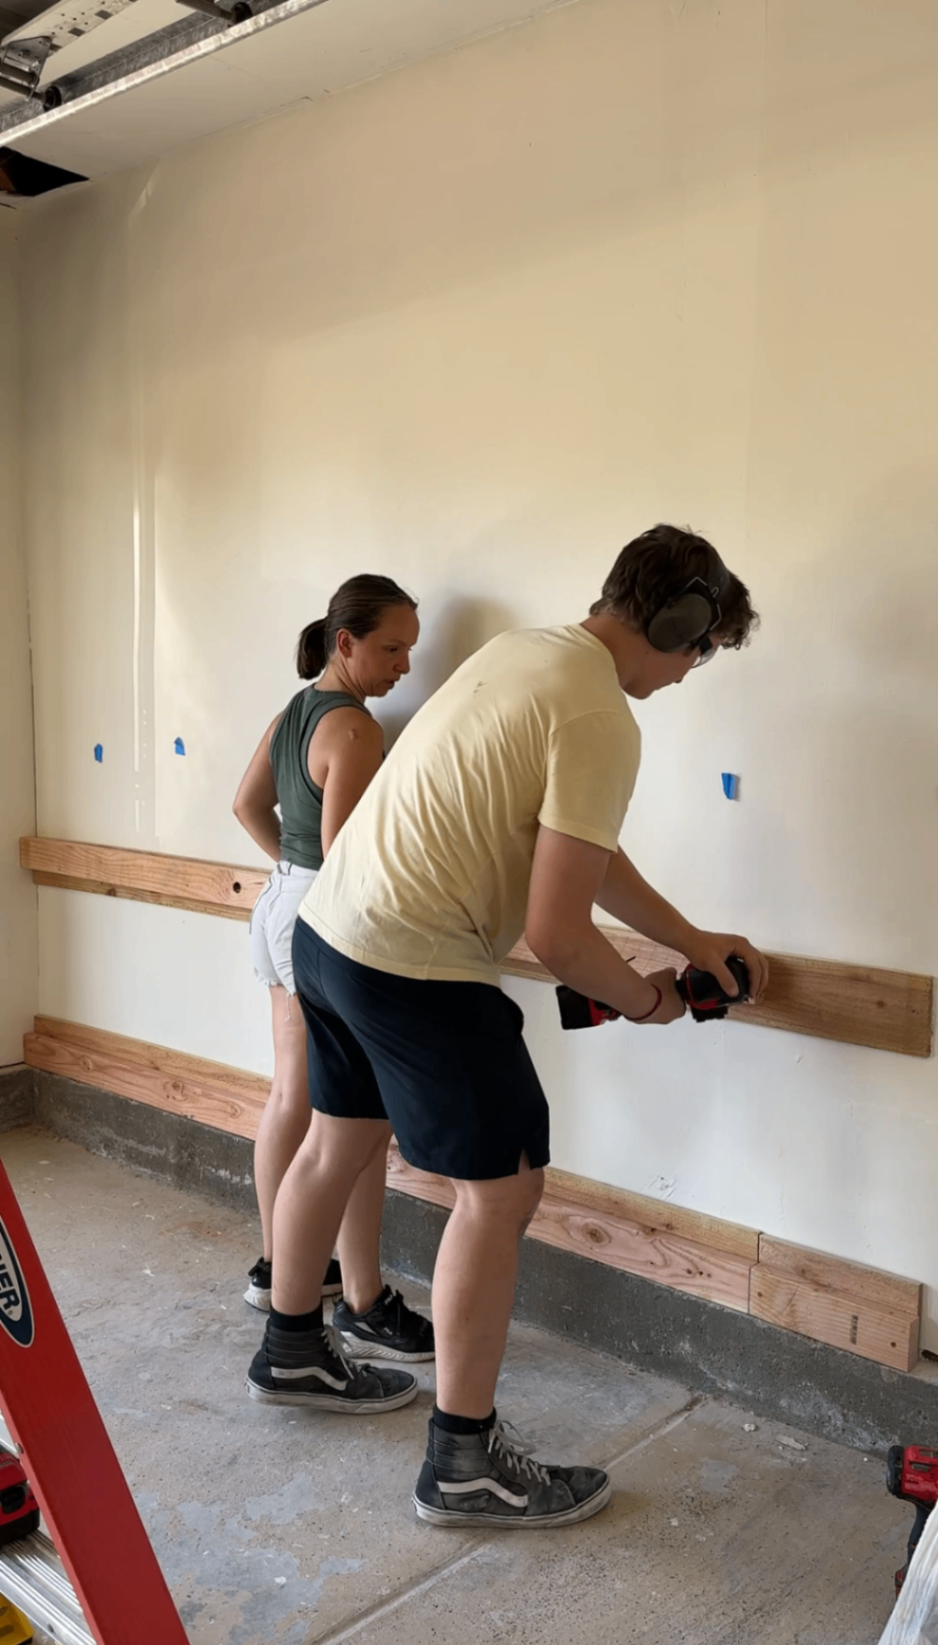
These braces essentially act as spacers, bringing the wall plane forward so the cabinets can sit flush and plumb. This is a super budget-friendly fix and works great for garage builds where the foundation isn’t perfectly aligned with the drywall.
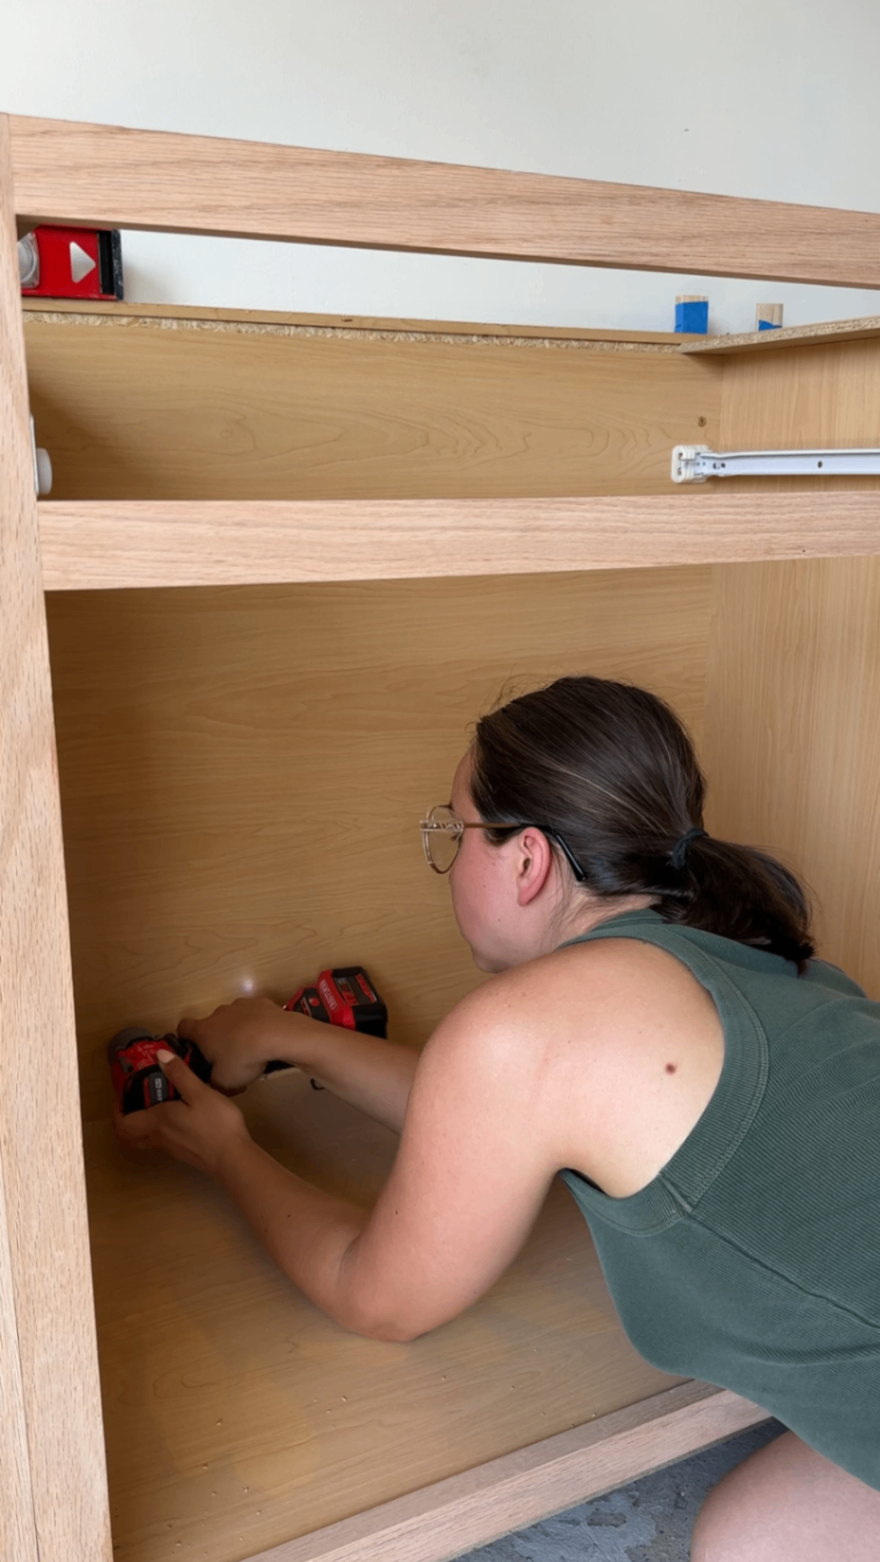
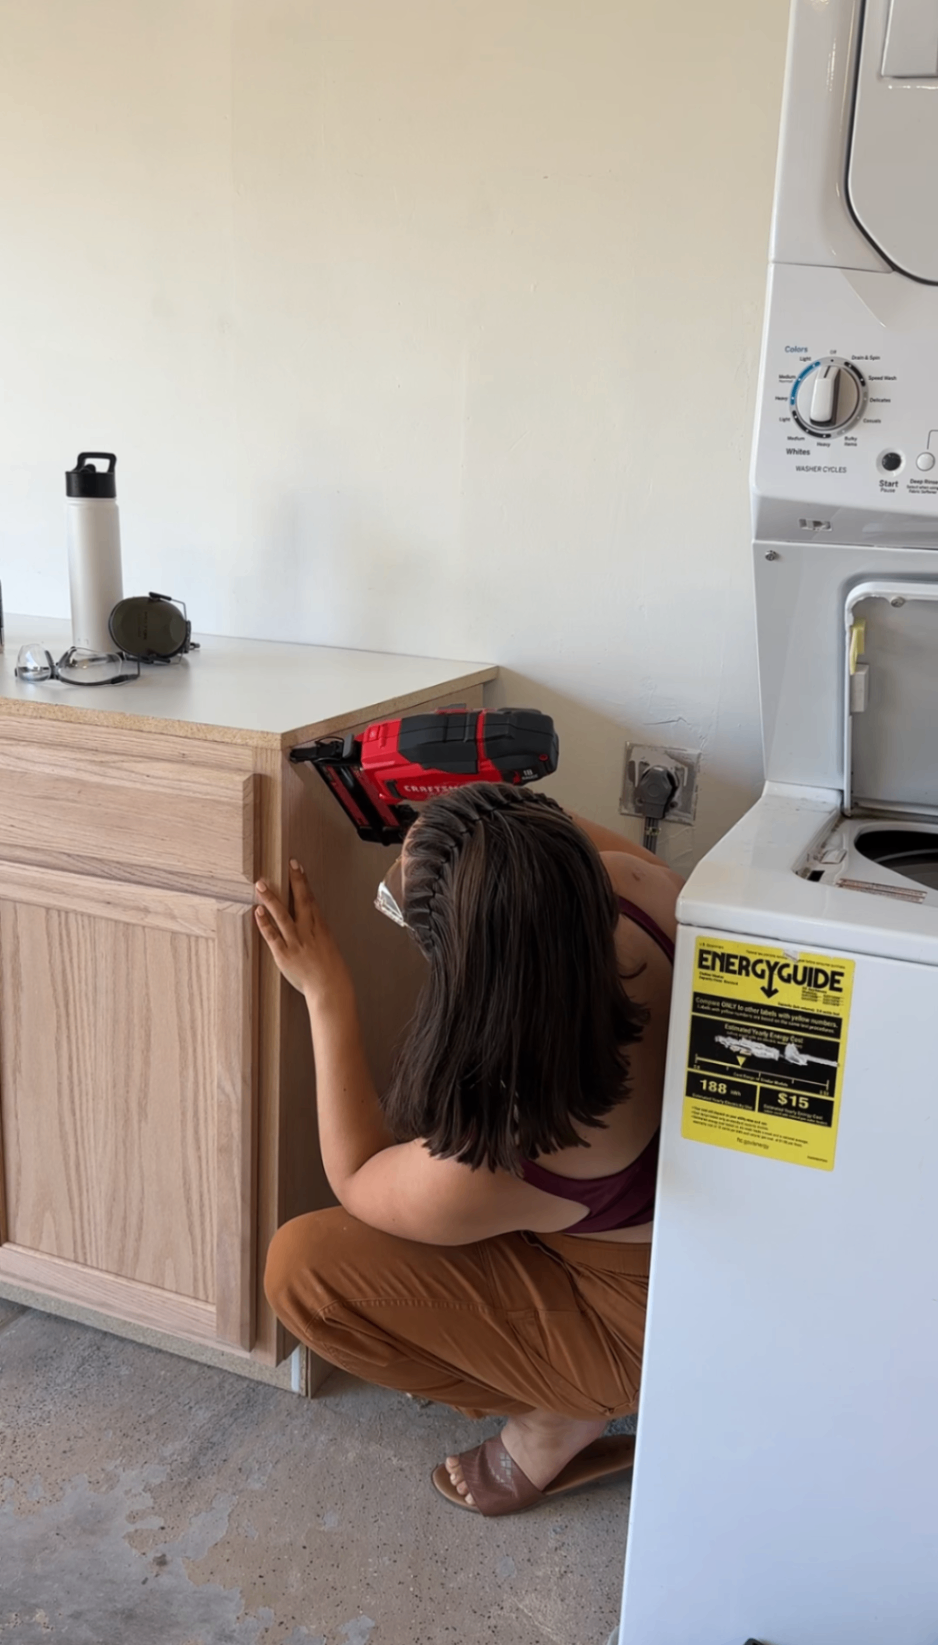
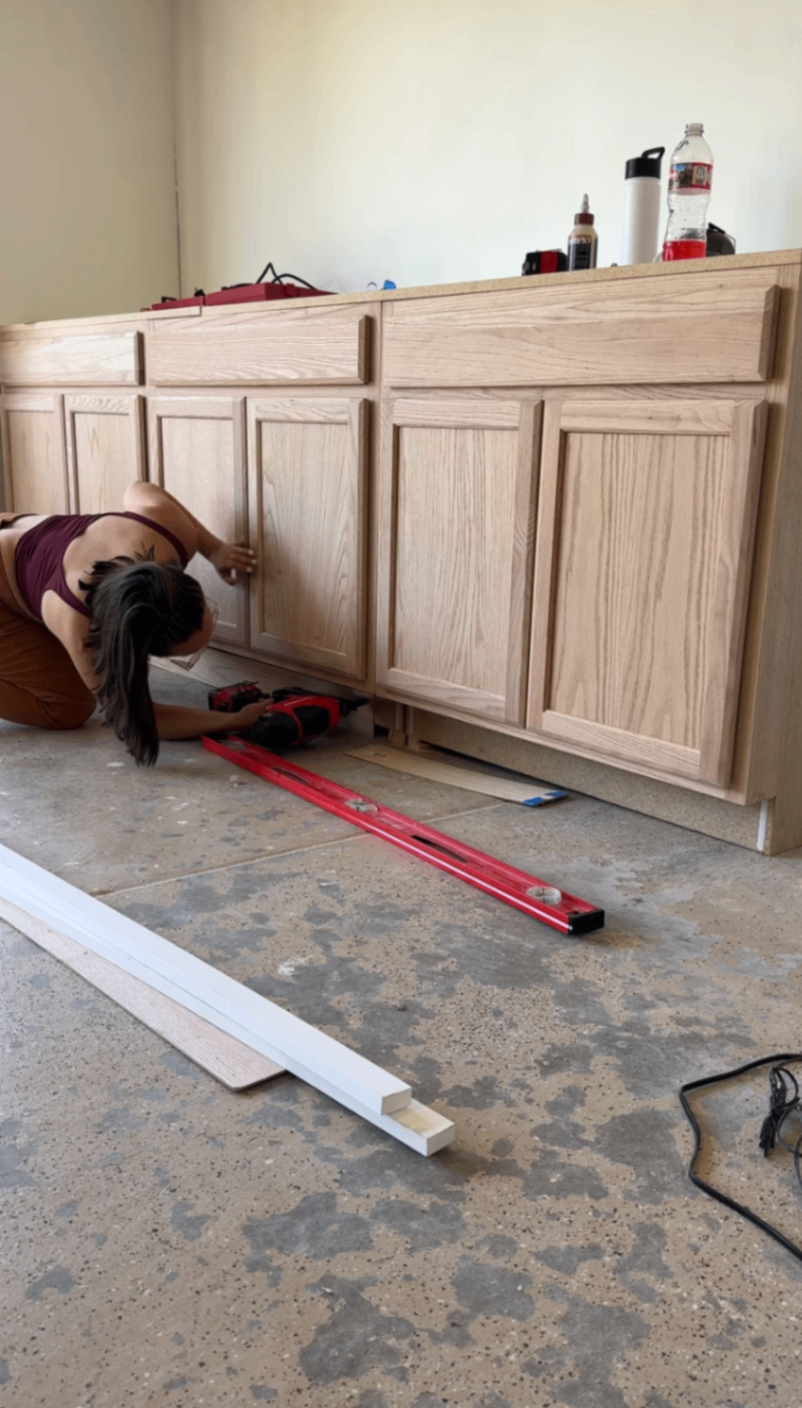
Step 4b: Install & Secure the Base Cabinets
Once the braces were installed, we moved on to setting the base cabinets in place.
Positioned the cabinets against the braces
Shimmed underneath as needed to get everything level
Anchored the cabinets through the backs and into the braces
Screwed the cabinets together through the face frames so they function as one continuous unit
Because these are base cabinets supporting a work surface, leveling is especially important. Even small height differences will show up later when you install the countertop.
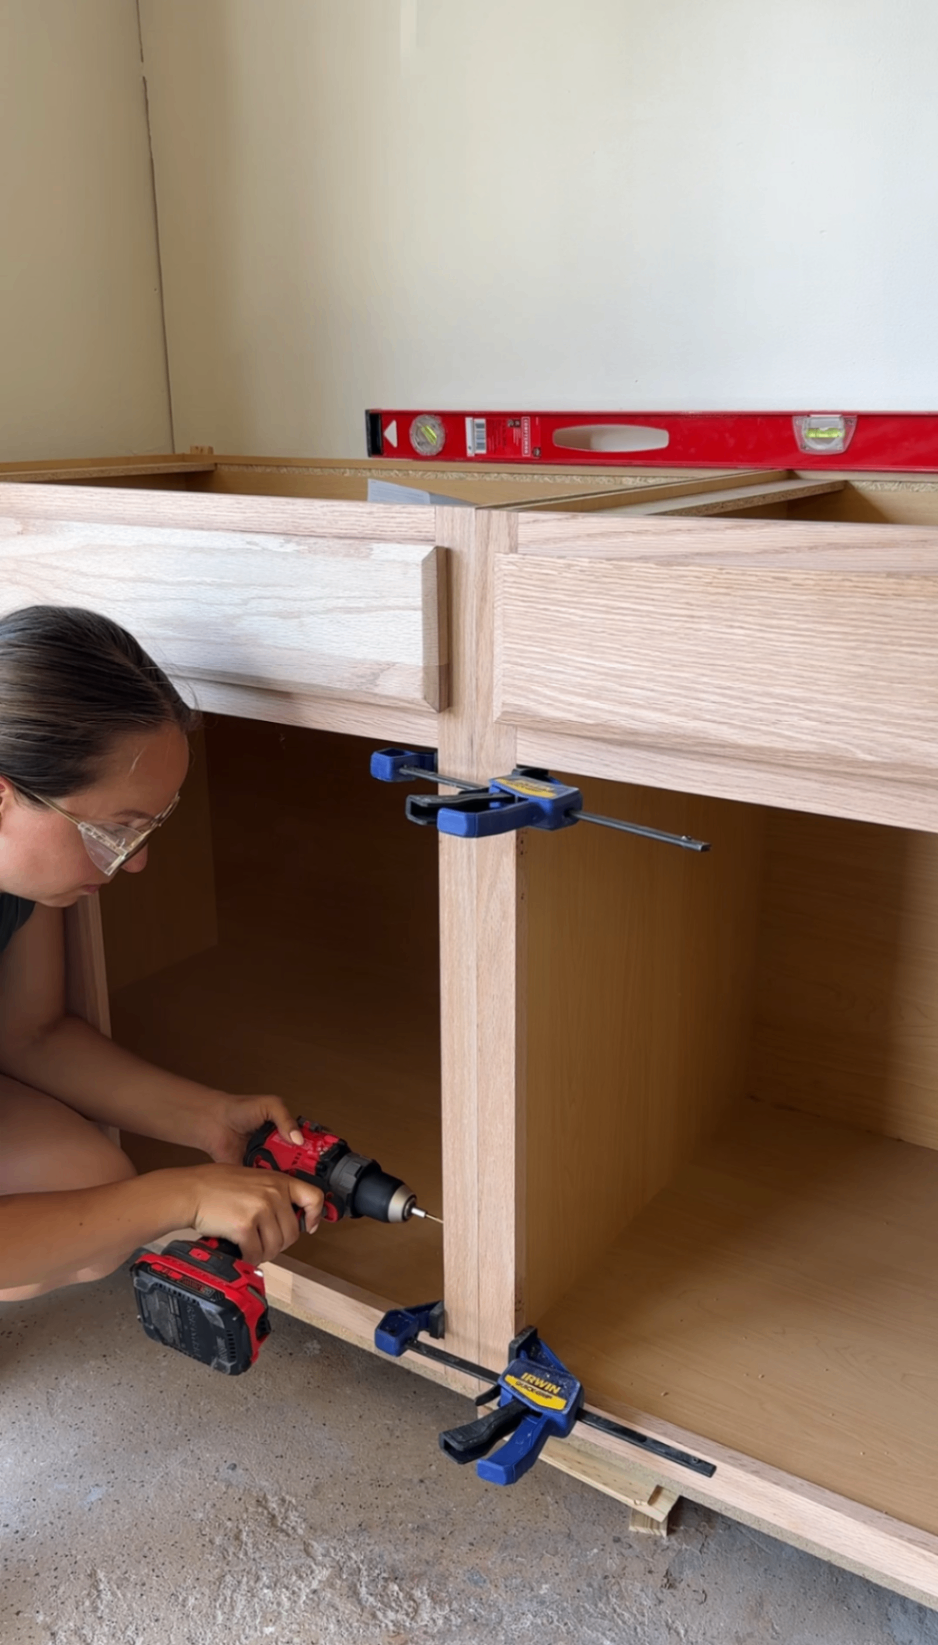
⚠️ Pro Tip: Always start cabinet installation from the highest point of the floor. Garage floors are rarely level, and starting high gives you room to shim up where needed. You can’t shorten cabinets, but you can always add shims.
We had to start in the corner for logistical reasons, which meant a bit of extra shimming — but it worked out perfectly in the end.
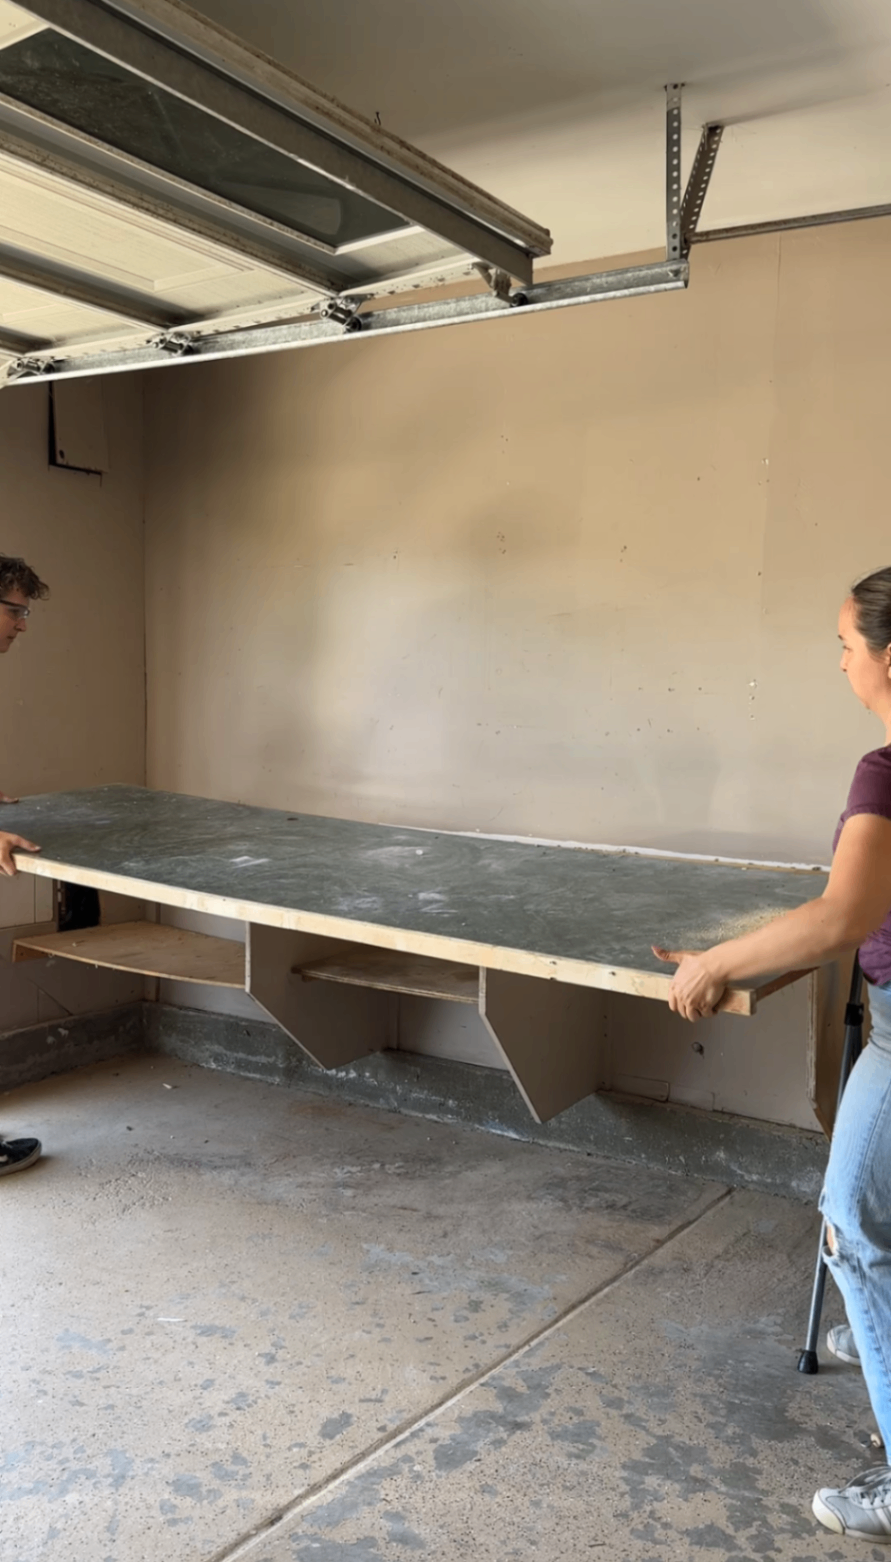
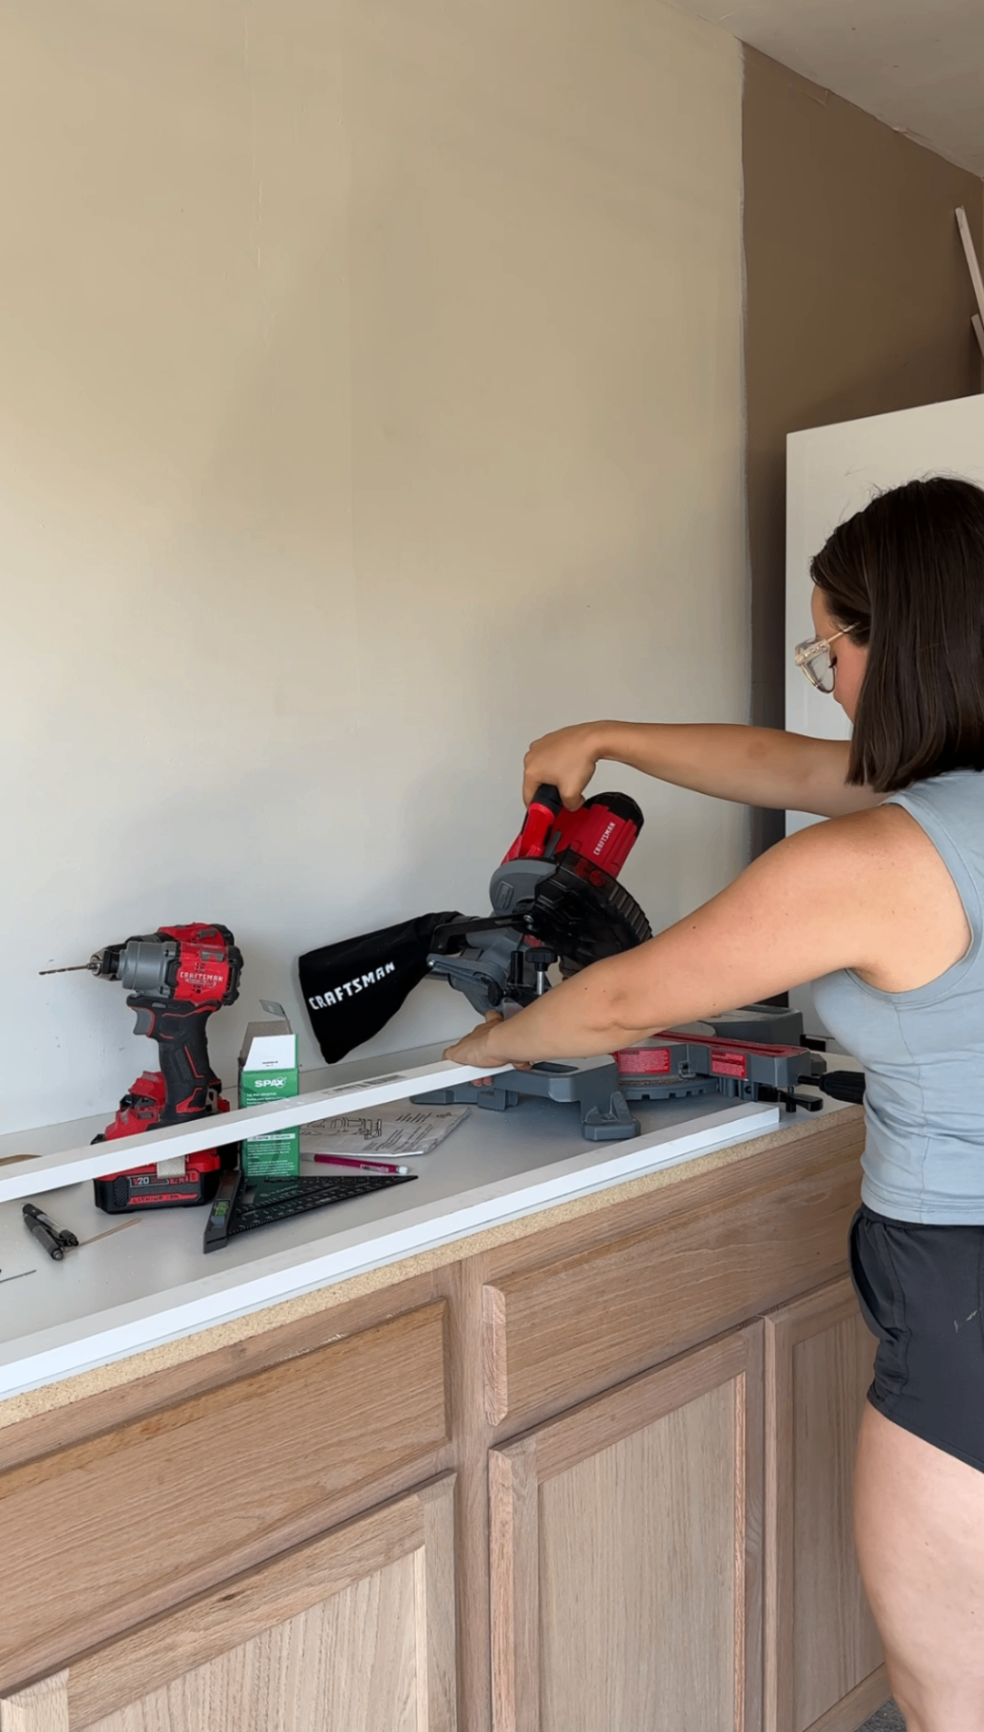
Step 5: Build a Custom Countertop
A prefab laminate countertop (like this) would’ve been the easiest solution, but none of the standard sizes fit with our foundation’s extra depth. Instead, we used a budget-friendly laminate sheet.
Why it works:
Affordable
Smooth and easy to clean (perfect for a sawdust-covered workbench)
Simple to swap out in the future if we want an upgrade
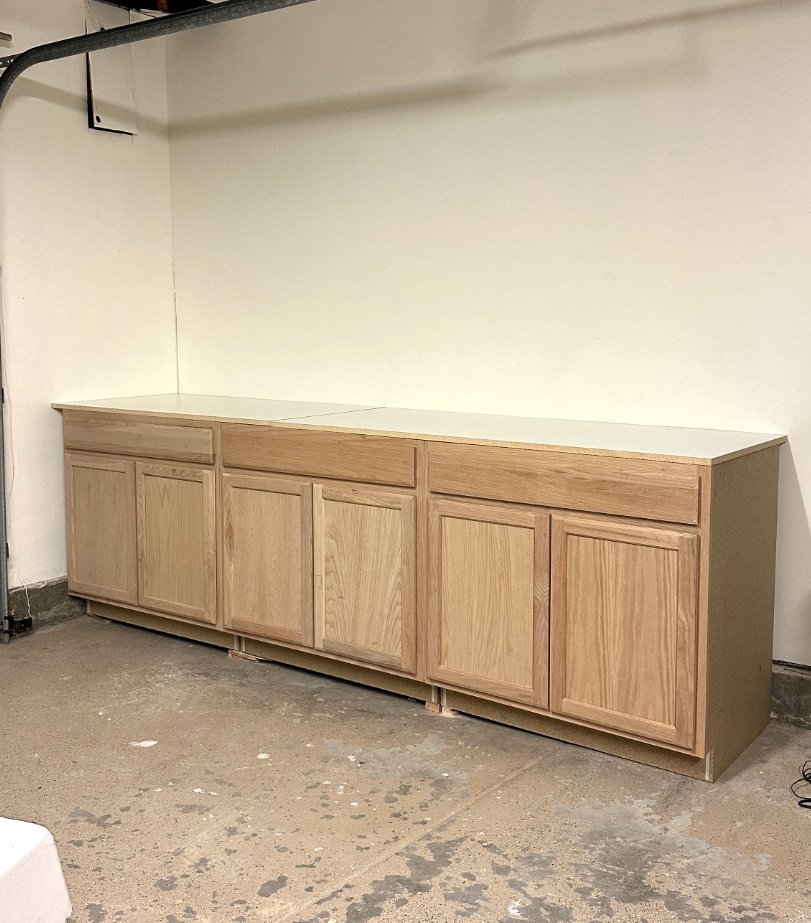
To finish it off, we:
Trimmed the edges with primed pine 1x2's
Added a toe kick
Trimmed the exposed cabinet side
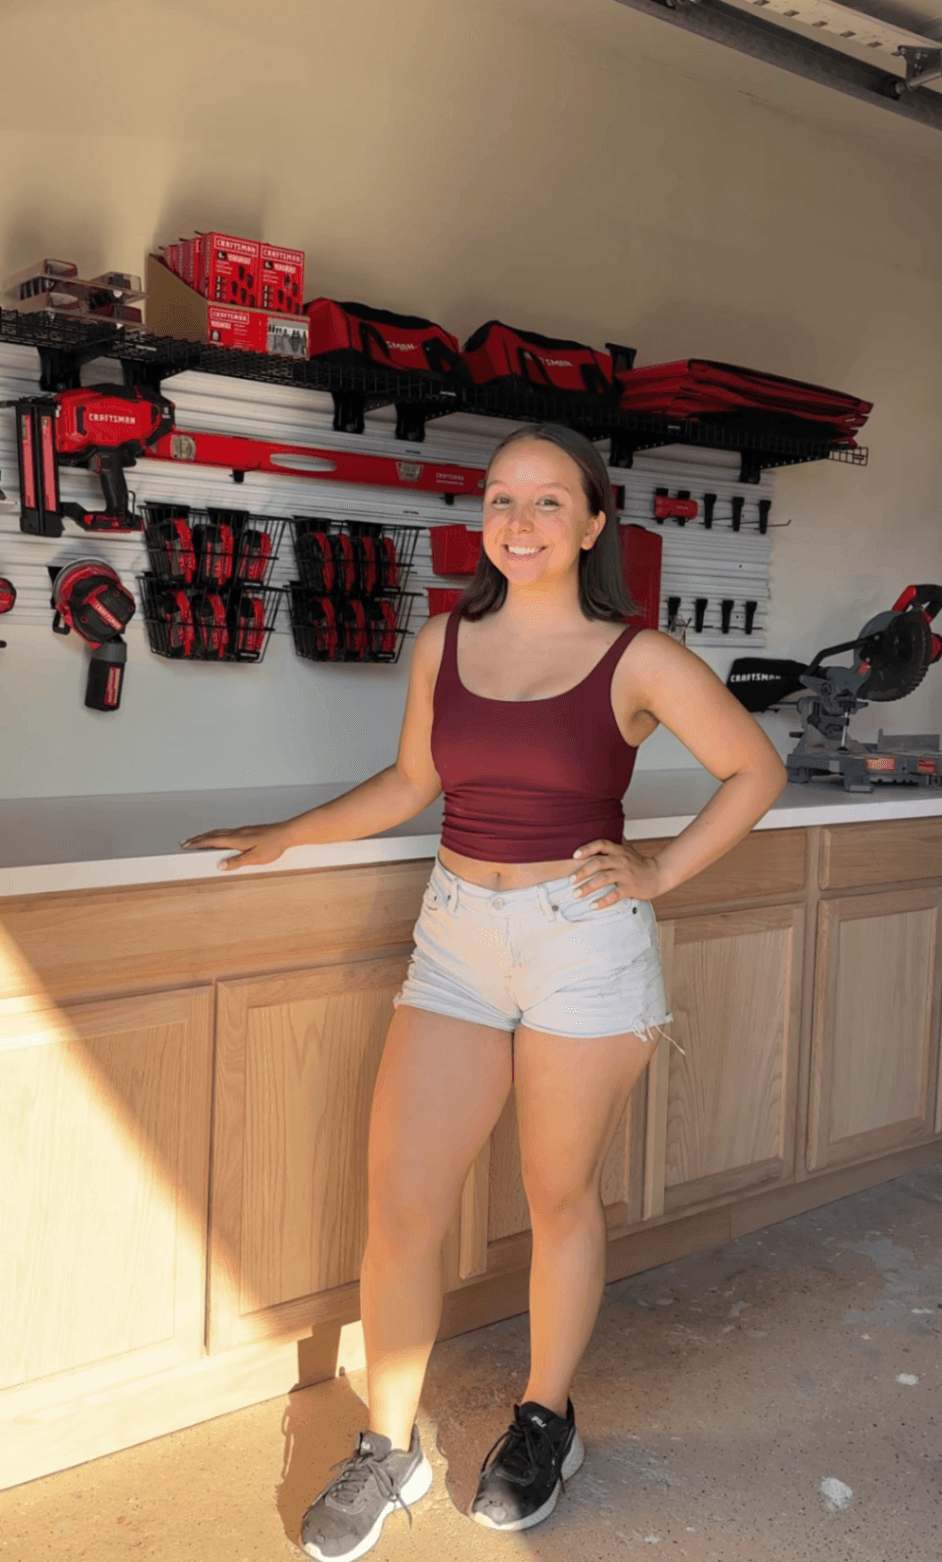
Step 6: Add Vertical & Hanging Garage Storage
With the cabinets and countertop installed, the final step was adding vertical garage storage to keep tools and supplies organized and easy to access. Wall-mounted storage is one of the most effective upgrades you can make in a garage organization or workstation makeover because it uses vertical space instead of taking up valuable floor or counter area.
We installed a horizontal wall track system by Craftsman above the workstation, along with a mix of hooks, baskets, and hanging accessories (also Craftsman). This type of garage wall storage system makes it easy to customize storage for tools, extension cords, buckets, and other frequently used items — and adjust the layout over time as needs change.
Why vertical garage storage works so well:
Keeps tools visible and within reach
Frees up cabinet and countertop space
Helps maintain a cleaner work surface
Can be rearranged as projects and storage needs evolve
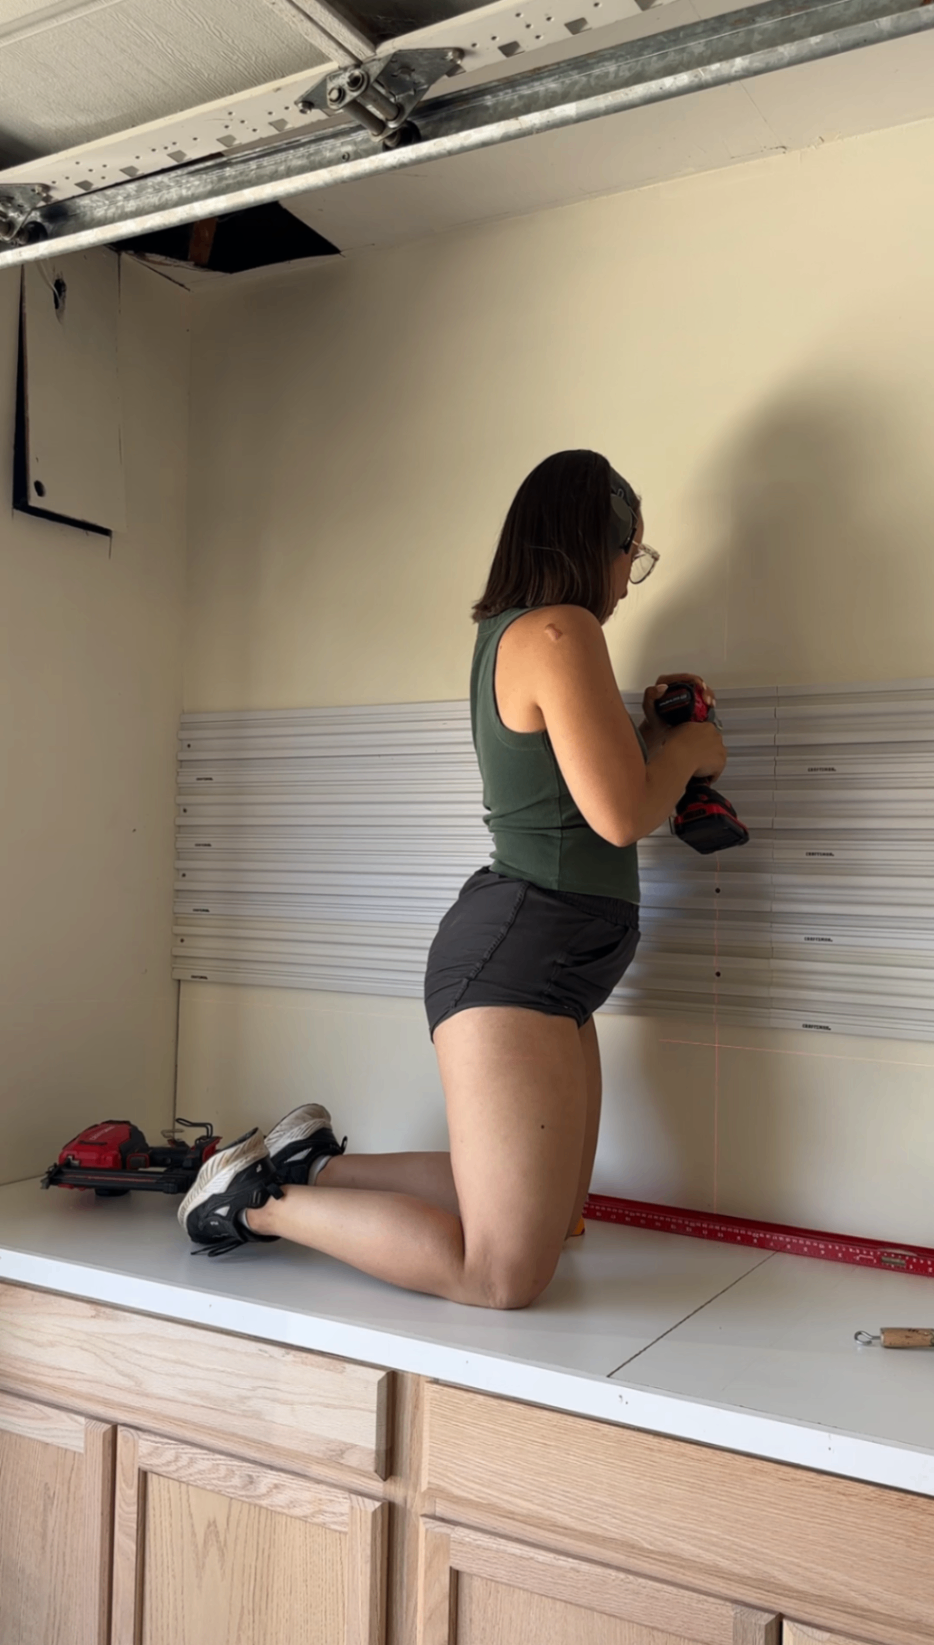
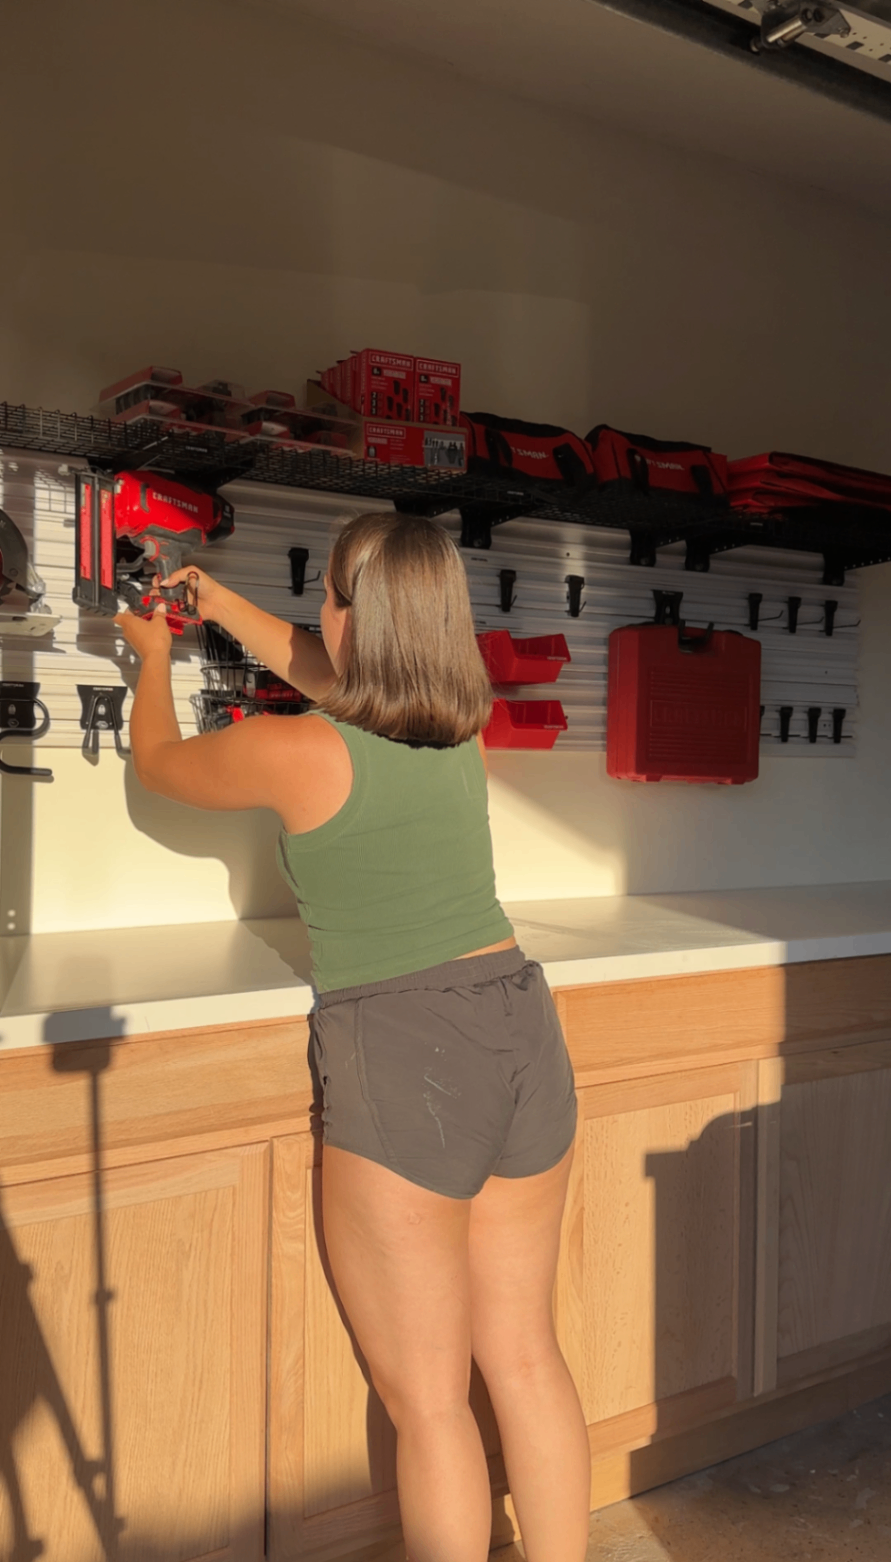
Instead of trying to hide everything, this setup allows everyday tools to live on the wall while less-used items stay tucked inside the base cabinets below.
With storage in place and everything finally organized, the garage transformed from a cluttered catch-all into a functional DIY workspace — setting the stage for the final reveal.
The Final Garage Transformation
Now this garage has:
✅ Tons of hidden storage inside cabinets
✅ Vertical storage for tools and supplies
✅ A bright, fresh coat of paint that makes it feel bigger
✅ A sturdy countertop for DIY projects

What was once a cluttered, unusable space is now a functional DIY workshop that makes me excited to come out and work on projects.
💰 DIY Garage Makeover Cost Breakdown
ITEM | COST |
|---|---|
Wall patch & paint (already had supplies) | ~$20 |
Three storage cabinets | $570 |
Laminate countertop sheet | $45 |
Cabinet trim (side panel, toe kick) | $80 |
Primed pine 1x2's | $10 |
Scrap wood braces | $12 |
VERSATRACK storage | Gifted |
Misc. supplies (caulk, filler, touch-up) | $5 |
TOTAL: | ~$742 |

👉 This $750 garage makeover completely transformed the space into a bright, organized workshop that’s actually fun to use.