How I Restored an MCM Dresser With a New Walnut Veneer Top
I restored this vintage Harmony House MCM dresser from scratched and faded to rich walnut, including repairing chipped veneer, adding a new walnut veneer top over the original laminate, color-matching repairs, and refinishing the entire piece. Then I listed it - and it sold within 48 hours.
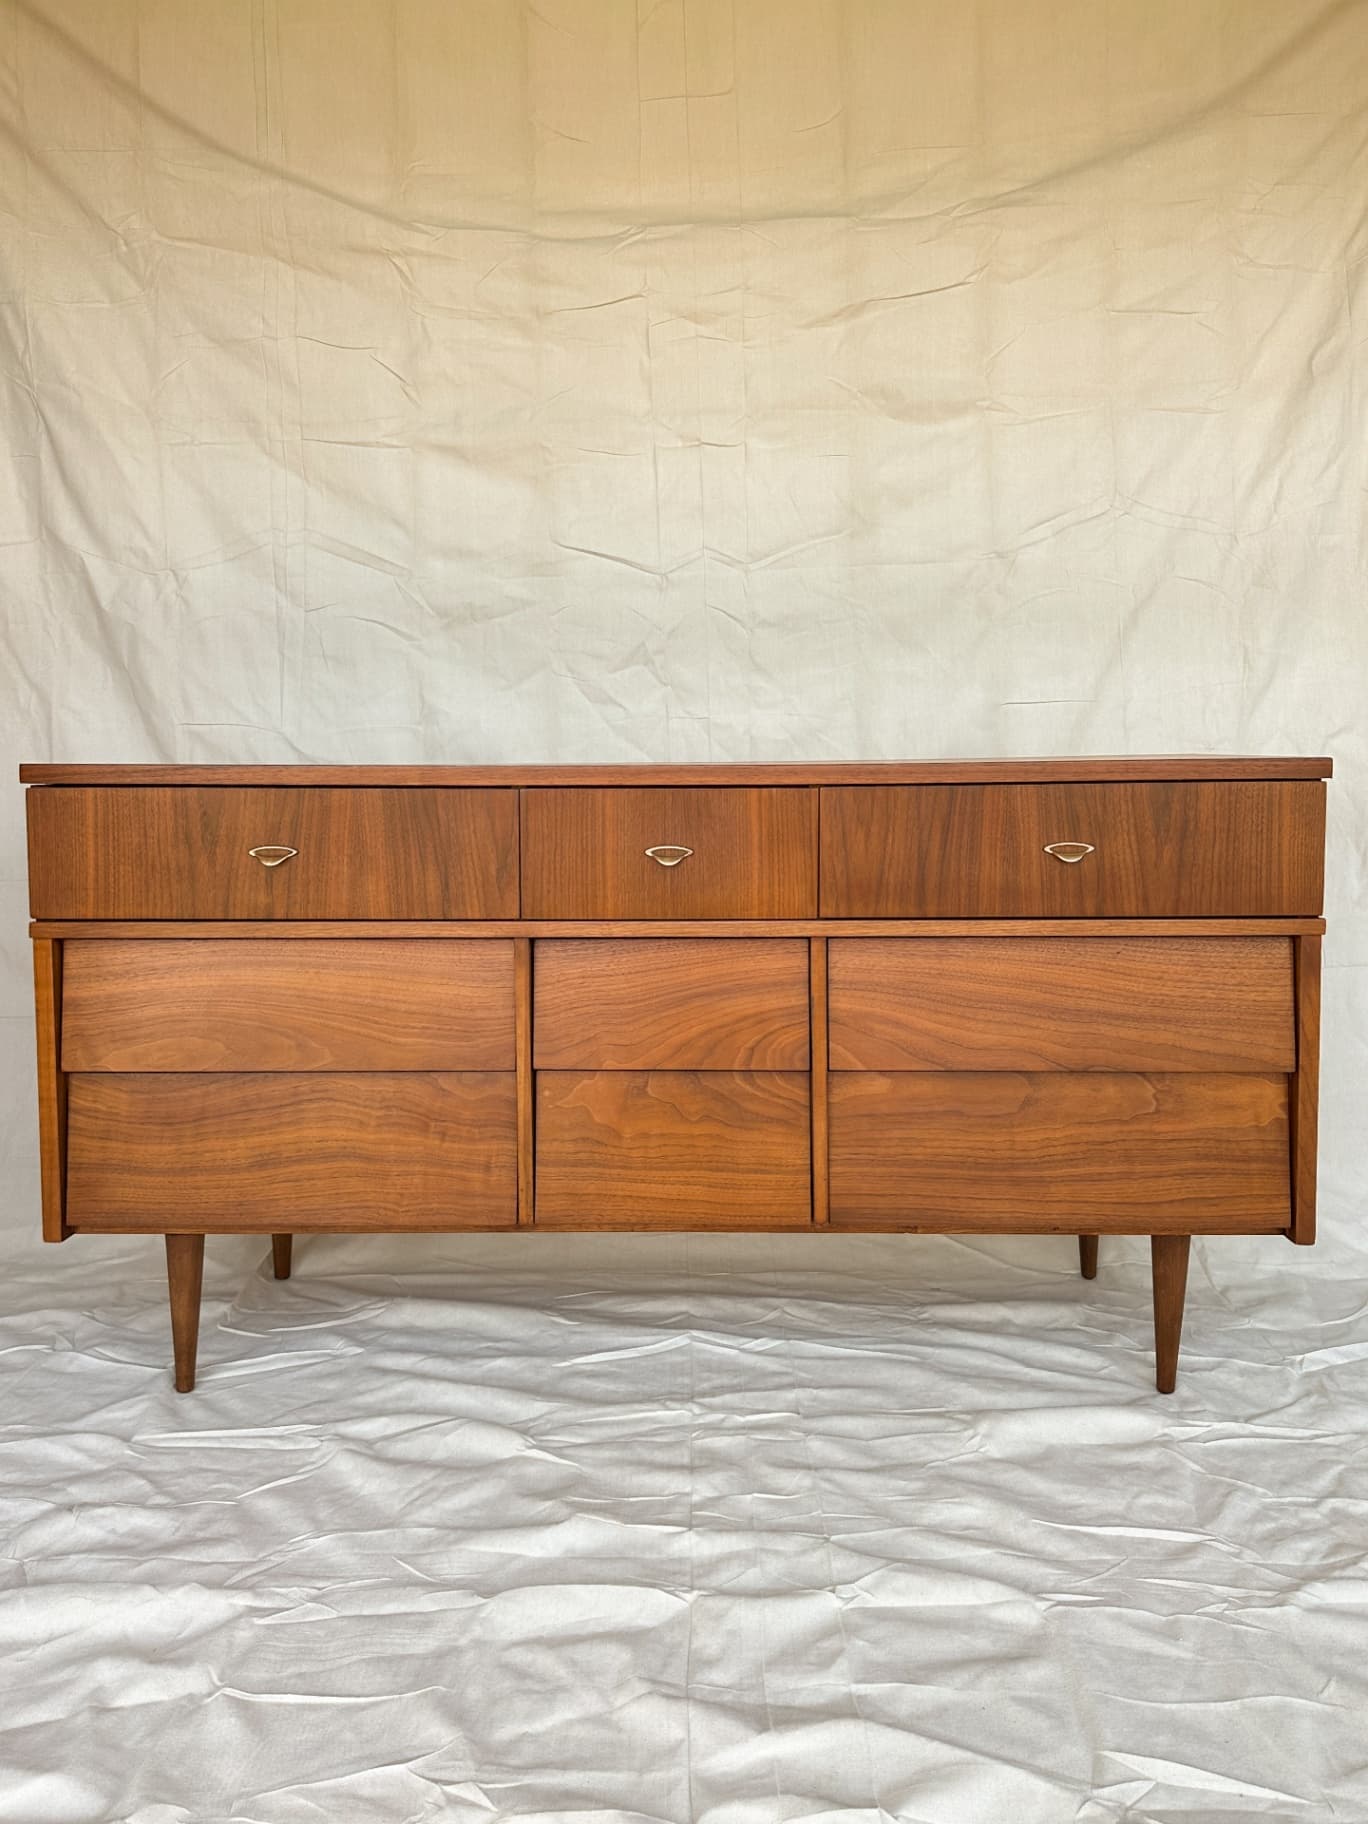
How I Restored a Vintage MCM Dresser With a Laminate Top - And Sold It in 48 Hours
When I first found this Harmony House lowboy, I knew it had potential. It had that classic MCM shape, nine drawers, tapered legs, and the original brass hardware - but years of wear had left it with chipped veneer, scratches, dings, and a few areas that needed some serious attention.
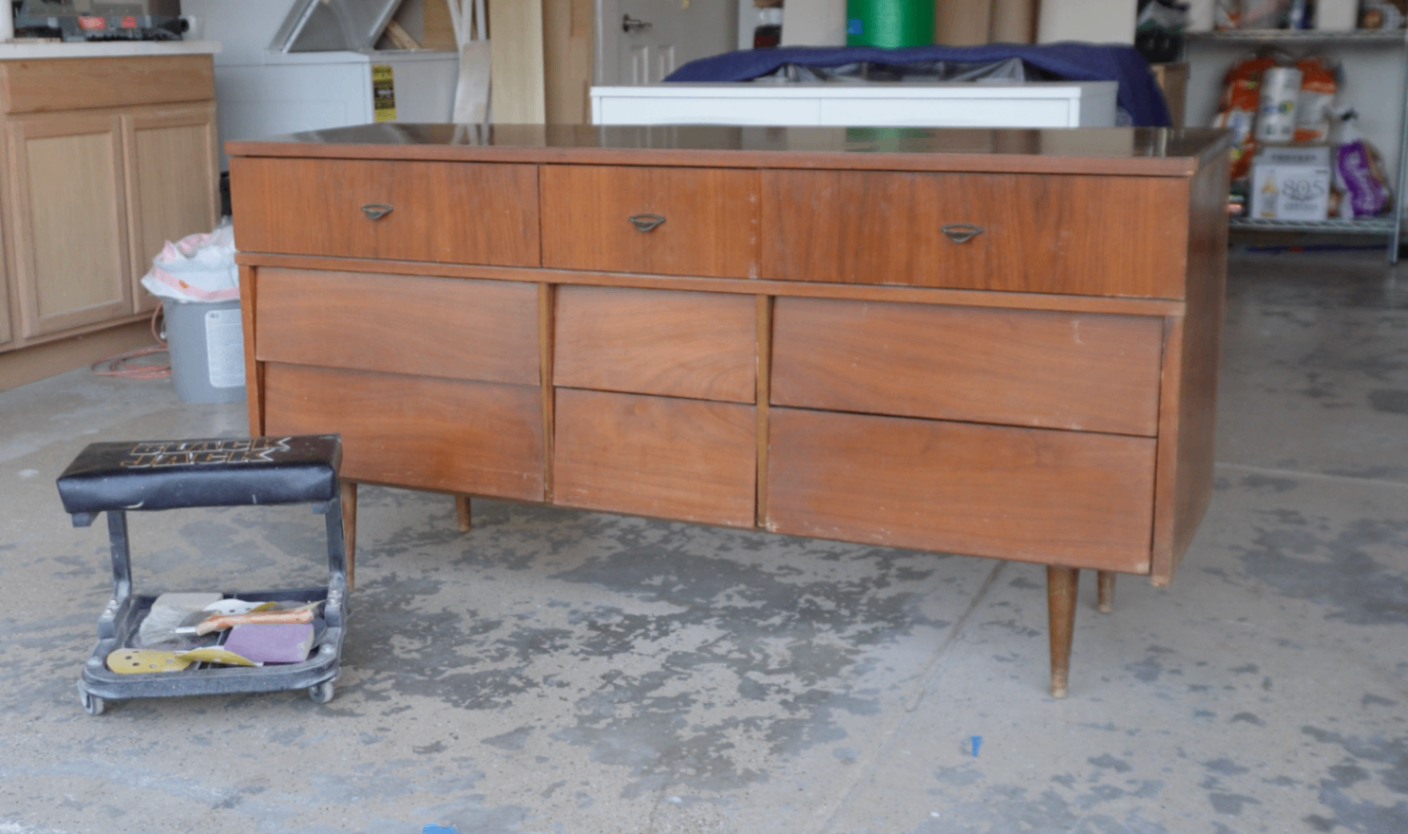
And then there was the top.
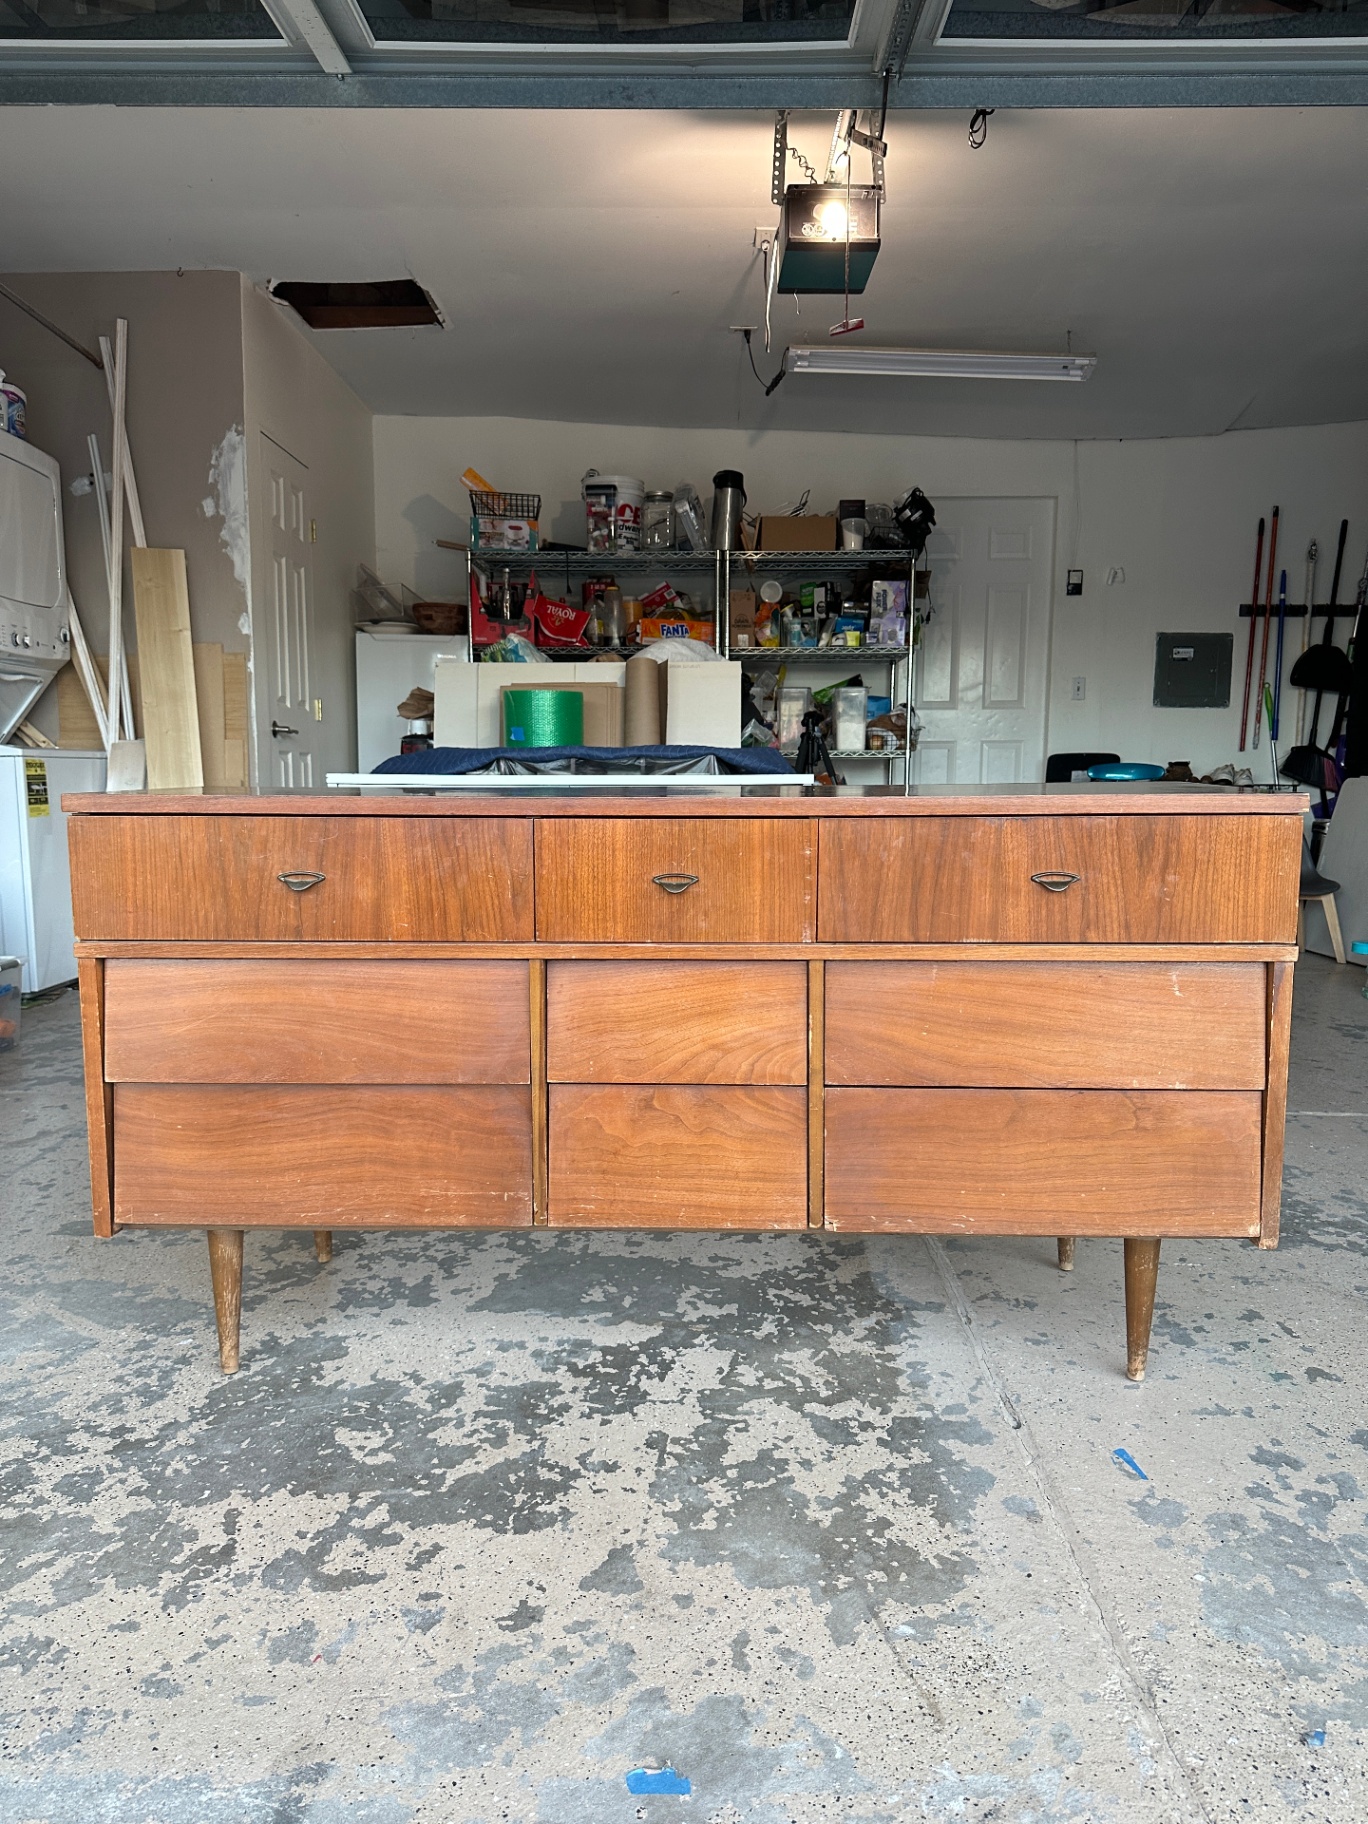
Instead of the beautiful walnut veneer you might expect on a vintage dresser like this, it had a laminate top. Durable? Sure. But it really took away from the look of the piece and would have seriously limited its resale value if I left it as-is.
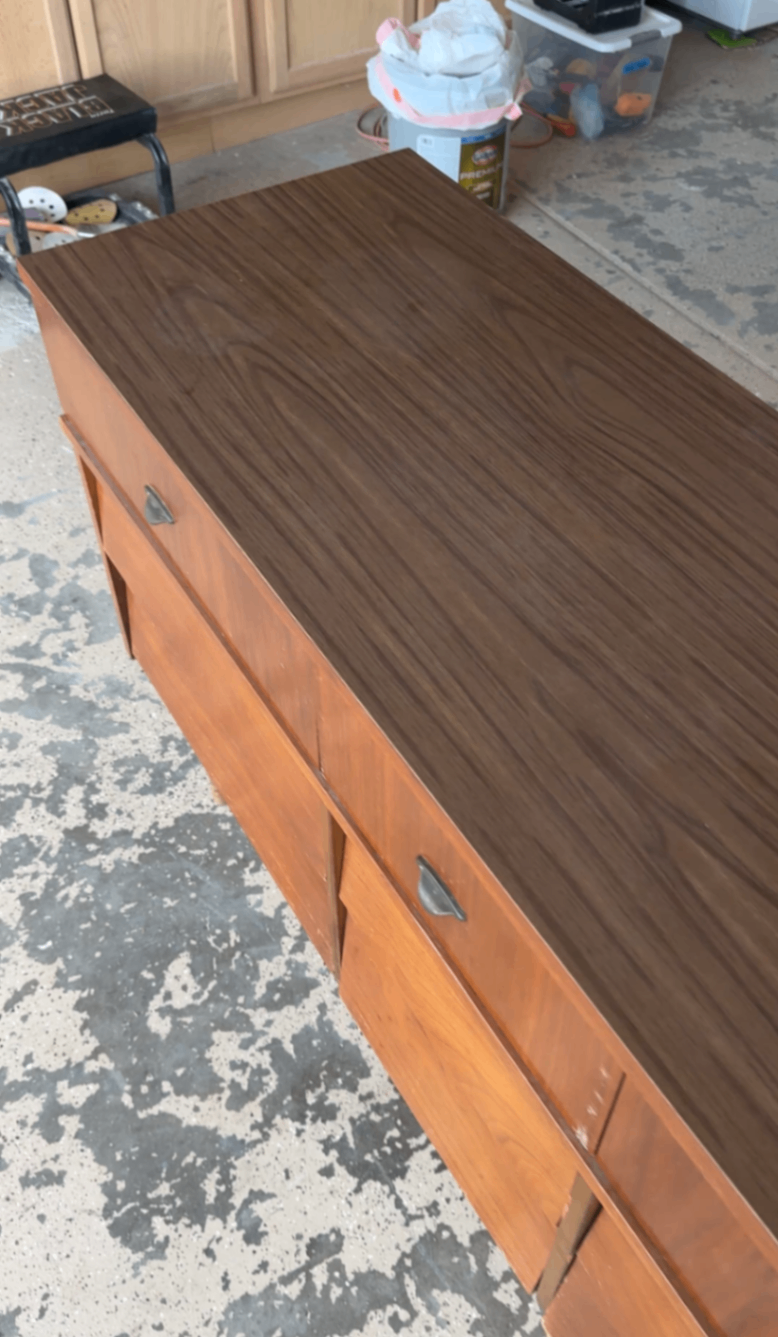
Laminate top - mismatched from dresser tone
So the plan from the beginning was to restore as much of the original wood as possible and give the top an entirely new walnut veneer surface.
In this blog, I’ll walk you through my full MCM dresser restoration process, including removing the old finish, repairing damaged walnut veneer, adding new walnut veneer over a laminate dresser top, color-matching the old and new walnut, troubleshooting a polyurethane finish, and ultimately selling the finished dresser within 48 hours.
Let’s get into it!
Prefer to watch? I filmed the entire restoration from start to finish, so you can watch the full MCM dresser makeover on my YouTube channel if you’re more of a visual learner.
And if you want to see the exact products and supplies I used for this restoration, I linked everything together in my ShopMy list here.
The Before: A Vintage Harmony House MCM Lowboy With Good Bones
This is a nine-drawer Harmony House mid-century modern lowboy dresser from the 1960s, and although it had definitely seen better days, the basic structure was still in really good shape.
That’s one of the biggest things I look for when deciding whether a vintage furniture piece is worth restoring.
Cosmetic damage? Usually fixable.
Broken drawers and missing glides? Not really something I want to deal with.
On this one, I was mostly working with:
Scratches and dings throughout the finish
Chipped and missing veneer
A laminate top instead of real wood
Faded wood and an overall tired finish
Original brass hardware that needed a good cleaning
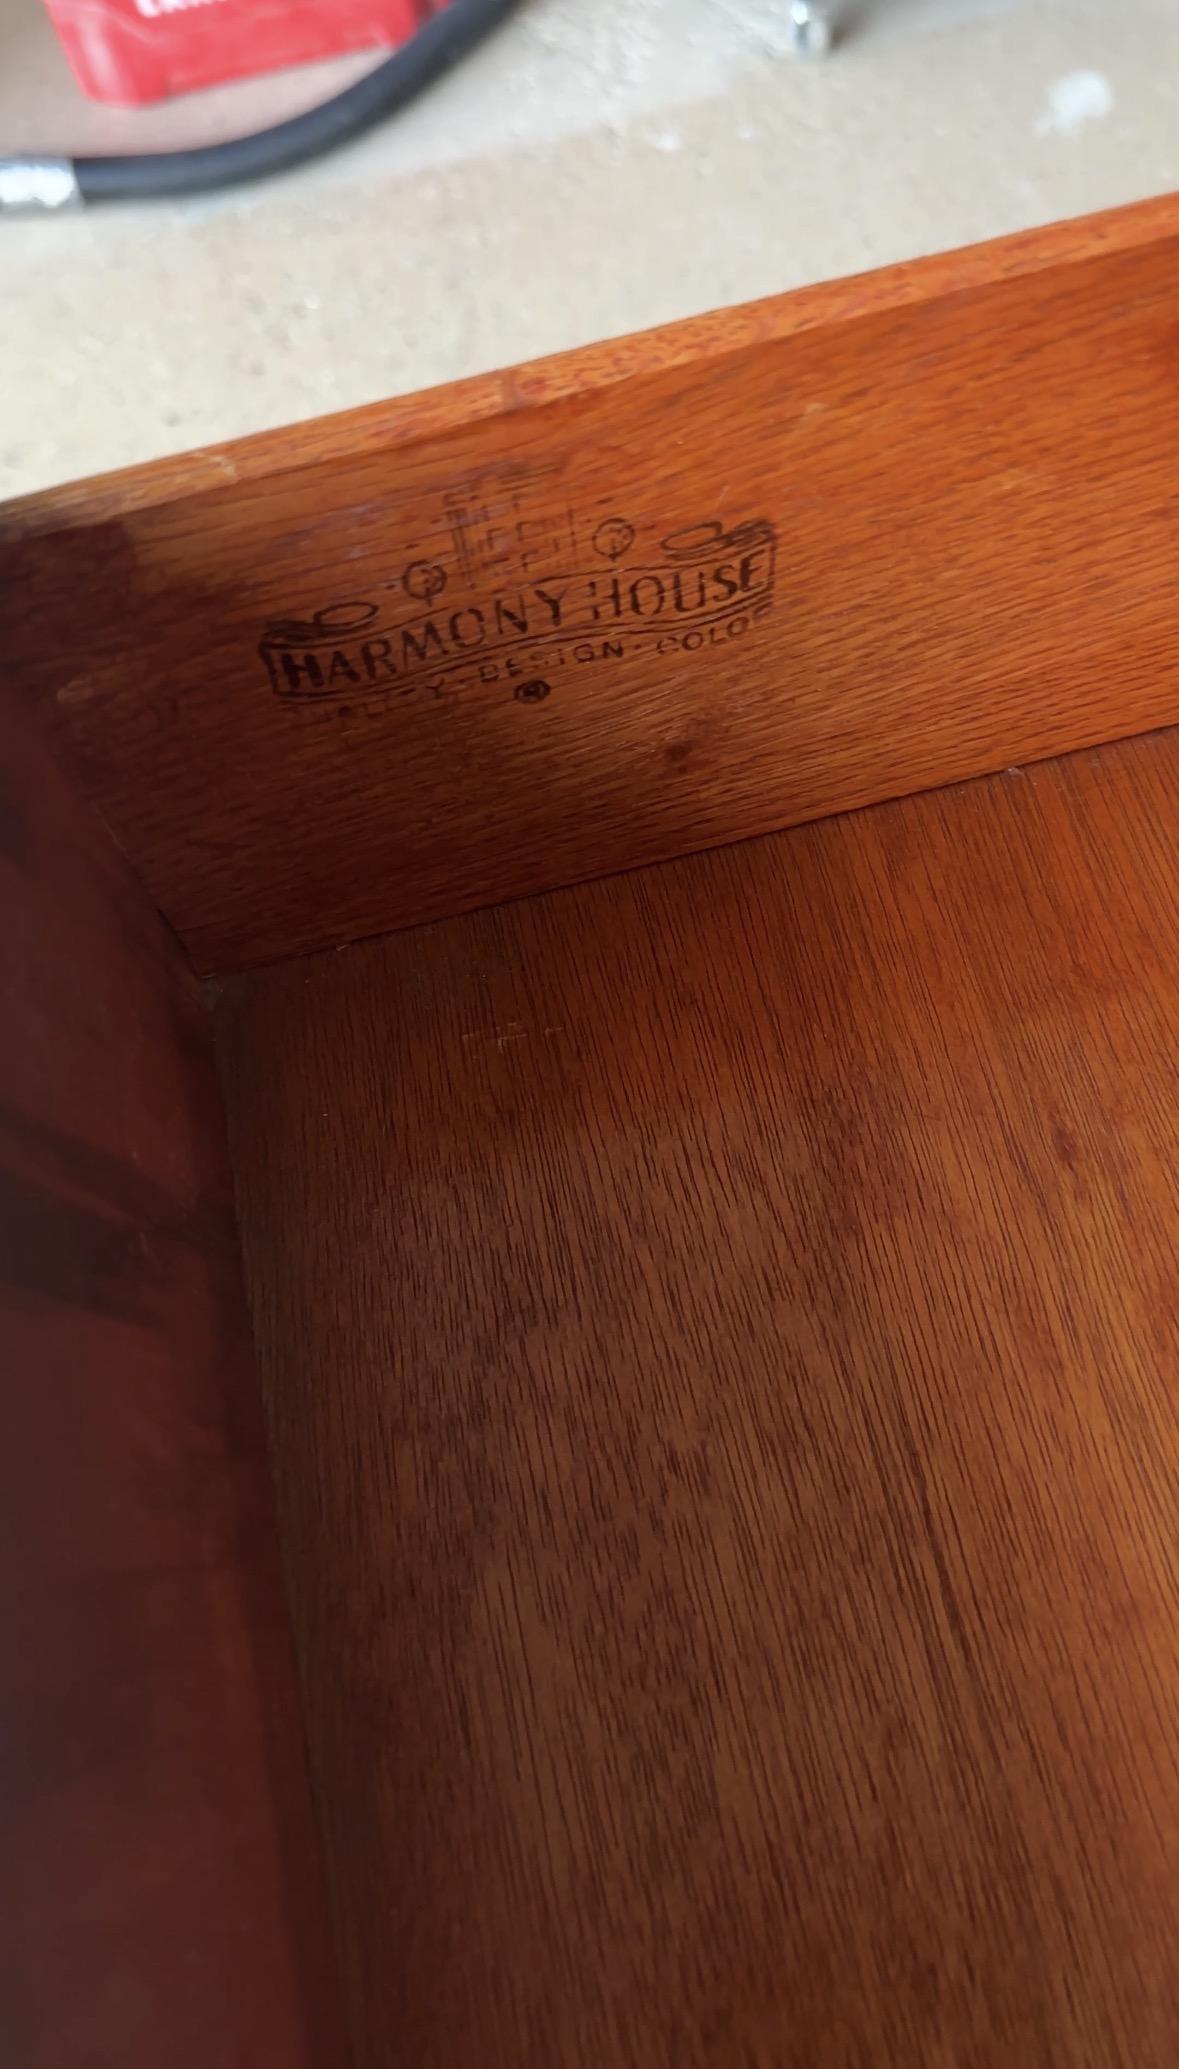
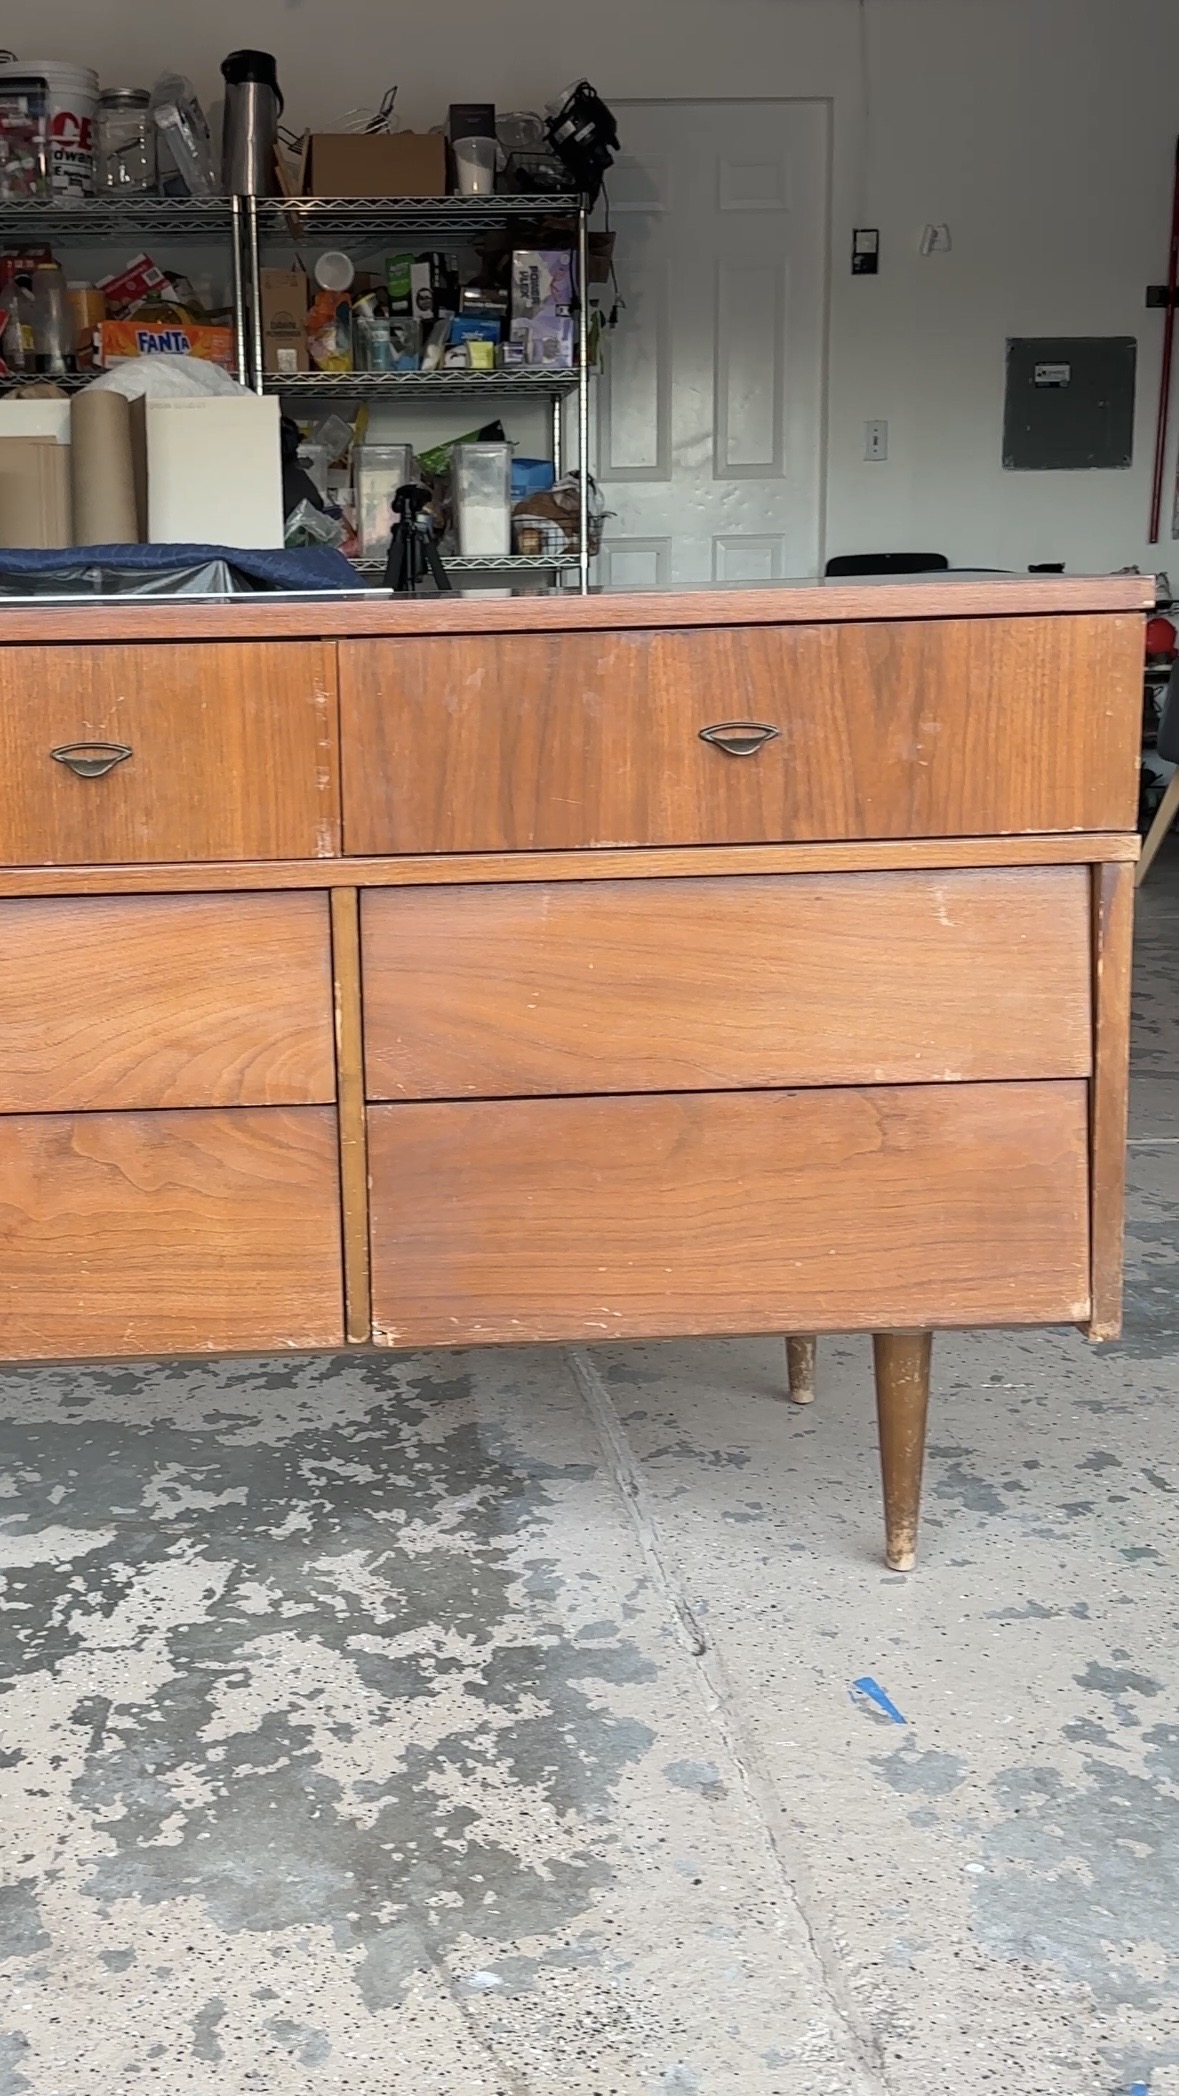
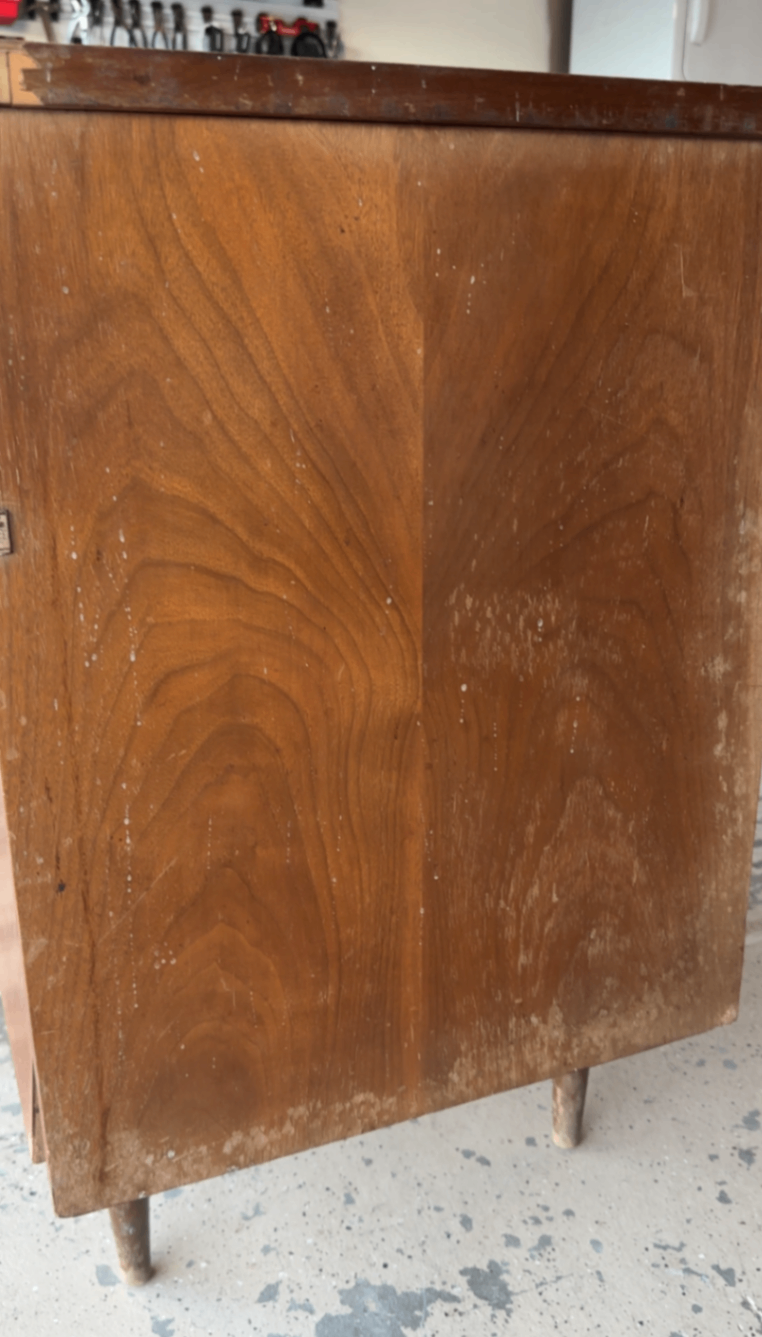
The drawers worked well, and the overall shape was exactly what I wanted in an MCM restoration.
My goal was simple: preserve as much of the original dresser as possible while cleaning up the areas that were distracting from it.
My Plan for Restoring the MCM Dresser Instead of Painting It
I know painting damaged furniture can sometimes be the easiest option, but on a piece like this? Trust me - I wouldn't dream of it!
The dresser already had the warm mid-century walnut look I wanted. It just needed a little help getting back there.
The laminate top was the biggest eyesore, which is why I planned from the start to add a completely new walnut veneer top.
That would make the top feel like it actually belonged with the dresser while still letting me restore the original wood everywhere else.
The basic plan was:
Remove the hardware and old finish.
Sand and assess the damage.
Repair chips and missing veneer.
Apply new walnut veneer over the laminate top.
Color-match the new veneer and lighter areas to the original walnut.
Seal and protect the piece.
Restore the hardware.
Clean, wax, and reassemble everything.
Pretty straightforward in theory.
Naturally, there were a few surprises along the way.
Removing the Old Finish From the Vintage Dresser
I started by pulling out all nine drawers and removing the original brass hardware so I could clean it separately.
For the old finish, I used a carbide scraper to remove most of it before sanding.
I really like using a carbide scraper on pieces like this because it removes a surprising amount of finish without immediately jumping into aggressive sanding - which is especially helpful when you're working with vintage veneer.
Unlike solid wood, you only have a thin layer of veneer to work with. Sand too aggressively and you can burn right through it.
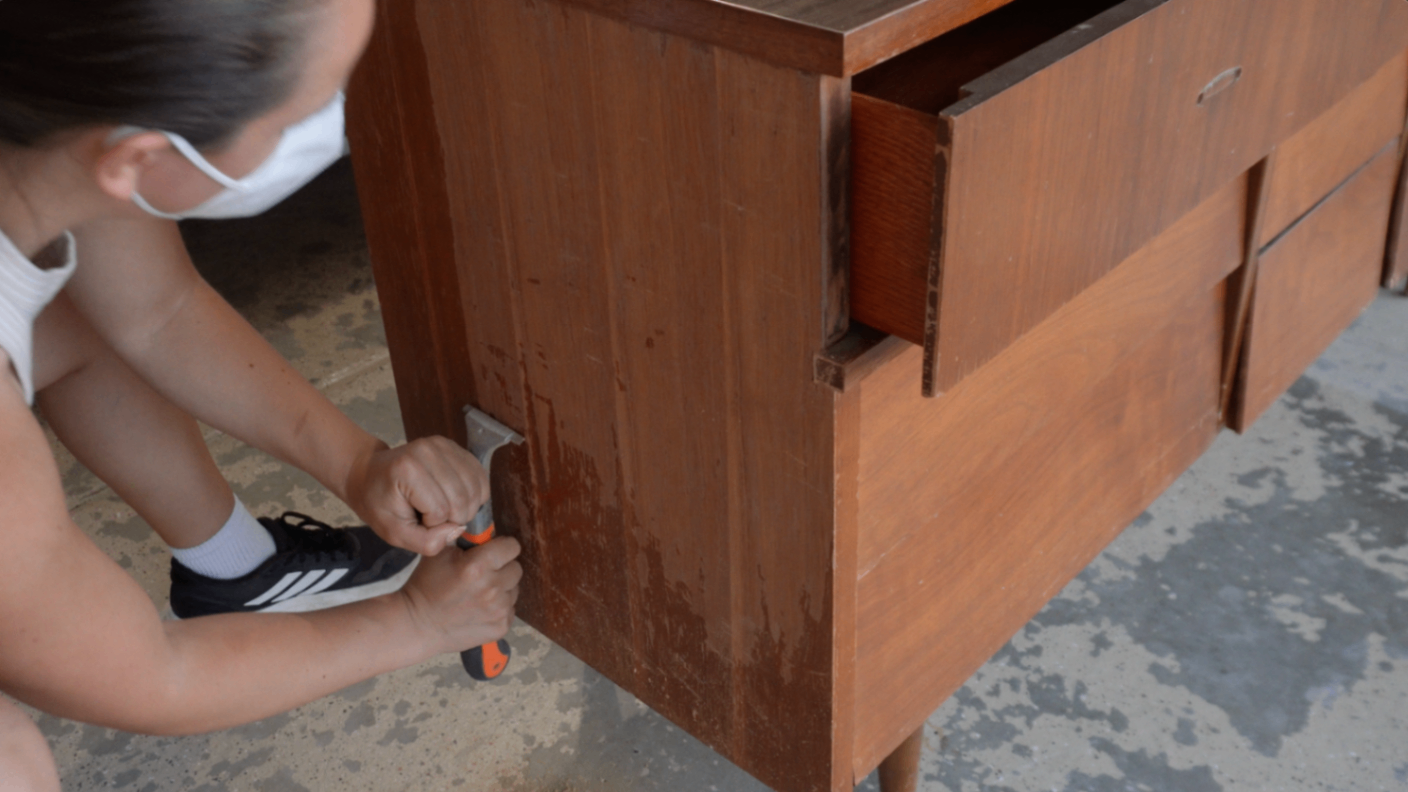
💡 Quick Tip: When working with vintage veneer, remove as much finish as you can with a carbide scraper before reaching for aggressive sandpaper. You have a lot less wood to work with than you would on a solid wood piece.
After scraping, I went over the dresser with 220-grit sandpaper using my orbital sander, hand sanding anywhere I needed more control.
I also lightly sanded the laminate top with my orbital. I wasn't trying to remove it; I just wanted to scuff up the slick surface so the new veneer would have something better to grab onto later.
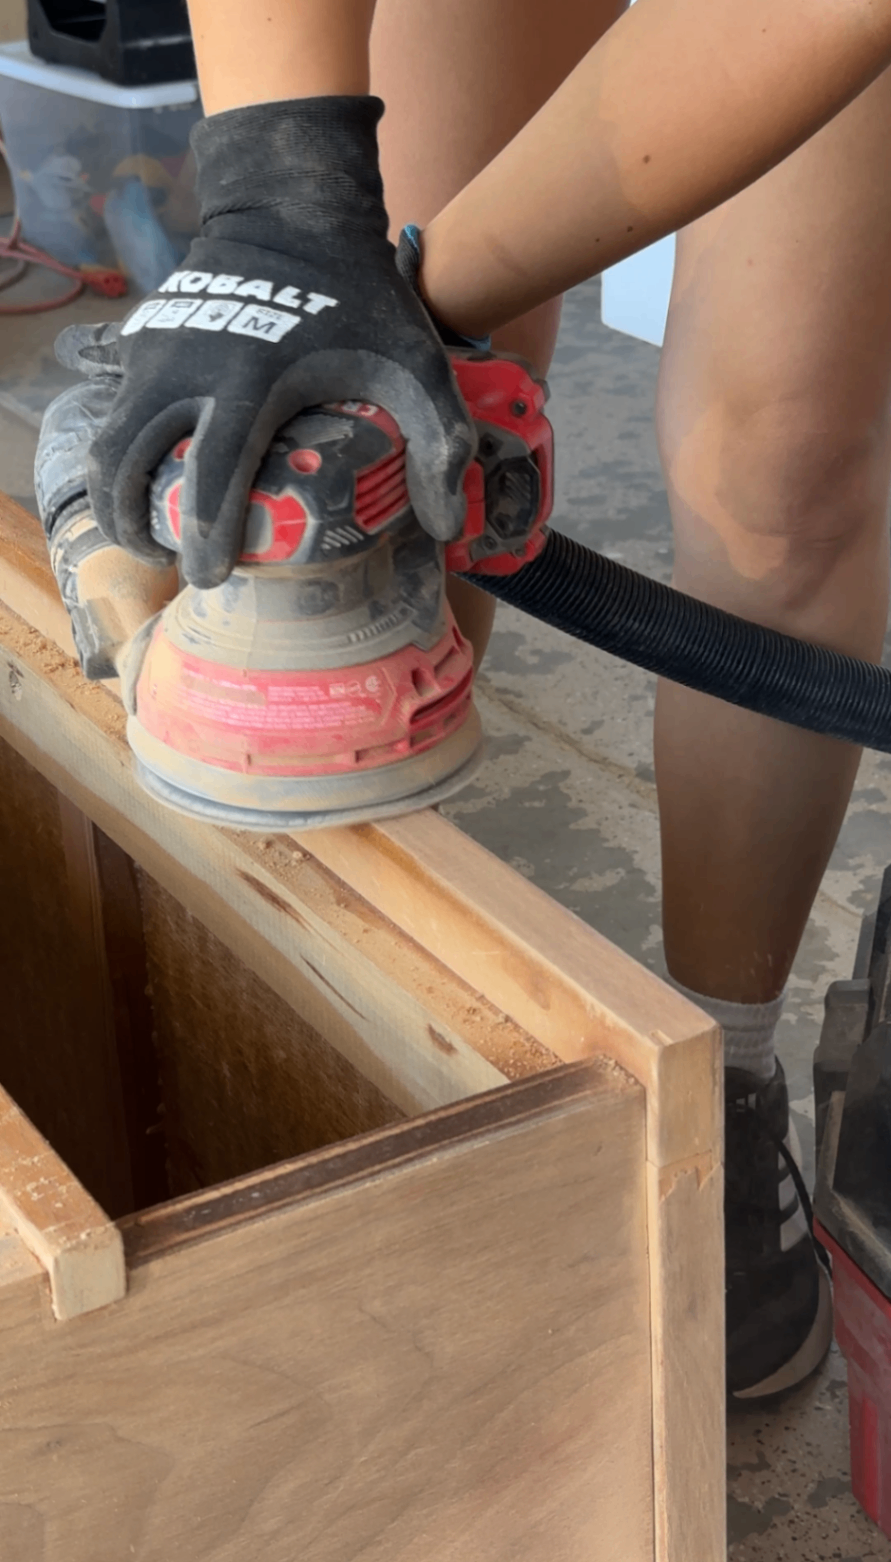
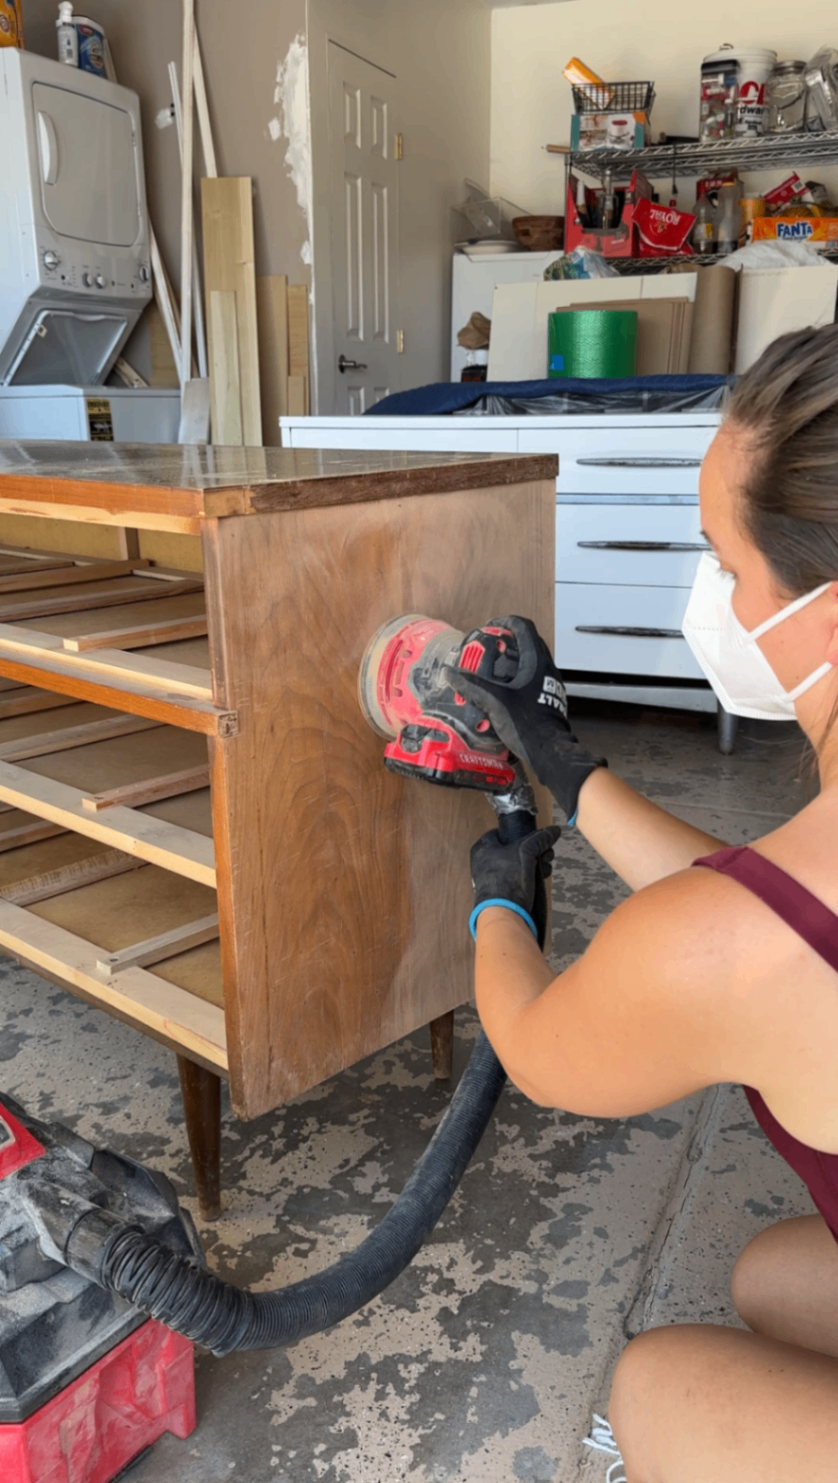
Once the old finish was gone, I could finally see exactly what I was working with - and there were definitely a few repairs waiting for me.
But before getting into all of that, I wanted to get the legs out of the way. Removing them would make the rest of the dresser much easier to work on, and I could get them refinished and drying while I moved on to everything else.
Restoring the Tapered MCM Dresser Legs
Before moving on to the rest of the dresser, I removed the tapered legs so I could refinish them separately - and make the rest of the piece a whole lot easier to work on.
Instead of awkwardly sanding around each leg by hand, I used one of my favorite tricks: putting the leg into the chuck of a drill so I could rotate it while sanding.
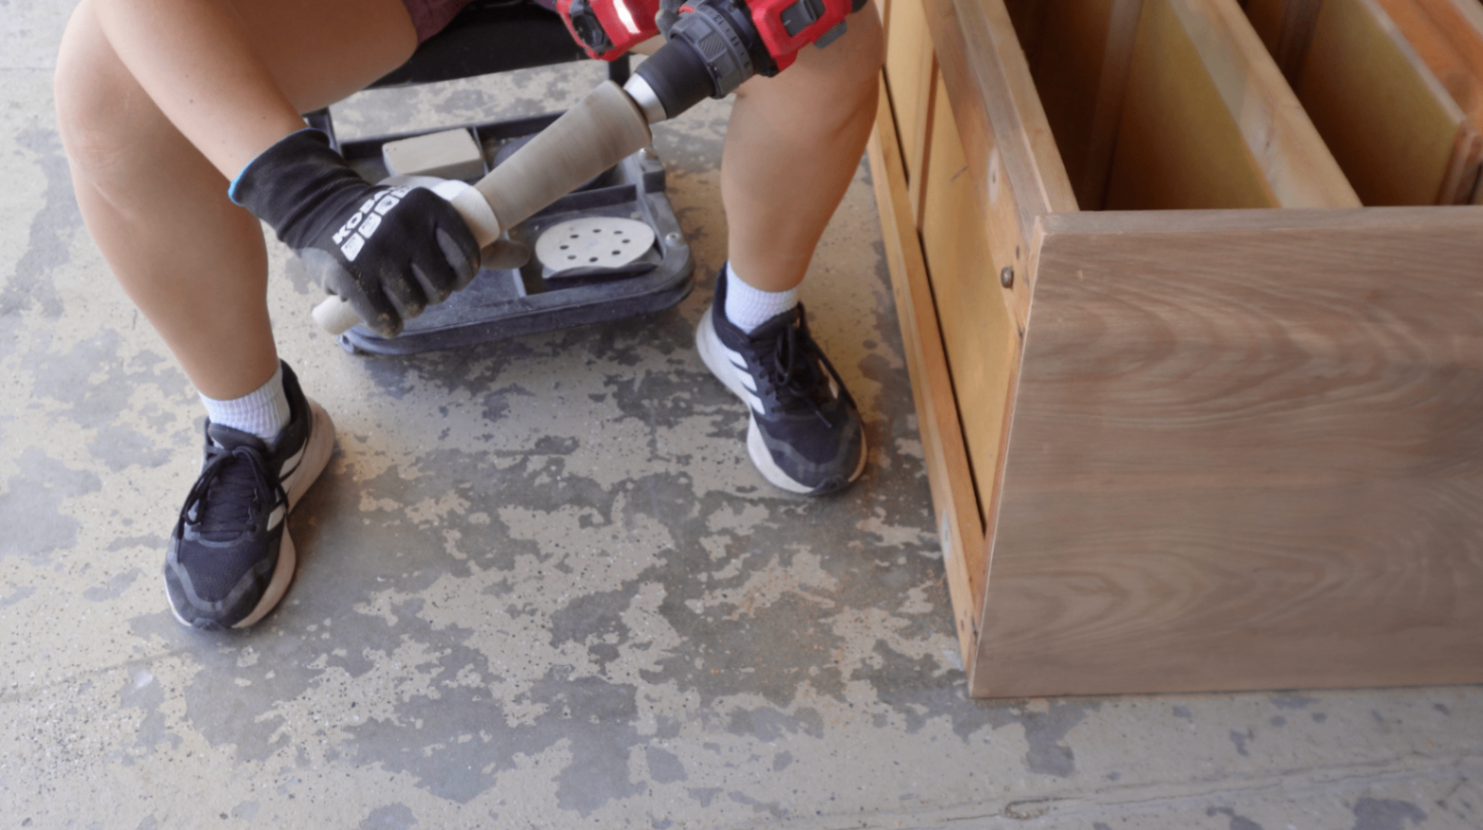
Basically a very budget-friendly furniture-leg lathe.
Once the old finish was removed, I stained the legs with walnut gel stain and finished them with a couple coats of wipe-on polyurethane.
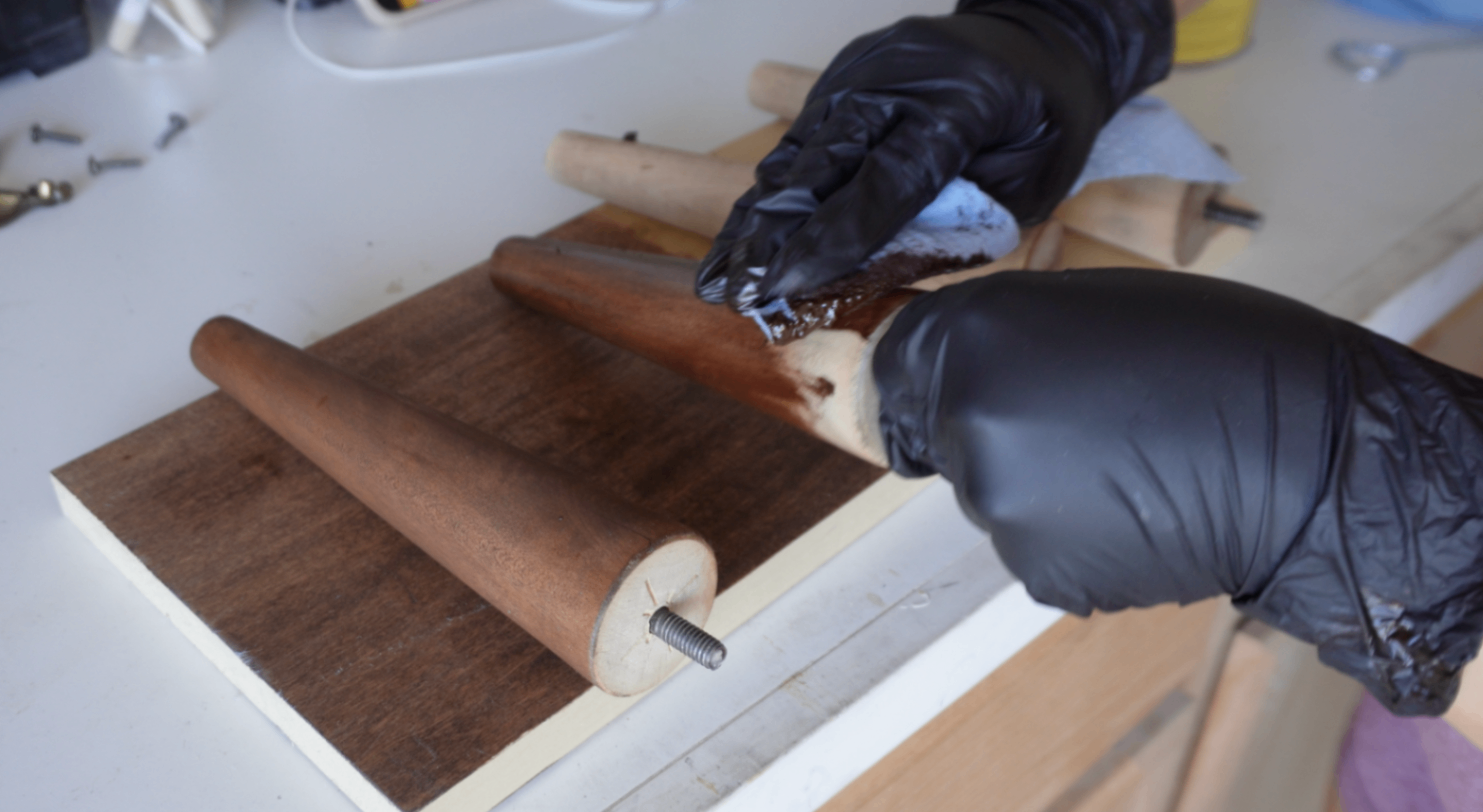
Then, while those were drying, I could move on to the more tedious part: all of those little veneer repairs.
How I Repaired Chipped and Missing Walnut Veneer
Once the old finish was gone, every scratch, chip, ding, and missing piece of veneer became very obvious.
I used Mohawk walnut epoxy putty to fill all the damage in.
I really like using this stuff for furniture repairs because it dries rock hard and cures pretty quickly, so it creates a much more solid repair than a softer wood filler. The downside is that you do need to work fairly quickly once you start mixing and applying it, because it starts firming up fast.
Another big reason I like it is that it's pre-tinted in wood tones. Since I'm already starting with a walnut-colored repair instead of a light beige filler, it makes the color-matching and blending process so much easier later on.
I worked the putty into the damaged areas and then let it cure while I moved on to the new dresser top. Once it was fully hardened, I came back and carefully sanded each repair flush with the surrounding wood.
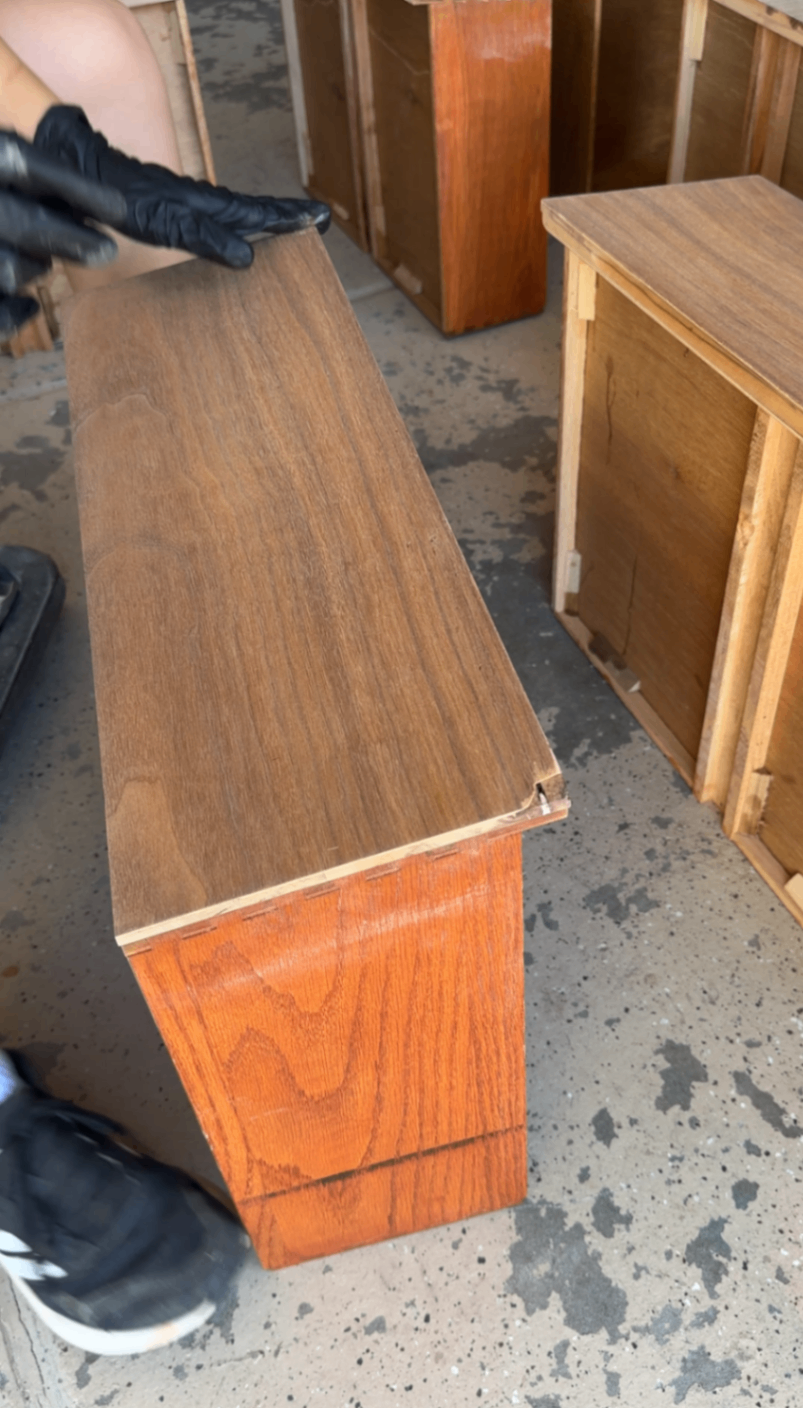
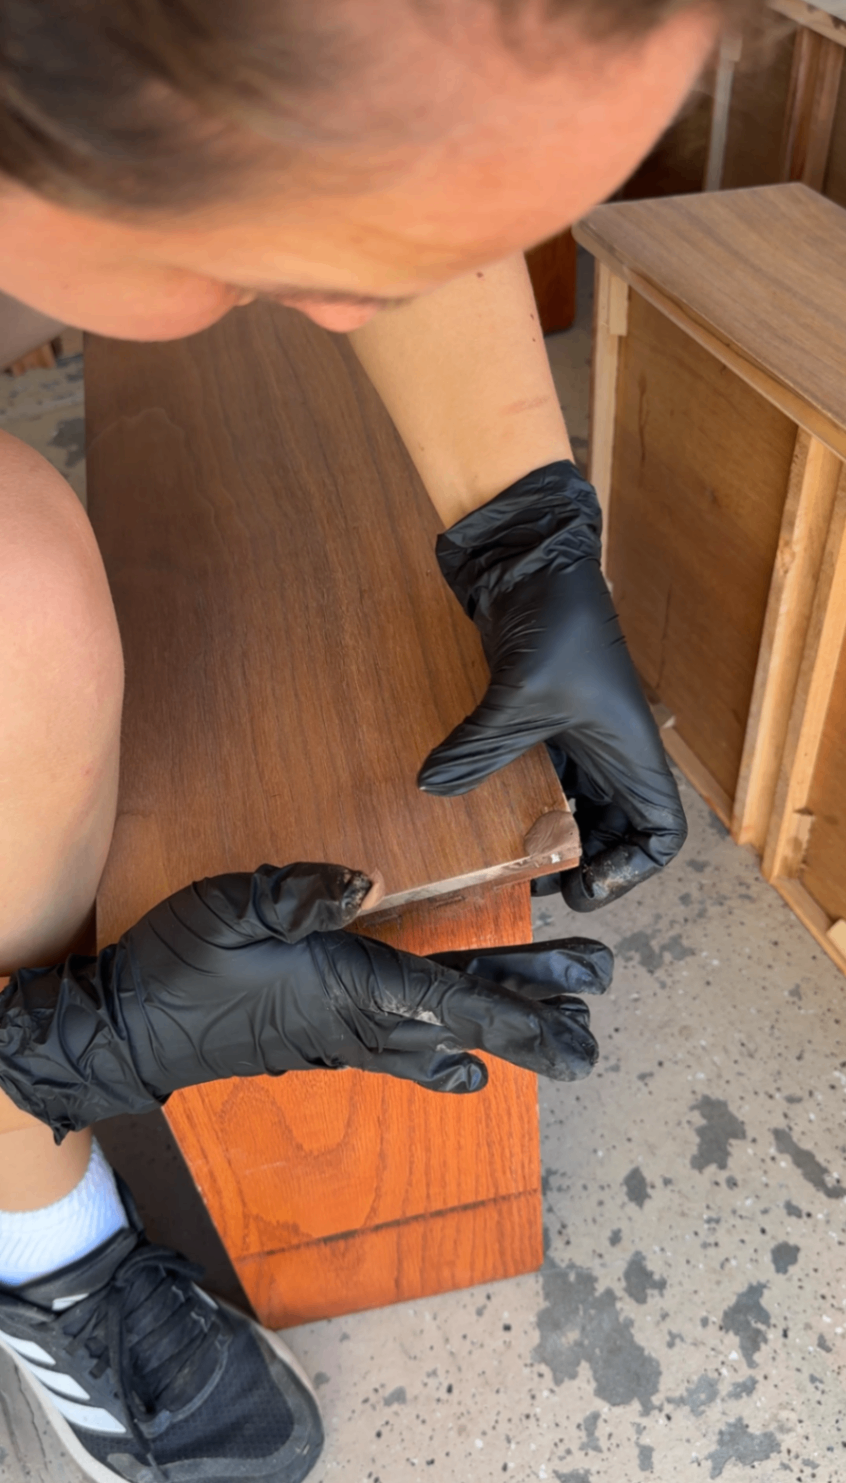
At this point, I wasn't trying to make every repair completely disappear. The goal was to rebuild the damaged areas first, then come back later with color and grain detailing once I could see how everything looked under finish.
That ended up making the blending process much easier.
🛠️ Products I Used: I put all of the furniture repair products, walnut veneer, stains, finishes, and other supplies I used for this makeover into one ShopMy list here if you want the exact products.
How I Added Walnut Veneer Over the Laminate Dresser Top
While the epoxy repairs were curing, I moved on to probably the biggest transformation of the whole project: that laminate top.
From the beginning, I knew I wanted to cover it with real walnut veneer so it would actually feel like part of the dresser.
There are two main types of wood veneer you'll usually come across for a project like this. Peel-and-stick veneer comes with adhesive already applied to the back, so it's more expensive, but also much more convenient and beginner-friendly. The more affordable option is traditional paper-backed veneer without adhesive, but you'll need to apply contact cement yourself and typically use dowels or another method to help position the veneer before pressing it into place.
Since this was my first time veneering an entire dresser top, I decided to spend a little more on the peel-and-stick version and ease myself into the process. One less thing to mess up!
Since I had already lightly sanded the laminate earlier, I started by thoroughly cleaning it with mineral spirits to remove any leftover dust or residue.
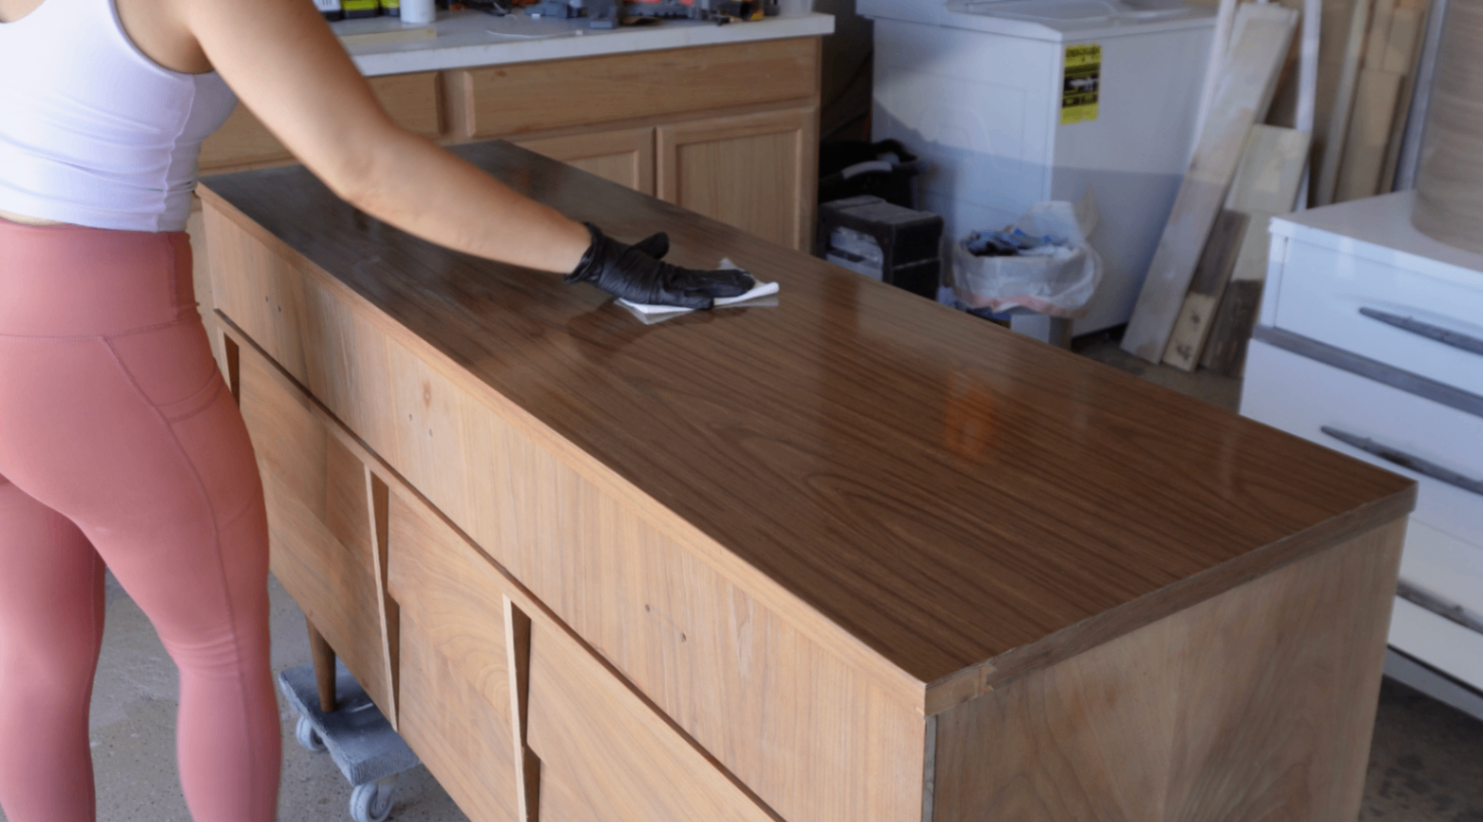
Then I cut the veneer roughly one inch oversized on all sides.
That little bit of extra material gave me some wiggle room while positioning it - and was much less stressful than trying to line up a perfectly sized sheet on the first try.
From there, I gradually peeled back the backing and pressed the veneer onto the top, working my way across and applying firm pressure as I went.
To apply pressure evenly and effectively, I just used a scrap piece of wood that I rounded over slightly on one side with my sander (to keep the wood from catching or denting the new veneer).
Once everything was fully adhered, I trimmed the excess flush with the edges of the dresser and carefully sanded everything smooth.
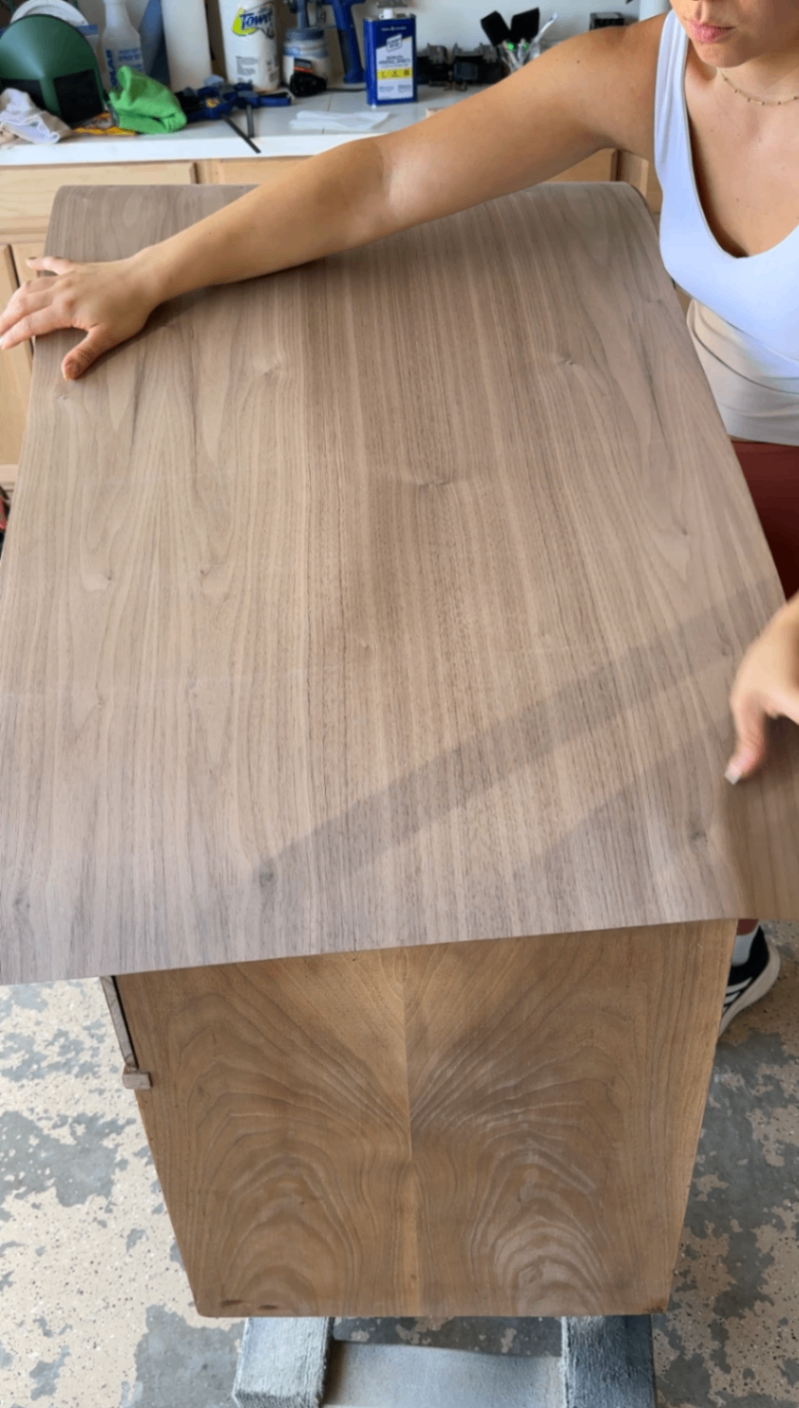
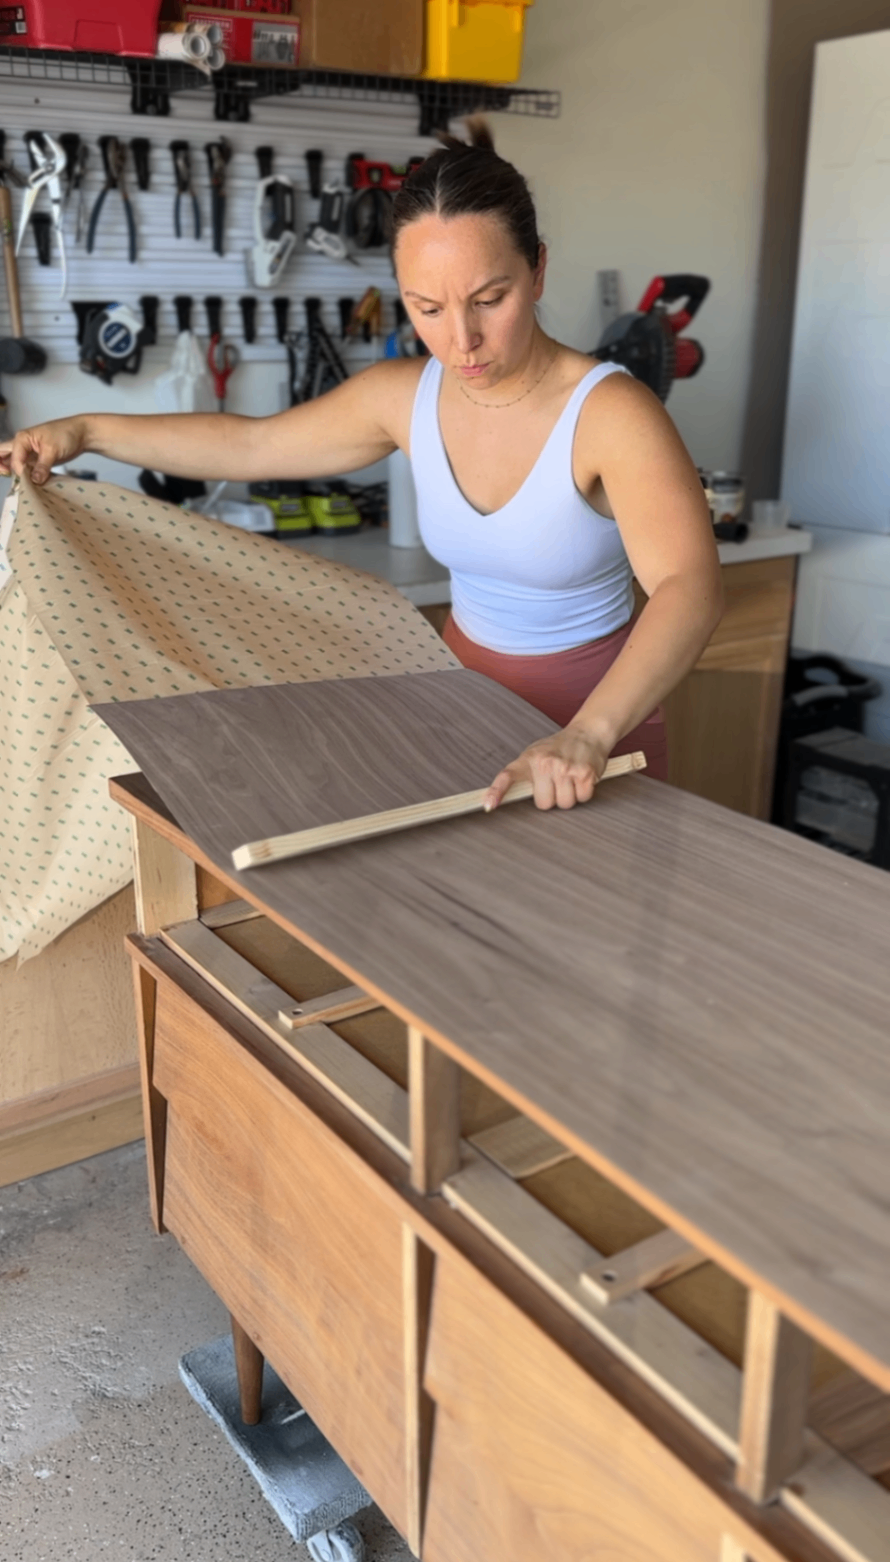
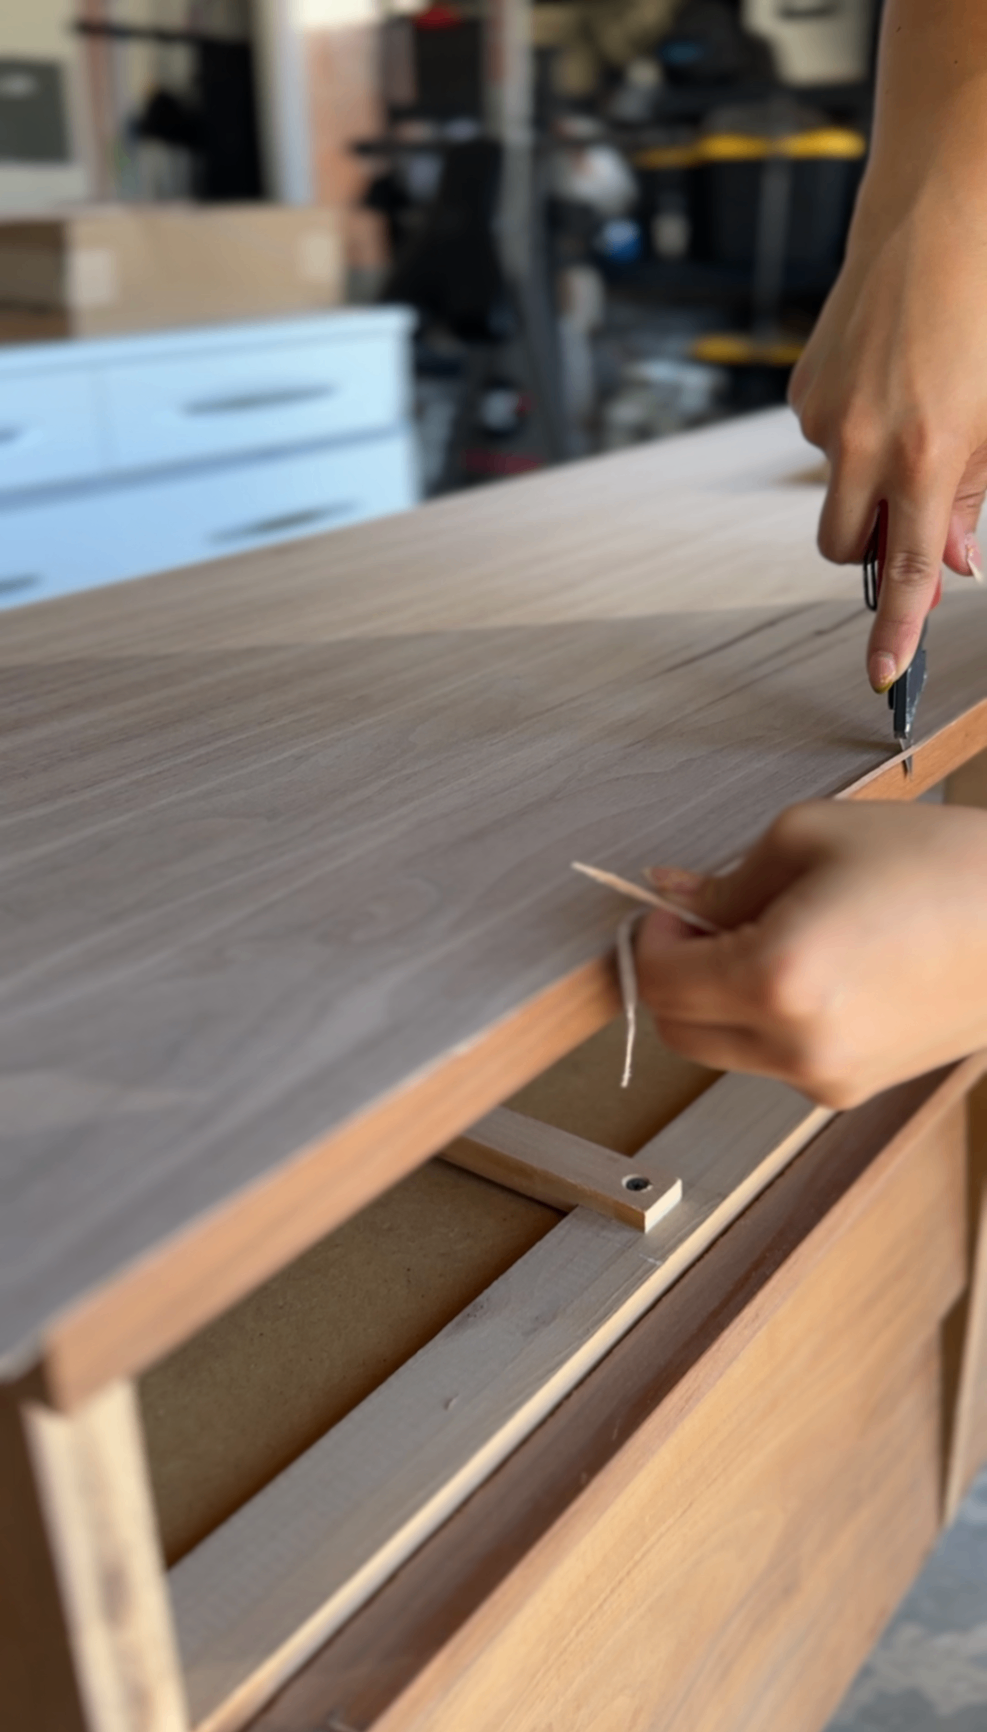
And honestly? The difference was immediate.
The top finally looked like it actually belonged on a walnut MCM dresser instead of being this random laminate surface sitting above it.
💡 Quick Tip: Clamp your veneer sheet down while you apply it to keep it in position - just shift the clamps farther down your work surface as you get close to them!
Sanding the Veneer Repairs Smooth
By the time the new top was installed, the epoxy putty repairs had fully cured, so I went back and sanded them flush with the surrounding wood.
This is where all of those rough-looking patches finally started looking like part of the dresser again.
They still needed color work, but having everything smooth and level gave me a much better foundation for blending them later.
With the repairs finished and the new walnut top in place, I could finally start bringing some color back into the piece.
Staining the New Walnut Veneer Top
Brand-new walnut next to 60-ish-year-old wood obviously wasn't going to be a perfect match right out of the box.
The new veneer looked great, but it needed more warmth to fit in with the original dresser.
For the top, I used General Finishes Candlelite Gel Stain.
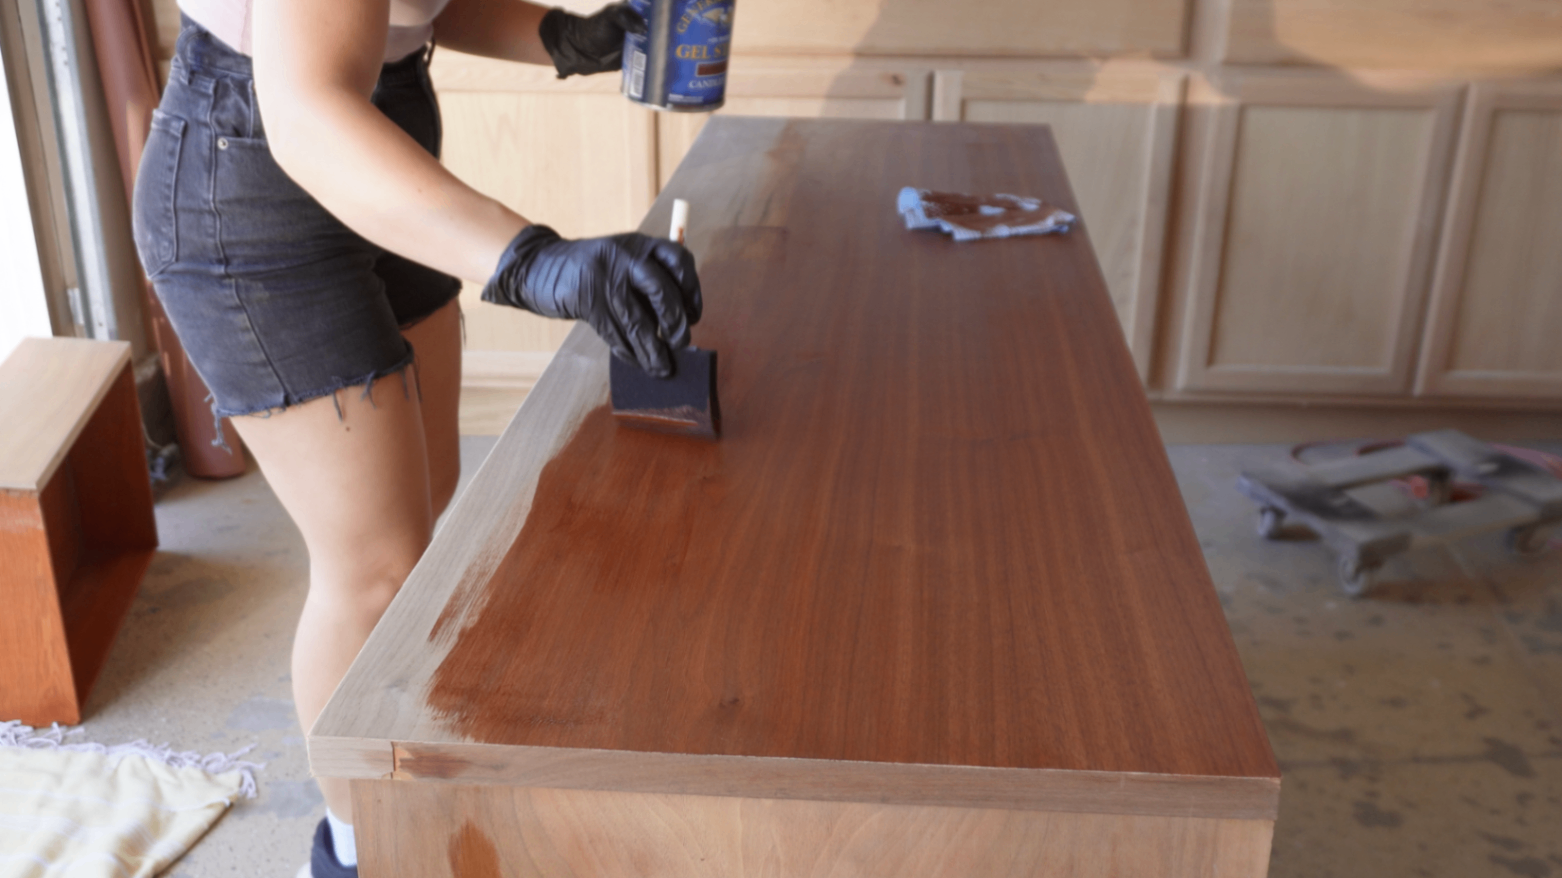
It gave the new walnut that warmer, slightly aged tone I was looking for while still letting plenty of the natural grain show through.
This was one of those steps where the project suddenly started looking much more finished.
But the top wasn't actually the trickiest part to color-match.
That award went to some of the lighter wood around the dresser itself.
Color-Matching the Original Wood on the Dresser
Some of the frame and drawer-edge areas were noticeably lighter than the main walnut body, so I needed to bring those closer together before sealing everything.
I started with walnut gel stain on the lighter areas to build some depth, then used Candlelite to add warmth and help everything feel more cohesive.
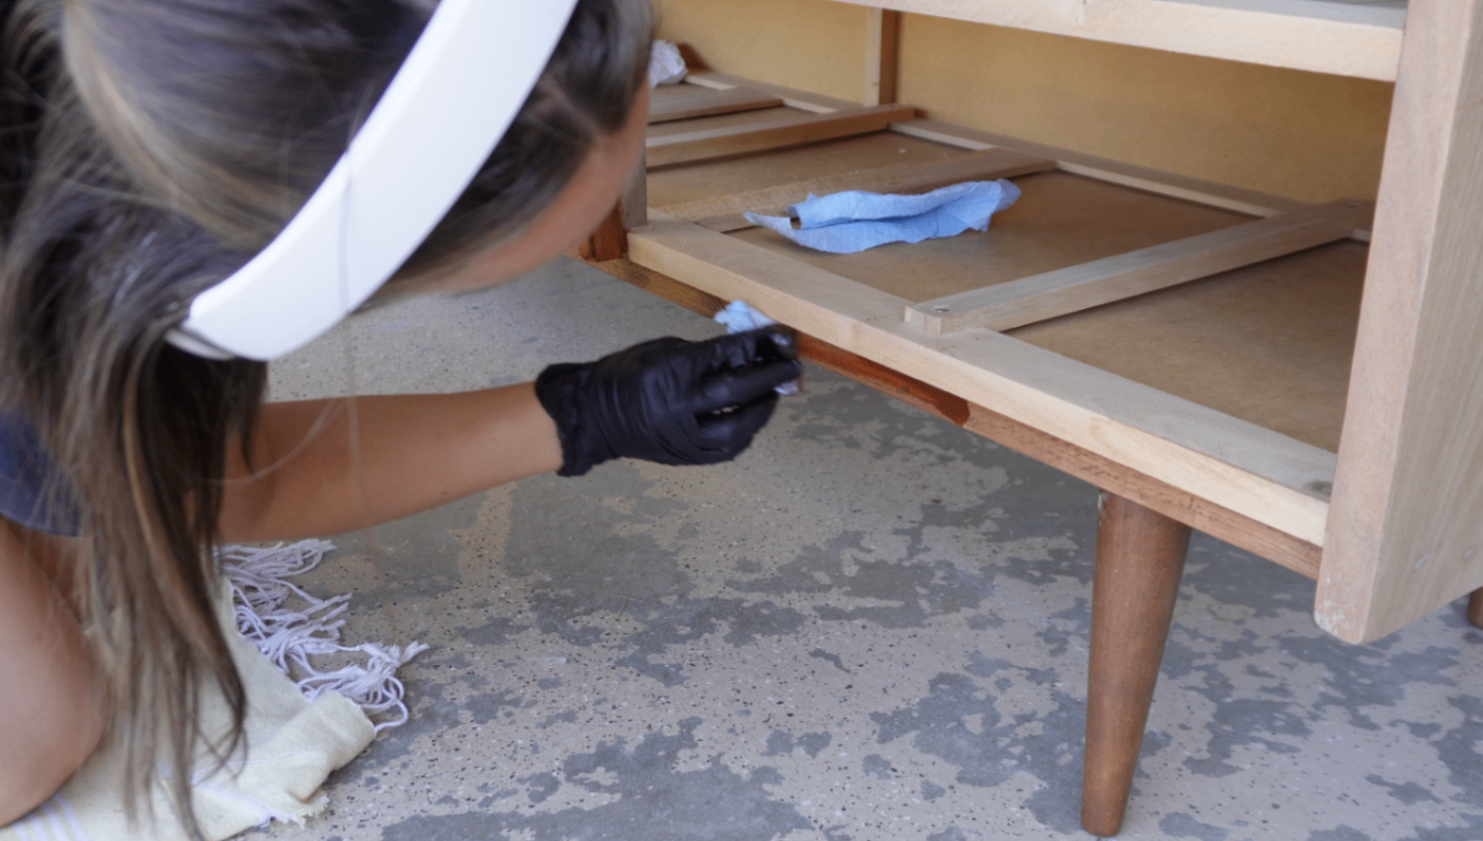
Finally the new veneer, original walnut veneer, and the lighter wood parts were finally looking like they belonged on the same piece.
Then it was time to seal it.
And that's where things got a little annoying.
Sealing the Dresser With Wipe-On Poly
For the protective finish, I used Watco Wipe-On Poly.
Full disclosure - I usually use the Minwax Wipe-On Poly, but my local Lowe's was out so I ran to Home Depot and picked up the Watco version. It worked fine for the smaller surfaces like all the trim and the drawers. The bigger sections like the sides and top is where I ran into some issues.
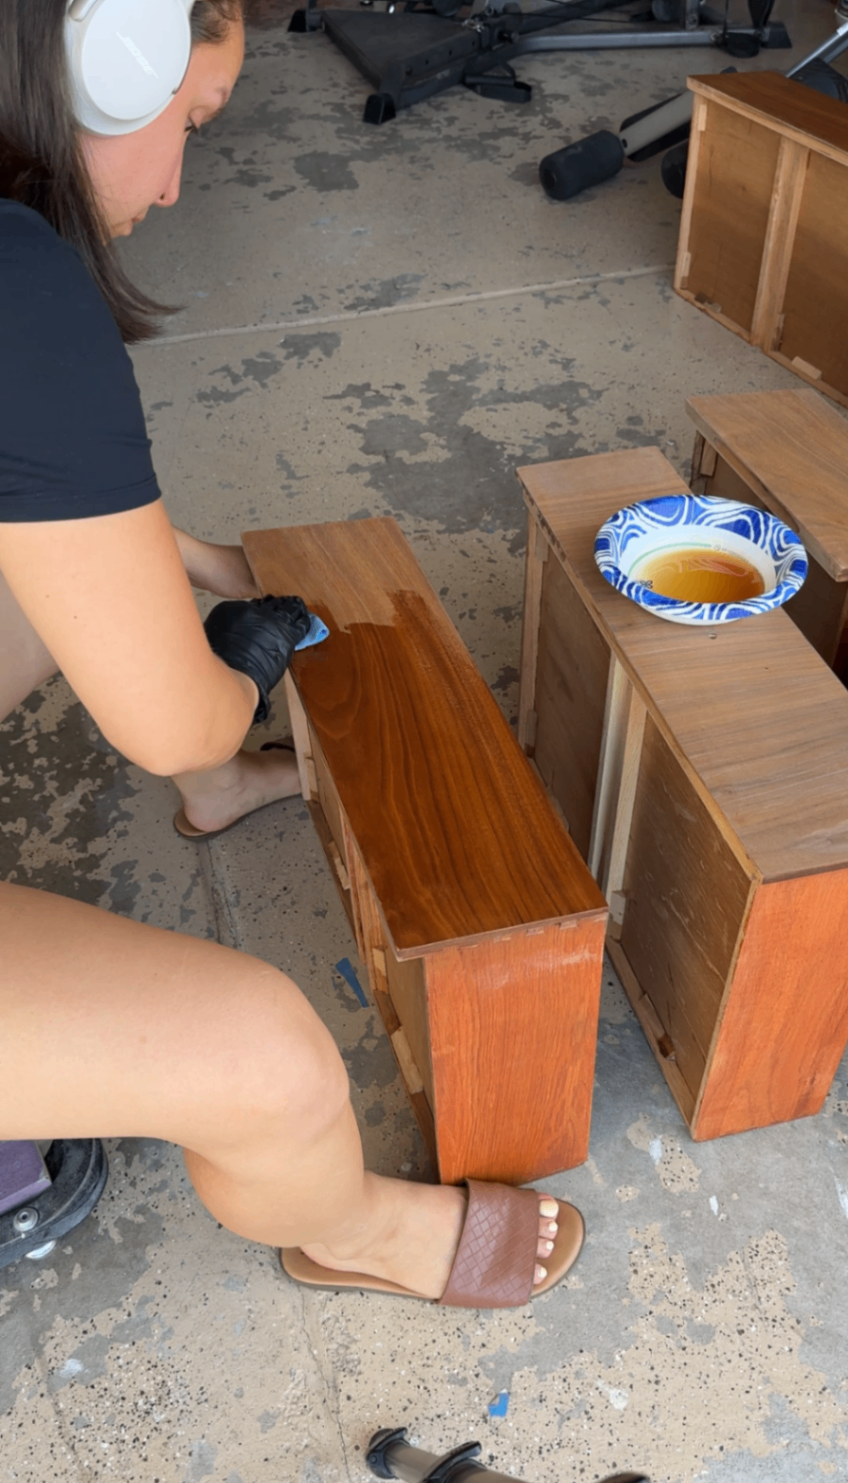
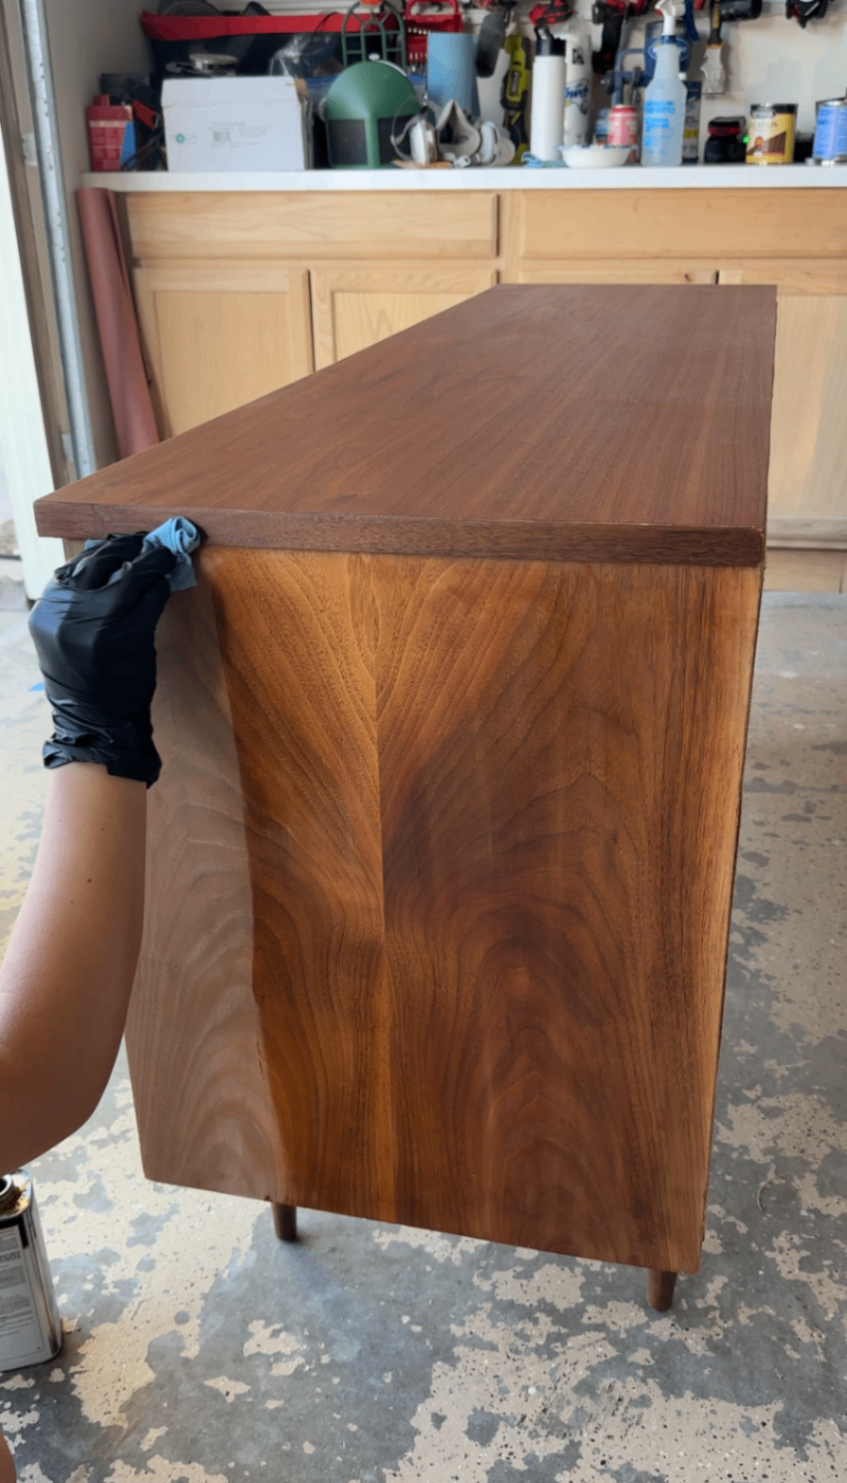
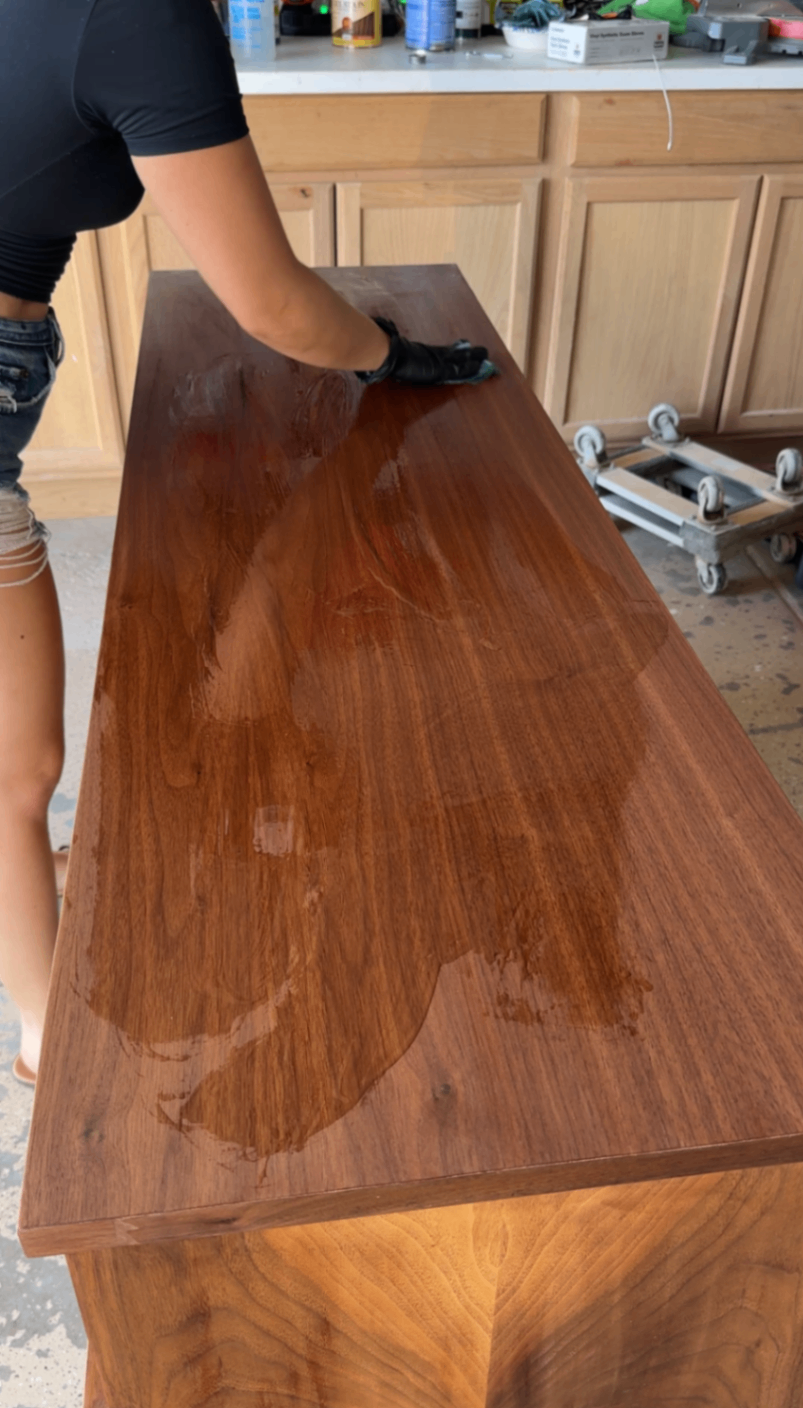
On the larger surfaces I started noticing the polyurethane was dragging across the surface instead of wiping on smoothly. Some areas stayed tacky, others developed streaks, and the top was really bad. To make matters worse, on the top of the dresser I accidentally poured way too much and was left with a ton of streaks and raised areas that I couldn't wipe smooth within the super quick working time.
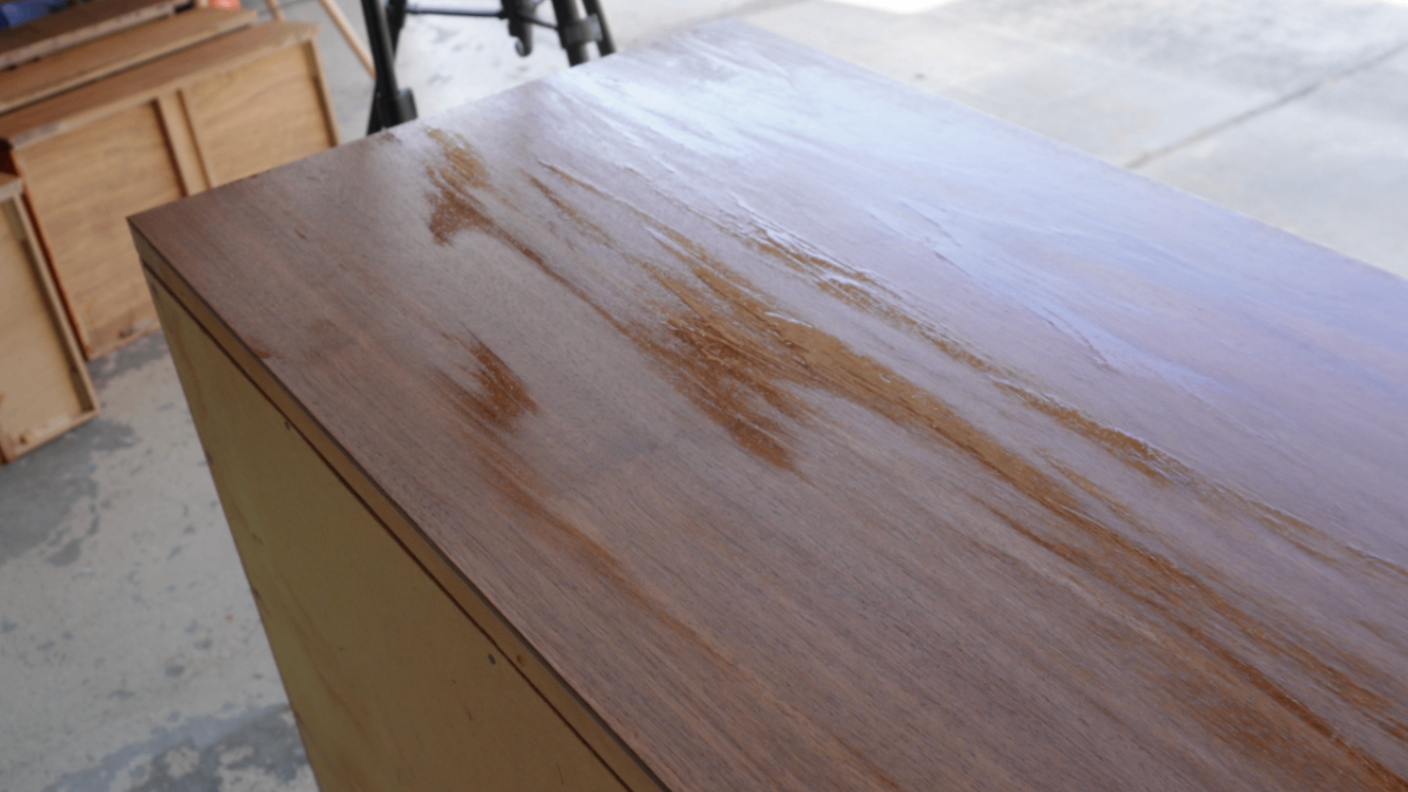
So I let everything dry completely and sanded the problem areas super carefully with 400-grit sandpaper.
On the next coat I used much less product and applied it to my towel first rather than dumping too much directly onto the furniture.
That already helped quite a bit, but I figured out how to make it even better - this was a game changer!
How I Fixed the Wipe-On Poly Finish
Turns out Watco Wipe-On Poly is much thicker than its Minwax counterpart, and the solution is to thin it out with a little mineral spirits.
The finish spread much more easily, stopped dragging across the wood, and gave me a lot more control over keeping the coats nice and thin.
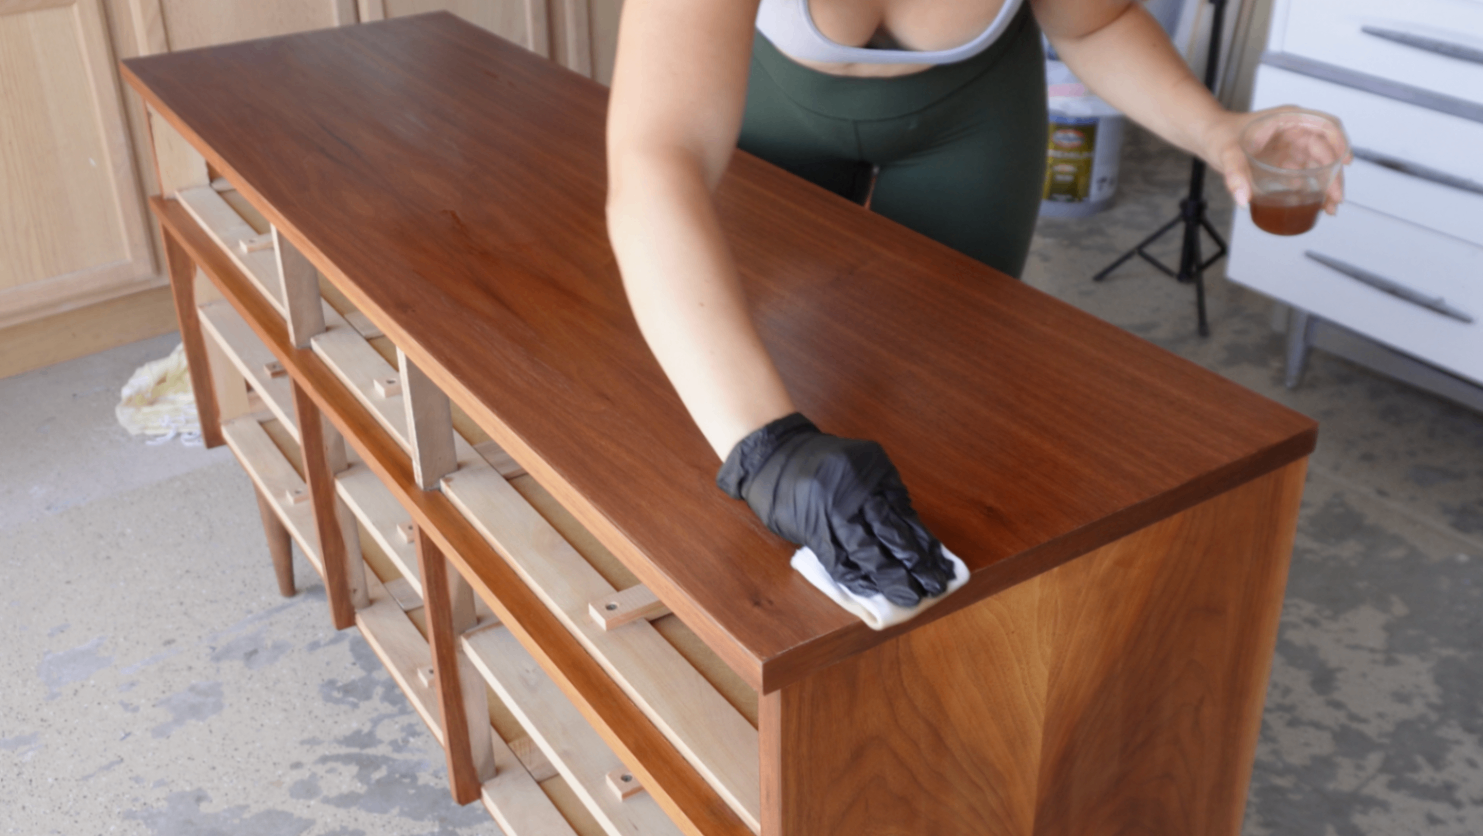
For future projects I'll absolutely start with thinner coats from the beginning!
The other thing I did was switch from using my blue shop towels for application to using a recycled cotton T-shirt rag (you can get them in bulk here). These have a lot more body to them and worked better for applying the top coat as well.
Blending the Veneer Repairs and Mismatched Areas
The order of operations here is important: the first round of top coat has to go on before blending the veneer repairs. Top coat deepens the wood tone, so I had to see the dresser’s finished color first to know what color to match the filler repairs to.
Now that that first coat was on, I could start color-matching the repairs.
This is when I brought out the Mohawk Blendal Sticks.
They’re basically like super soft, waxy crayons made for furniture touch-ups. I like to layer the colors on, smudge them out, and keep adjusting the color and pattern until the repair starts blending into the surrounding wood.
For walnut, I usually start with a warmer orangey tone as the base, then layer in little bits of red, green, and brown. I’ll also use a dark brown stick to continue existing grain lines or add shadows where needed.
It’s definitely a bit of trial and error, but that’s the nice thing about them - you can keep layering and tweaking until the repair starts to disappear into the surrounding wood. Just spray on some Mohawk Sanding Sealer every now and then to lock in the pattern so you can keep layering on top of it.
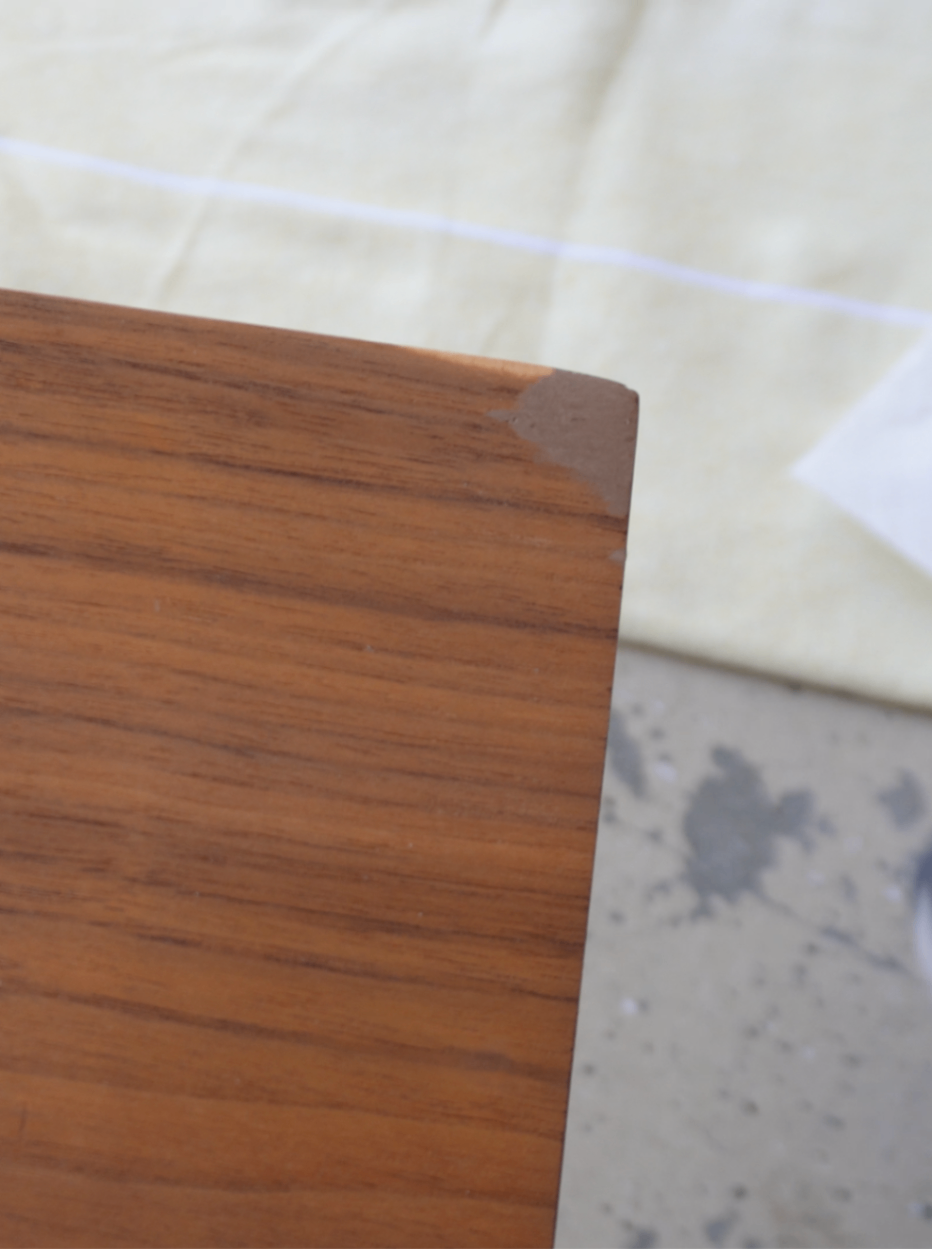
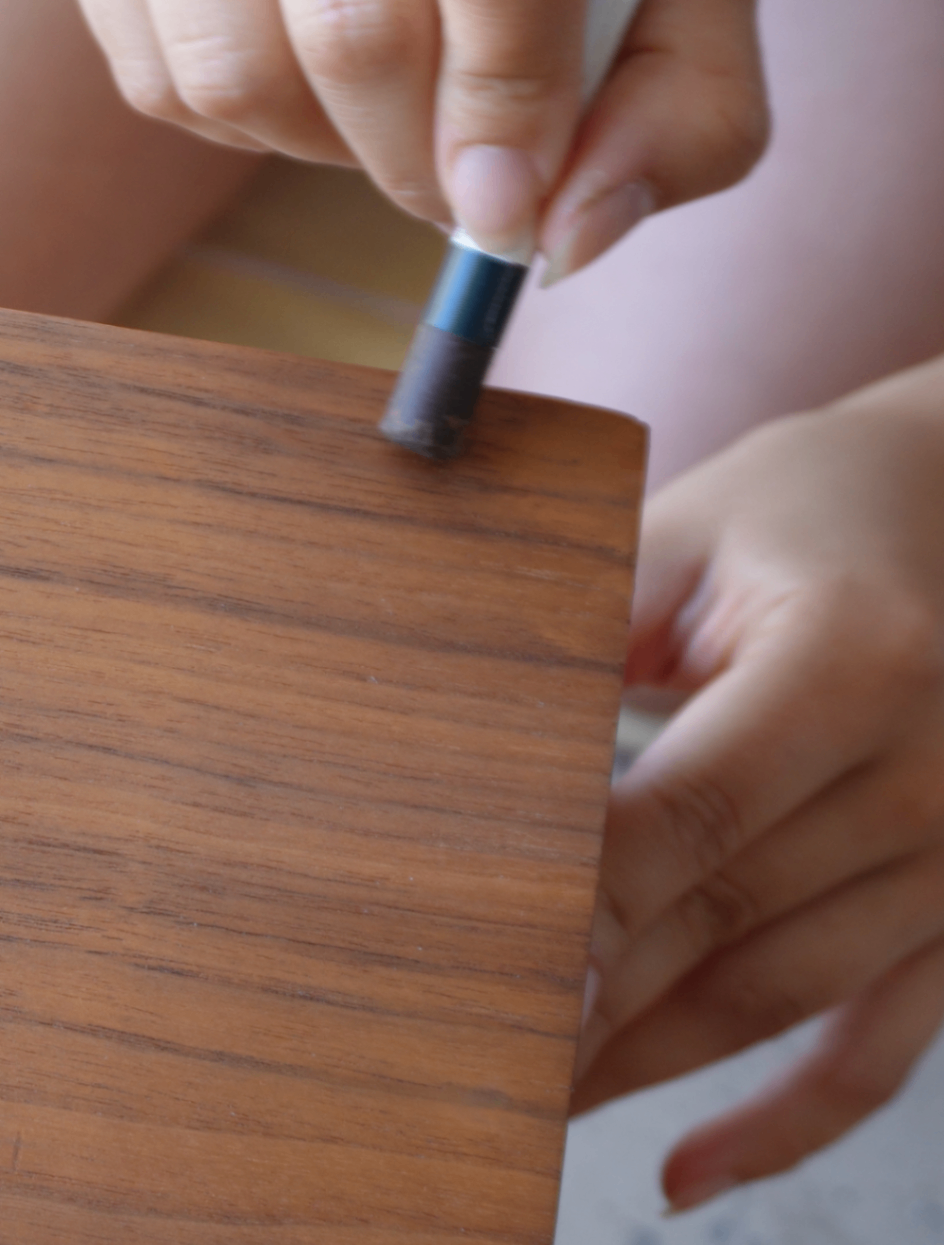
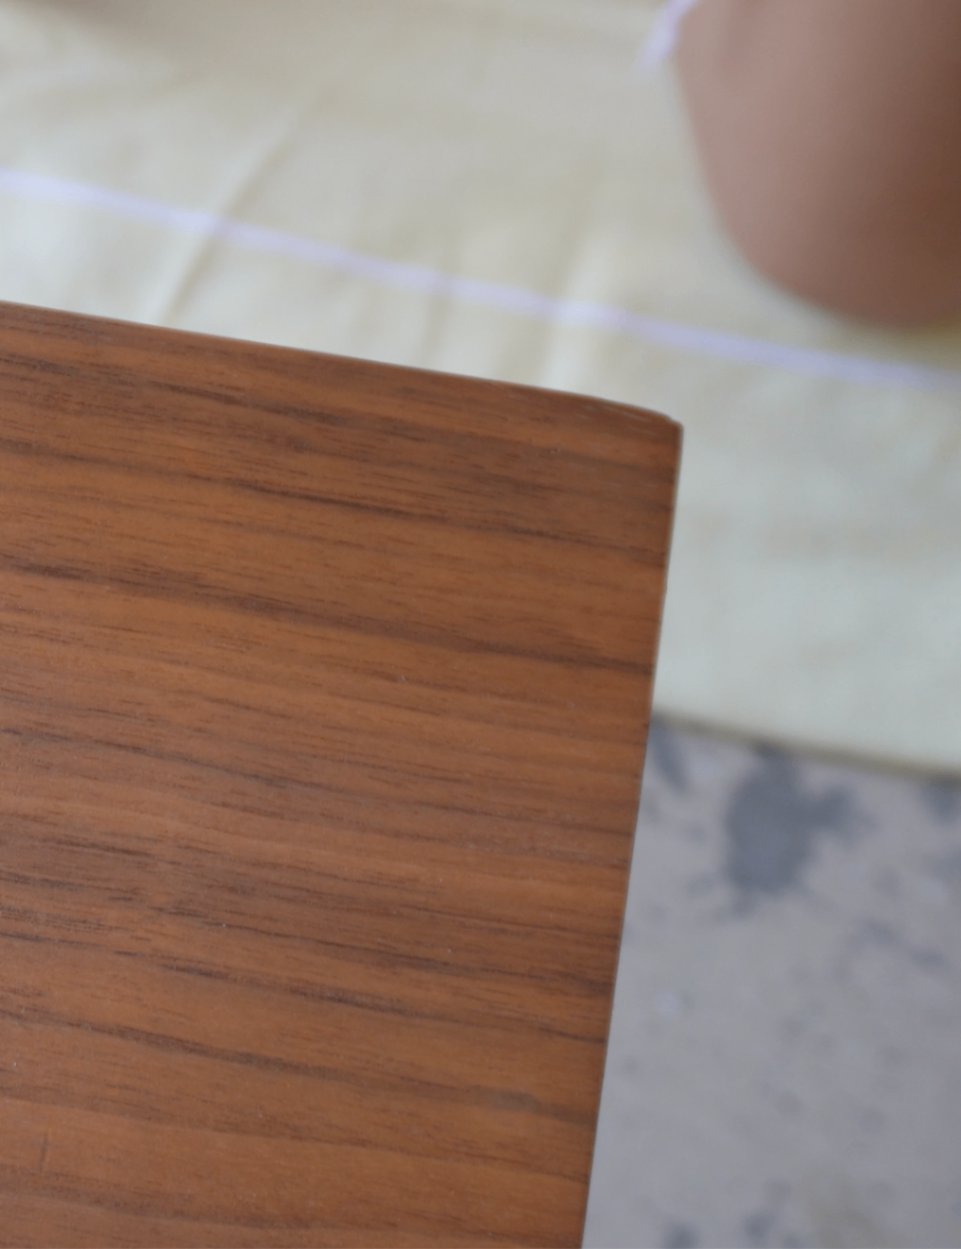
I also used Mohawk Toner as a final step on all the repaired areas to soften any remaining color differences and even out all the tones.
This is one of those steps where a small amount of work can make a surprisingly big visual difference.
🎥 Want to see this technique in action? The Blendal Stick process is one of those things that makes a lot more sense visually, so if you want to see exactly how I layered, smudged, and added grain lines to blend the repairs into the surrounding walnut, you can watch that part in my full YouTube restoration video here.
Cleaning the Original Brass Hardware and Drawers
While I was getting all of those final color details dialed in, I also cleaned up the original brass hardware with Brasso and some fine steel wool.
I almost always prefer keeping original hardware on vintage furniture when I can, and these pulls were such a big part of the dresser's MCM look that replacing them was never really on the table.
I cleaned all nine drawers as well and waxed the drawer glides to help everything slide nice and smoothly.
It's a small detail, but especially on furniture I'm restoring to sell, it makes a big difference.
Final Touch-Ups and Protective Finish
Before calling the restoration finished, I gave the entire dresser one last look for any areas that still felt slightly off.
I added a little more toner where needed, then finished everything off with a final thin coat of my mineral-spirits-thinned wipe-on poly.
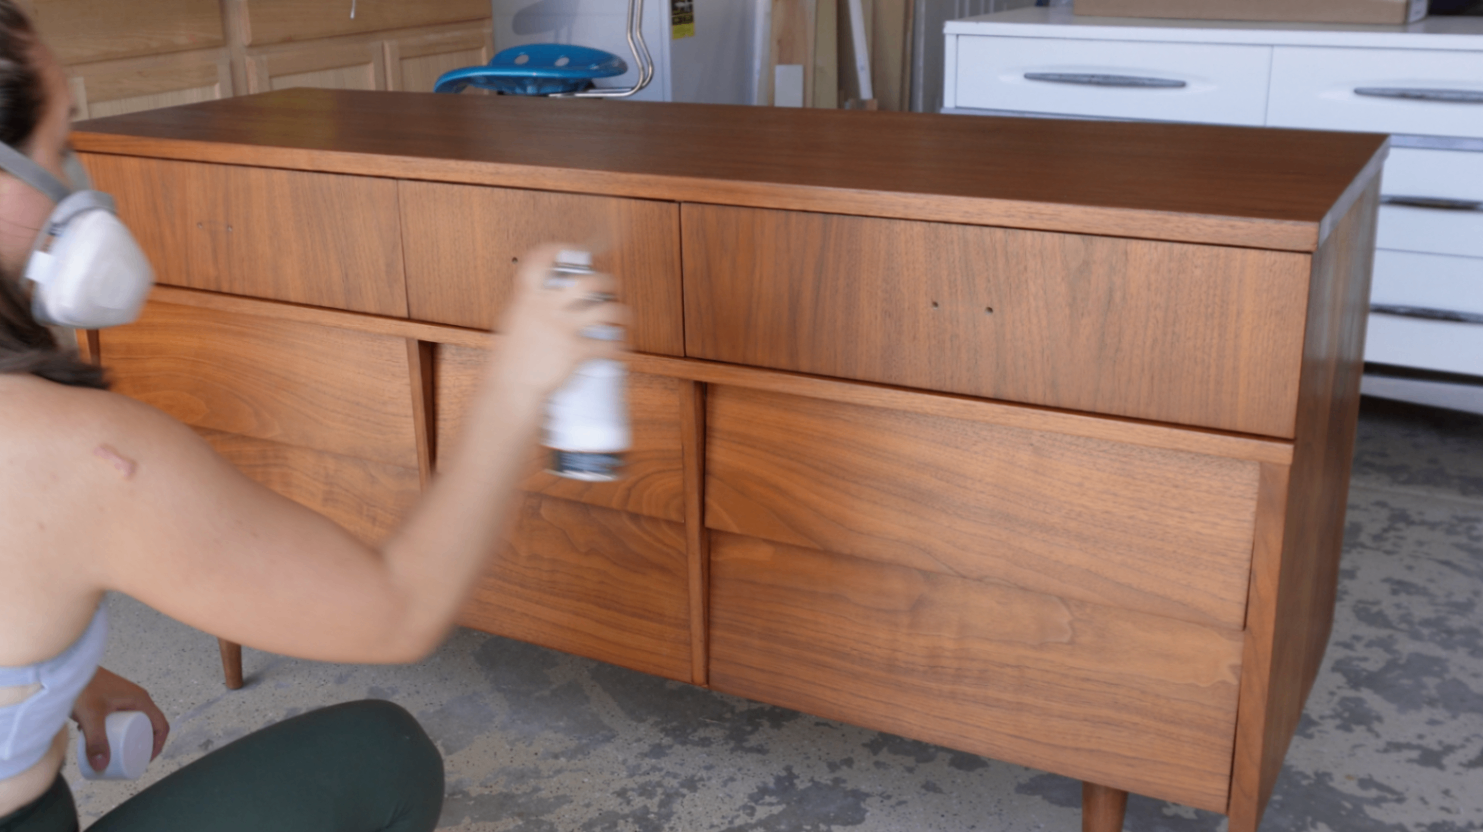
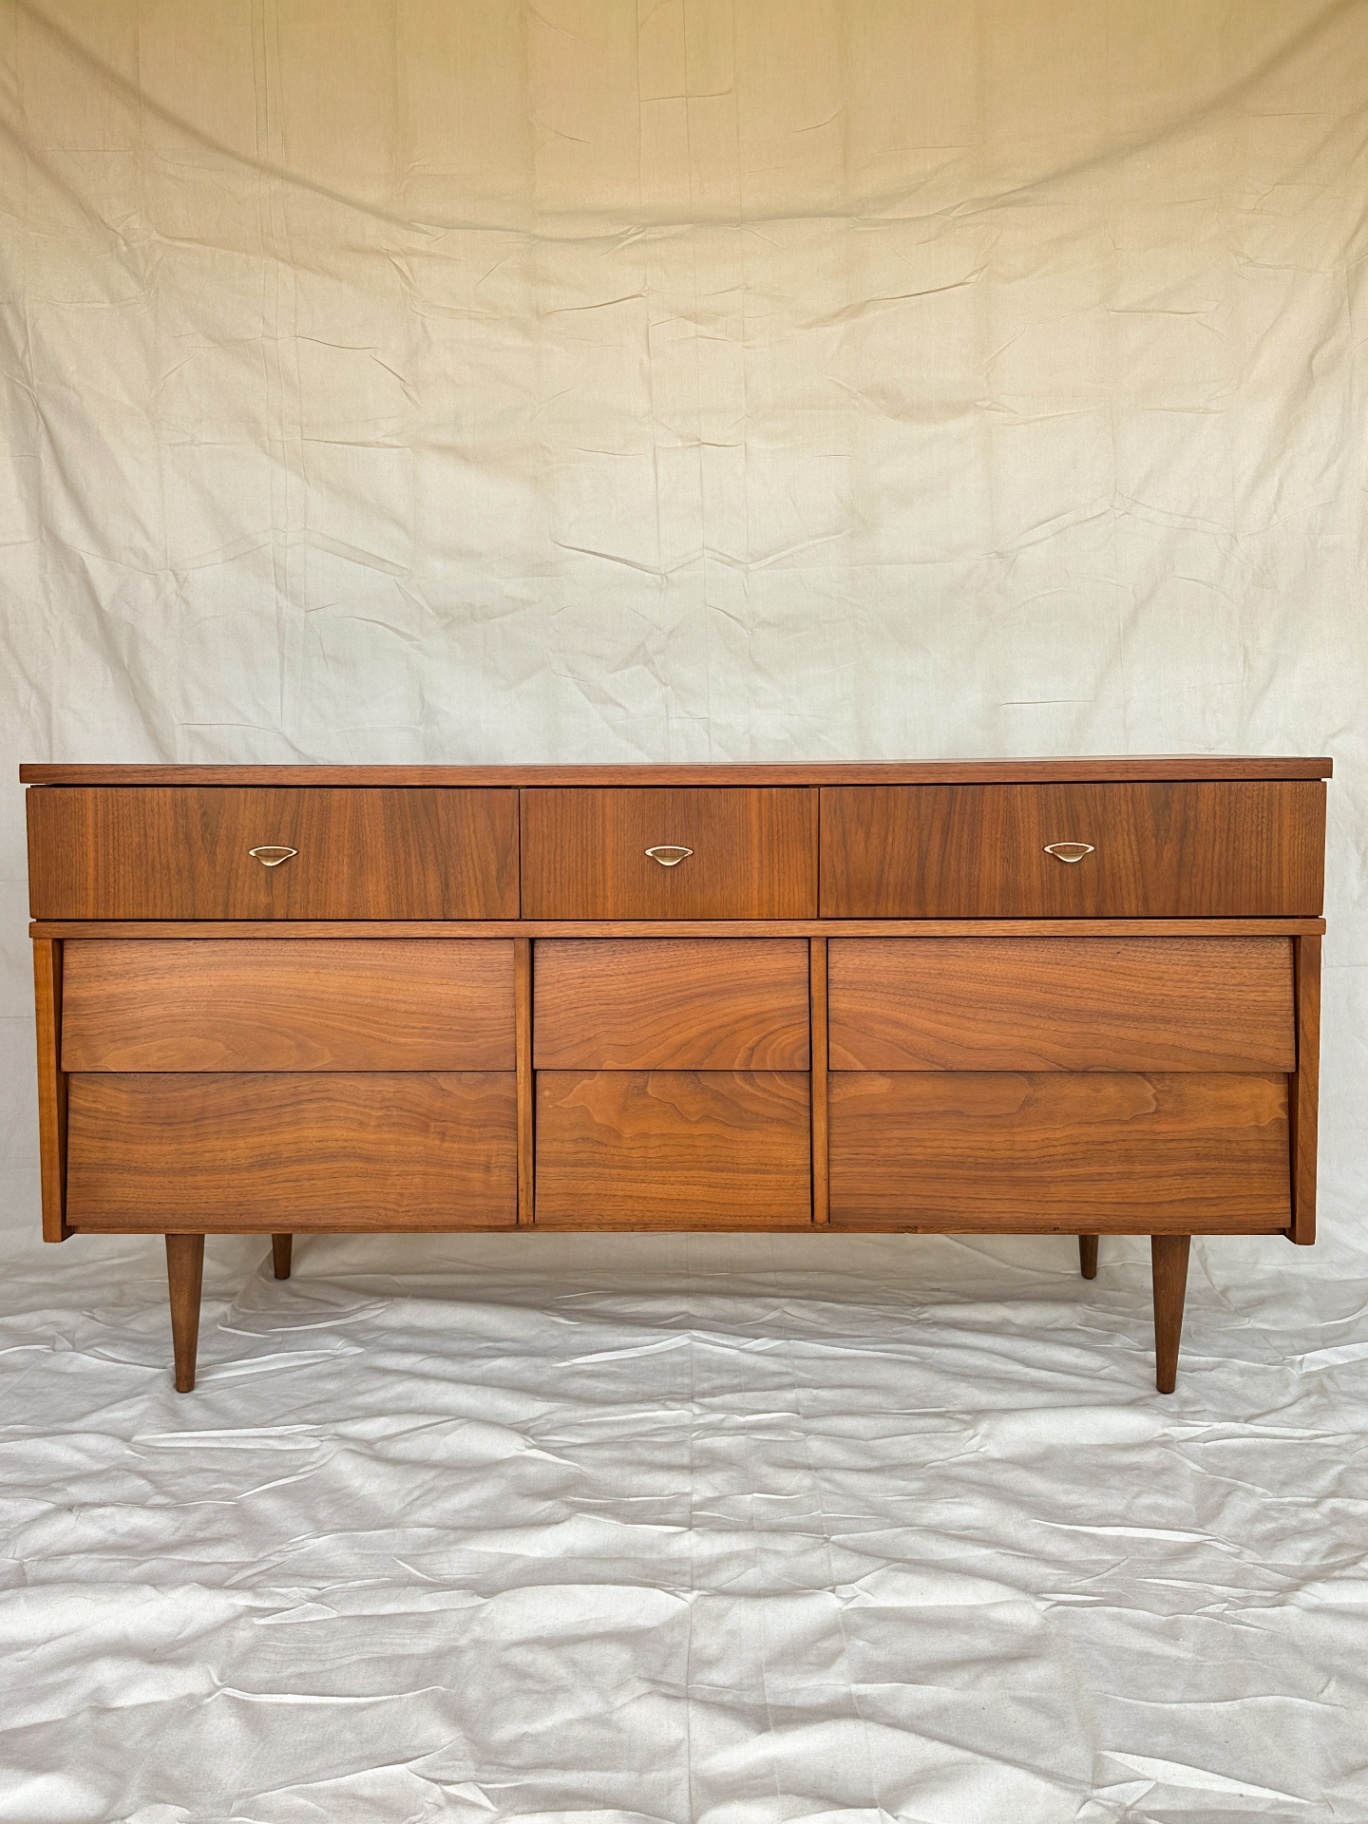
At this point, all the separate pieces of the project finally came together - the original walnut, new veneer top, repaired areas, darker legs, and brass hardware all felt like they belonged together again.
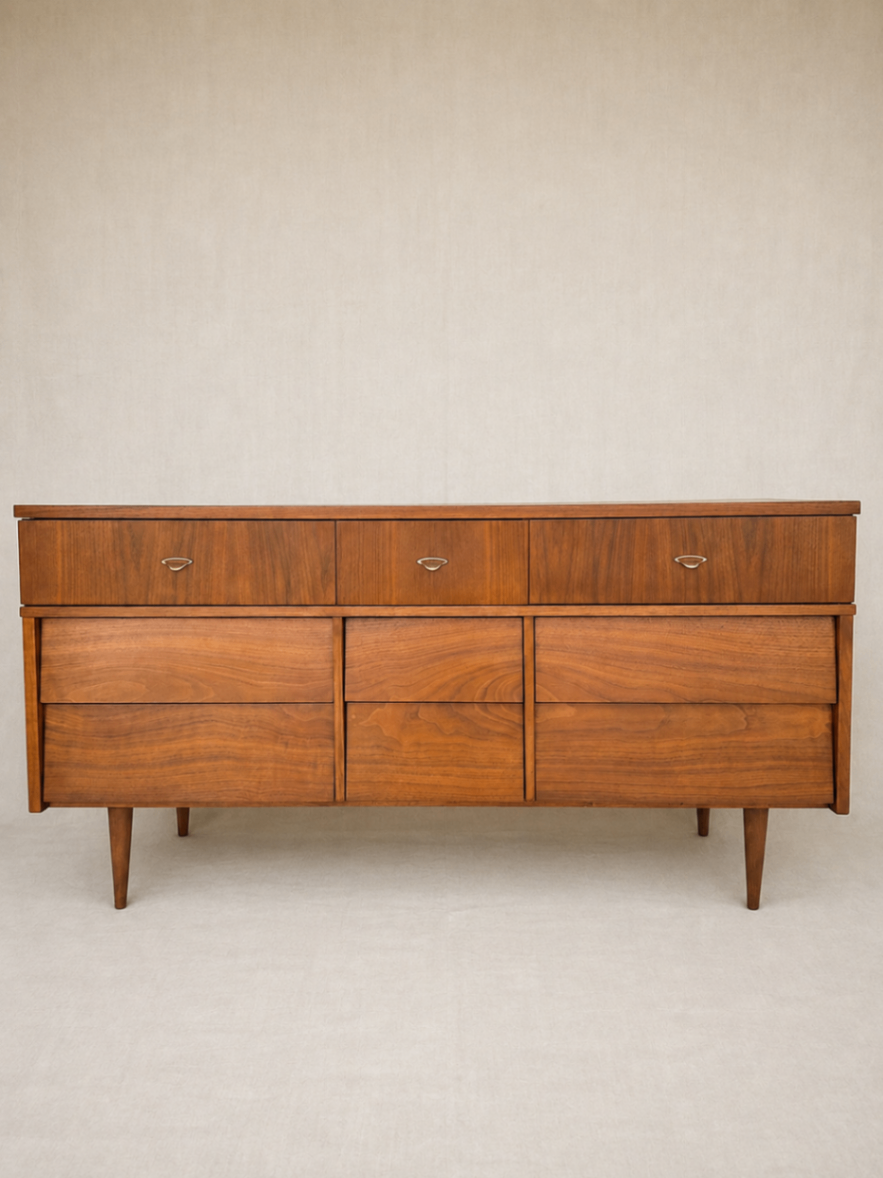
The Finished Harmony House MCM Dresser
This one came a long way.
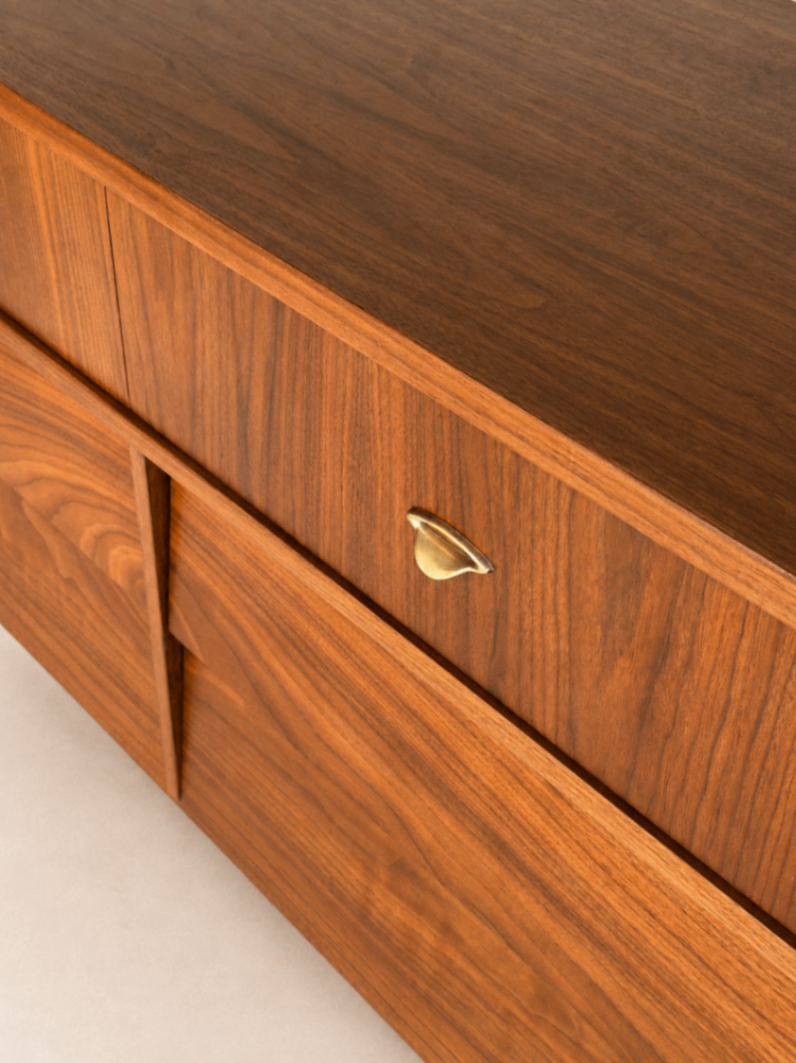
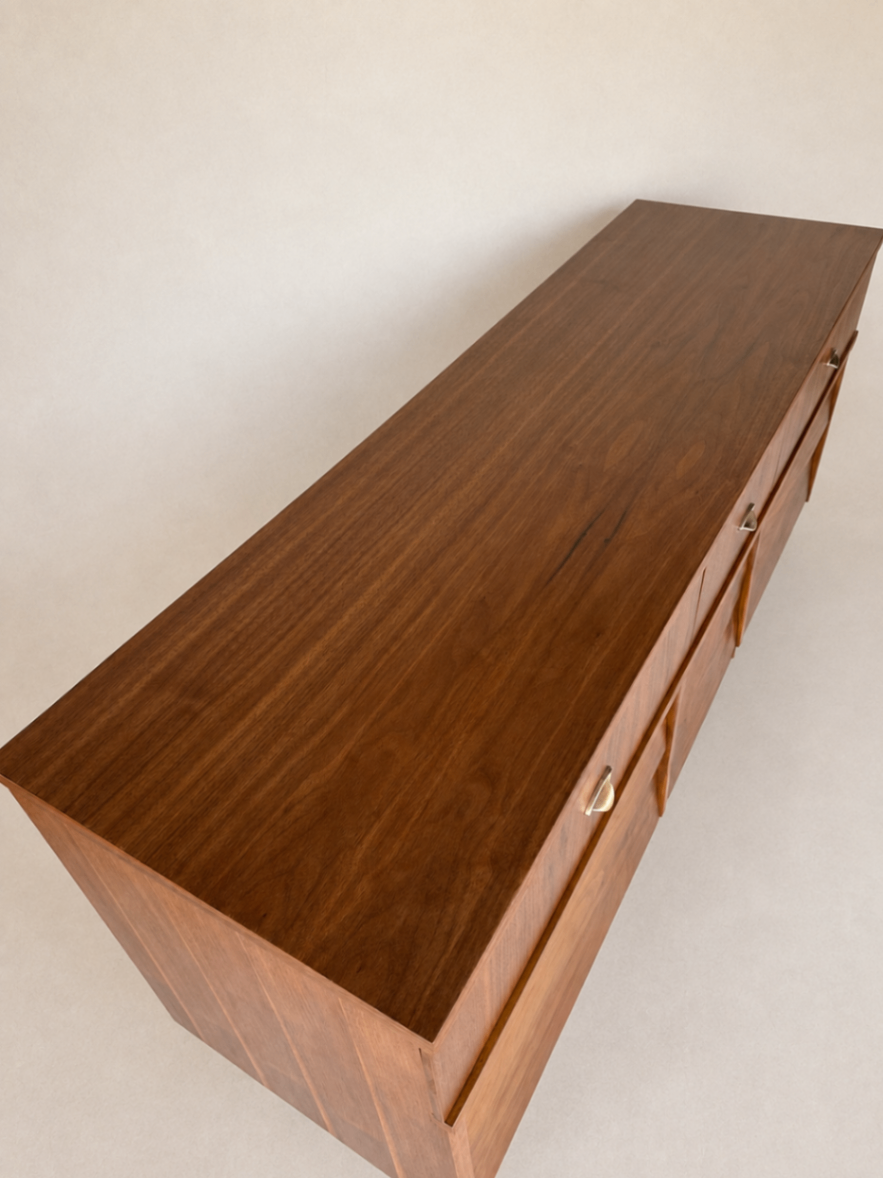
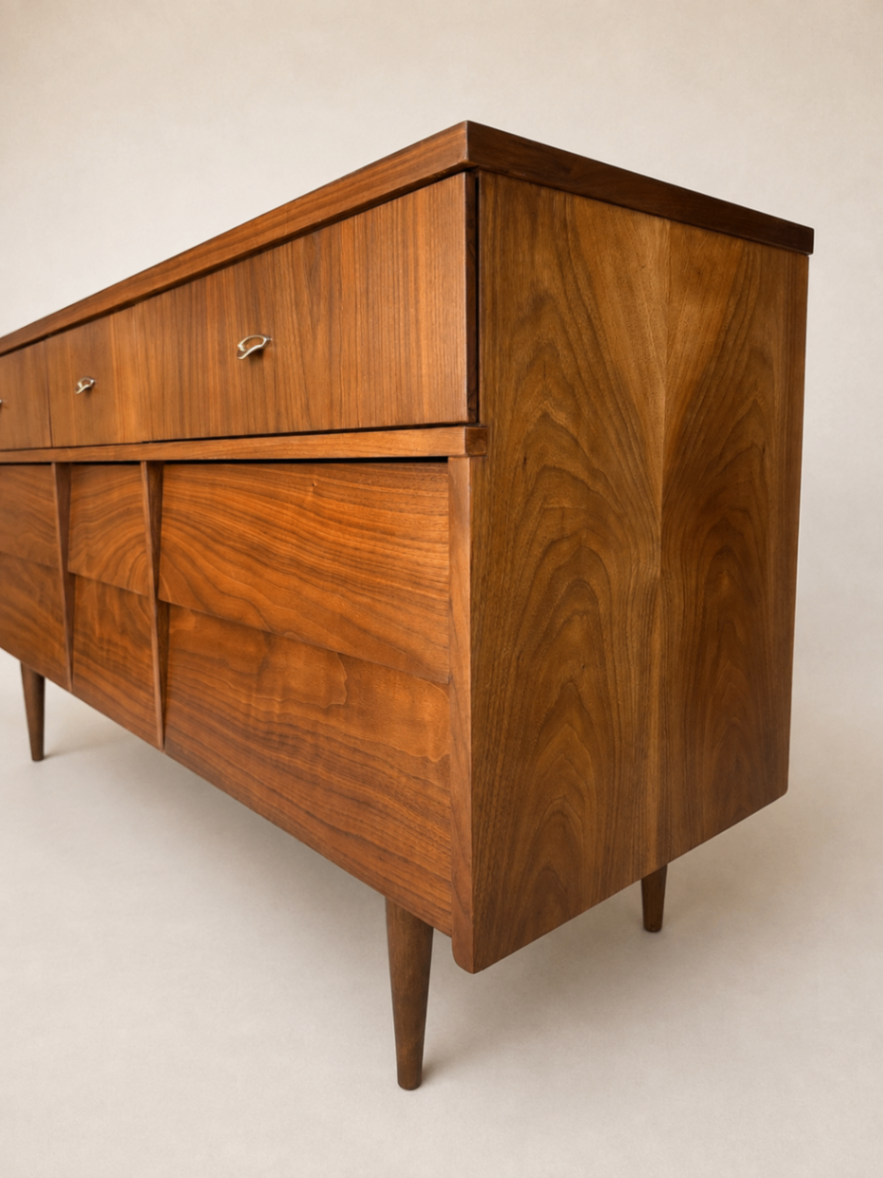
The nine-drawer lowboy shape, walnut tones, tapered legs, and original brass hardware are all still there, but now the chipped veneer, faded finish, and laminate top aren't stealing the show.
The new walnut veneer top was easily the biggest visual transformation, but I think it's all of the smaller repairs and color-matching work that really made the final piece feel cohesive.
How Much Did This MCM Dresser Restoration Cost?
Furniture restoration costs can vary a lot depending on what you already have in your workshop, and this project required a few more specialty products than some of my simpler flips.
Between the dresser itself and the materials I used to restore it, I had approximately $230 total invested in the project.
That included the new walnut veneer, stains and finishes, repair supplies, misc costs, and the dresser itself.
Which brings us to the fun part.
Did putting all that extra work into restoring the original wood actually pay off?
What Did the Restored MCM Dresser Sell For?
I listed the finished Harmony House dresser for $1,100.
And it sold within 48 hours of listing.
With about $230 invested in the dresser and restoration materials, that left an $870 profit on this piece!
💰 The Numbers: About $230 invested, $1,100 sale price, and sold within 48 hours.
After all the repair work that went into this one, seeing it sell that quickly felt like some pretty good validation that preserving the walnut and replacing the laminate top was worth the extra effort.
What I Learned From This Vintage Dresser Restoration
Every furniture restoration teaches me something, and this one definitely added a few lessons to the list.
First - a laminate top is an easier fix that I realized! I'll definitely be picking up more projects like this in the future and adding a real wood veneer on top.
Secondly - I'd personally been on the hunt for a great MCM warm walnut toned stain that helps me match other wood tones to it. This was my first time using this Candlelite gel stain and it's 100% what I was looking for.
And finally - mixing in some mineral spirits to wipe-on-poly out of the can is a game changer! So much smoother and easier to apply.
Is Restoring a Vintage MCM Dresser Worth It?
For me, this one absolutely was.
I love finding furniture that's still solid and usable but has a few issues keeping it from really shining.
For this dresser, it was the laminate top, damaged veneer, and tired finish.
None of those problems meant I had to hide the piece under paint. They just required figuring out how to work with what was already there.
After plenty of scraping, sanding, filling, veneering, staining, color matching, troubleshooting, and finishing, this Harmony House lowboy got another chance to look like the beautiful mid-century piece it was meant to be.
And the fact that it sold in two days wasn't too shabby either.
🎥 Watch the Full Restoration
If you’re more of a visual learner, you can watch the entire MCM dresser restoration from start to finish on my YouTube channel here.
I show the full process, including the walnut veneer top, epoxy repairs, color matching, Blendal Stick technique, and all the little troubleshooting moments that are much easier to understand on video.
📌 Save This for Later
If you found this restoration helpful, make sure to pin it for later - especially if you’re working on a vintage dresser with damaged veneer, a laminate top, or tricky color-matching repairs.
Or send it to someone who has an old MCM piece they’ve been debating whether to restore!
More Vintage MCM Dresser Restorations
If you liked this restoration, I have two more vintage MCM dresser makeovers you'll love:
Restoring a Painted MCM Dresser Back to Walnut — This one started completely covered in thick white paint, so I fully stripped it, repaired the veneer, and brought the original walnut back to life.
MCM Walnut Tallboy Dresser Restoration — This tallboy started with a faded, bleached finish, so I refinished it to bring back the deeper walnut tones while keeping its original MCM character.
Both are great examples of how the restoration process changes depending on what you're starting with!