How to Modernize Dated Wood Furniture (Step-by-Step Nightstand Makeover)
Learn how to modernize dated wood furniture with this step-by-step painted nightstand makeover. See how I transformed $60 solid wood nightstands using paint, new hardware, and taller legs to create a modern, custom look on a budget.
How to Modernize Dated Wood Furniture
If you have a piece of dated wood furniture sitting in your house right now and you’re not sure what to do with it… this is your sign.
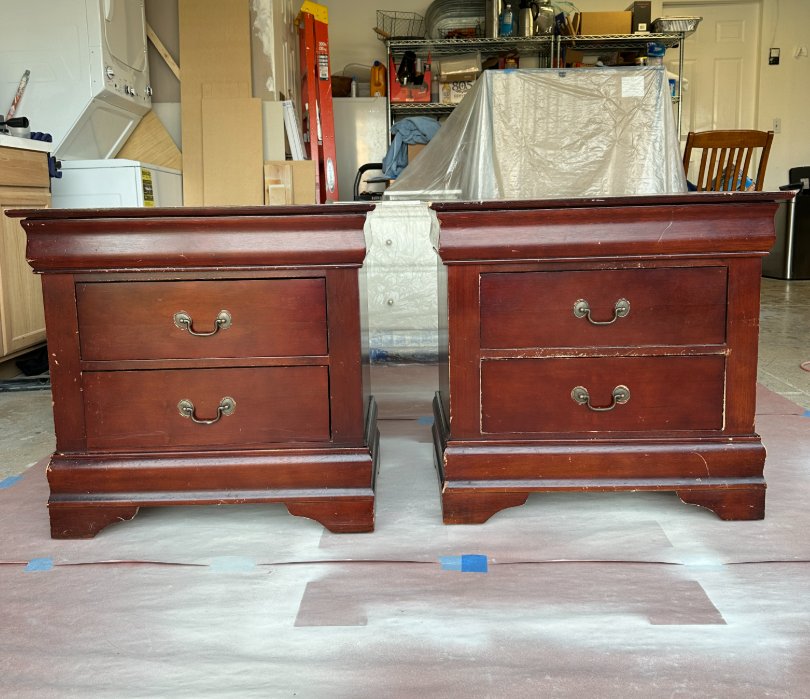
I picked up these solid wood nightstands on Facebook Marketplace for $60, and by the end of this makeover, they looked like something you’d easily pay hundreds for.
The best part? I didn’t overcomplicate it.
I didn’t strip them.
I didn’t rebuild them.
I didn’t do anything crazy.
I just updated the finish and the silhouette — and that’s exactly how you modernize dated wood furniture without replacing it.
Why Dated Wood Furniture Looks “Old”
Before we jump into the steps, let’s talk about why pieces like this feel outdated in the first place.
These nightstands were:
Solid wood
Structurally great
In good shape
But they had:
A heavy faux cherry finish
Narrow, dated hardware
A bulky base that made them feel shorter and heavier
And that combination is what screams “1990s bedroom set.”
Just because something is solid wood does NOT automatically mean it needs to stay stained.
Sometimes the best way to preserve a solid piece is to update the finish — not scrap it.
Step 1: Remove Hardware (And Label Your Drawers)
The very first thing I did was remove all the hardware.
Old hardware alone can instantly date a piece of furniture.
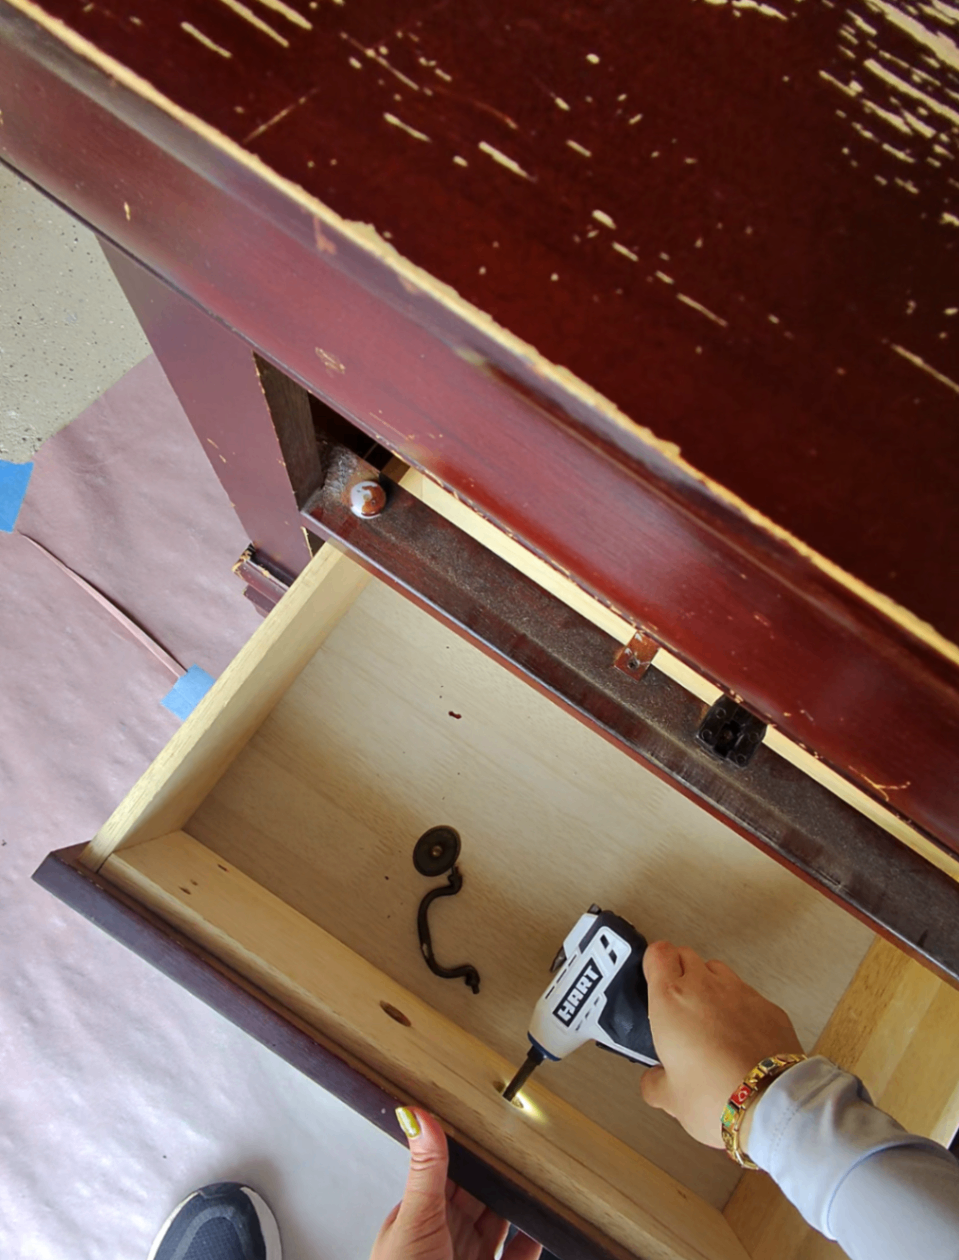
Pro tip:
Label your drawers with tape as you remove them. Older furniture can be particular about where drawers fit, and putting them back in their original spots will save you frustration later.
Step 2: Deep Clean Everything
If you’re wondering how to modernize dated wood furniture properly, cleaning is non-negotiable.
I:
Vacuumed inside and along the rails
Wiped everything down thoroughly with all-purpose cleaner
Cleaned inside drawers
Even when furniture looks “clean,” you’d be shocked how much buildup comes off once you actually wipe it down.
Clean surface = better adhesion = longer lasting finish. Plus who knows what's been in or on these old pieces!
Should You Paint Solid Wood Furniture?
I KNOW some people get nervous when they hear “painted solid wood.”
Here’s my take:
These were solid wood — but not high-end hardwood.
The phrase "solid wood" sometimes makes people think it's nicer than it is. The grain wasn’t especially beautiful or consistent, and it had a common faux cherry finish that reads super dated.
Could you strip and stain it?
Yes.
Should you?
That depends on your goals.
For my market (and my own home), painting preserved:
The durability
The structure
The quality
While completely upgrading the look.
Modernizing dated wood furniture isn’t about destroying it — it’s about elevating it.
Step 3: Scuff Sand (Don’t Strip)
To prep for primer and paint, I used:

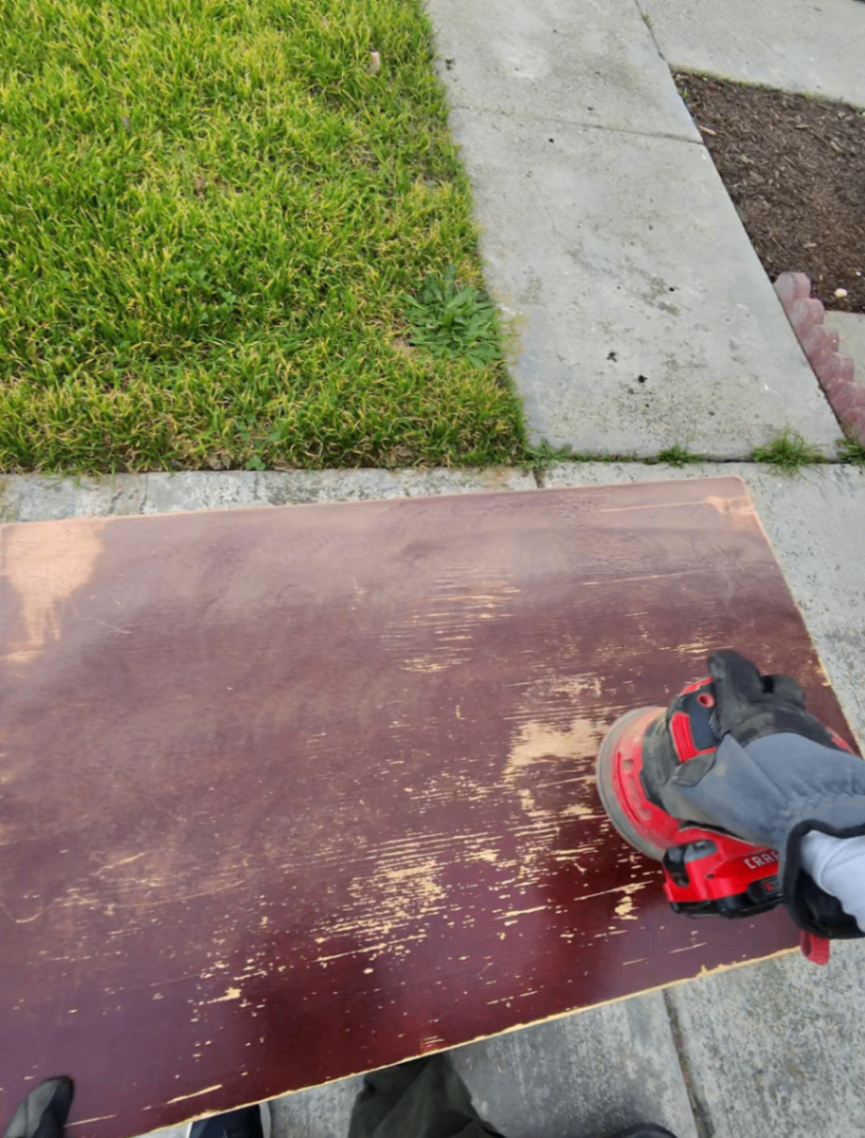
Orbital sander for flat surfaces
Hand sanding for curves
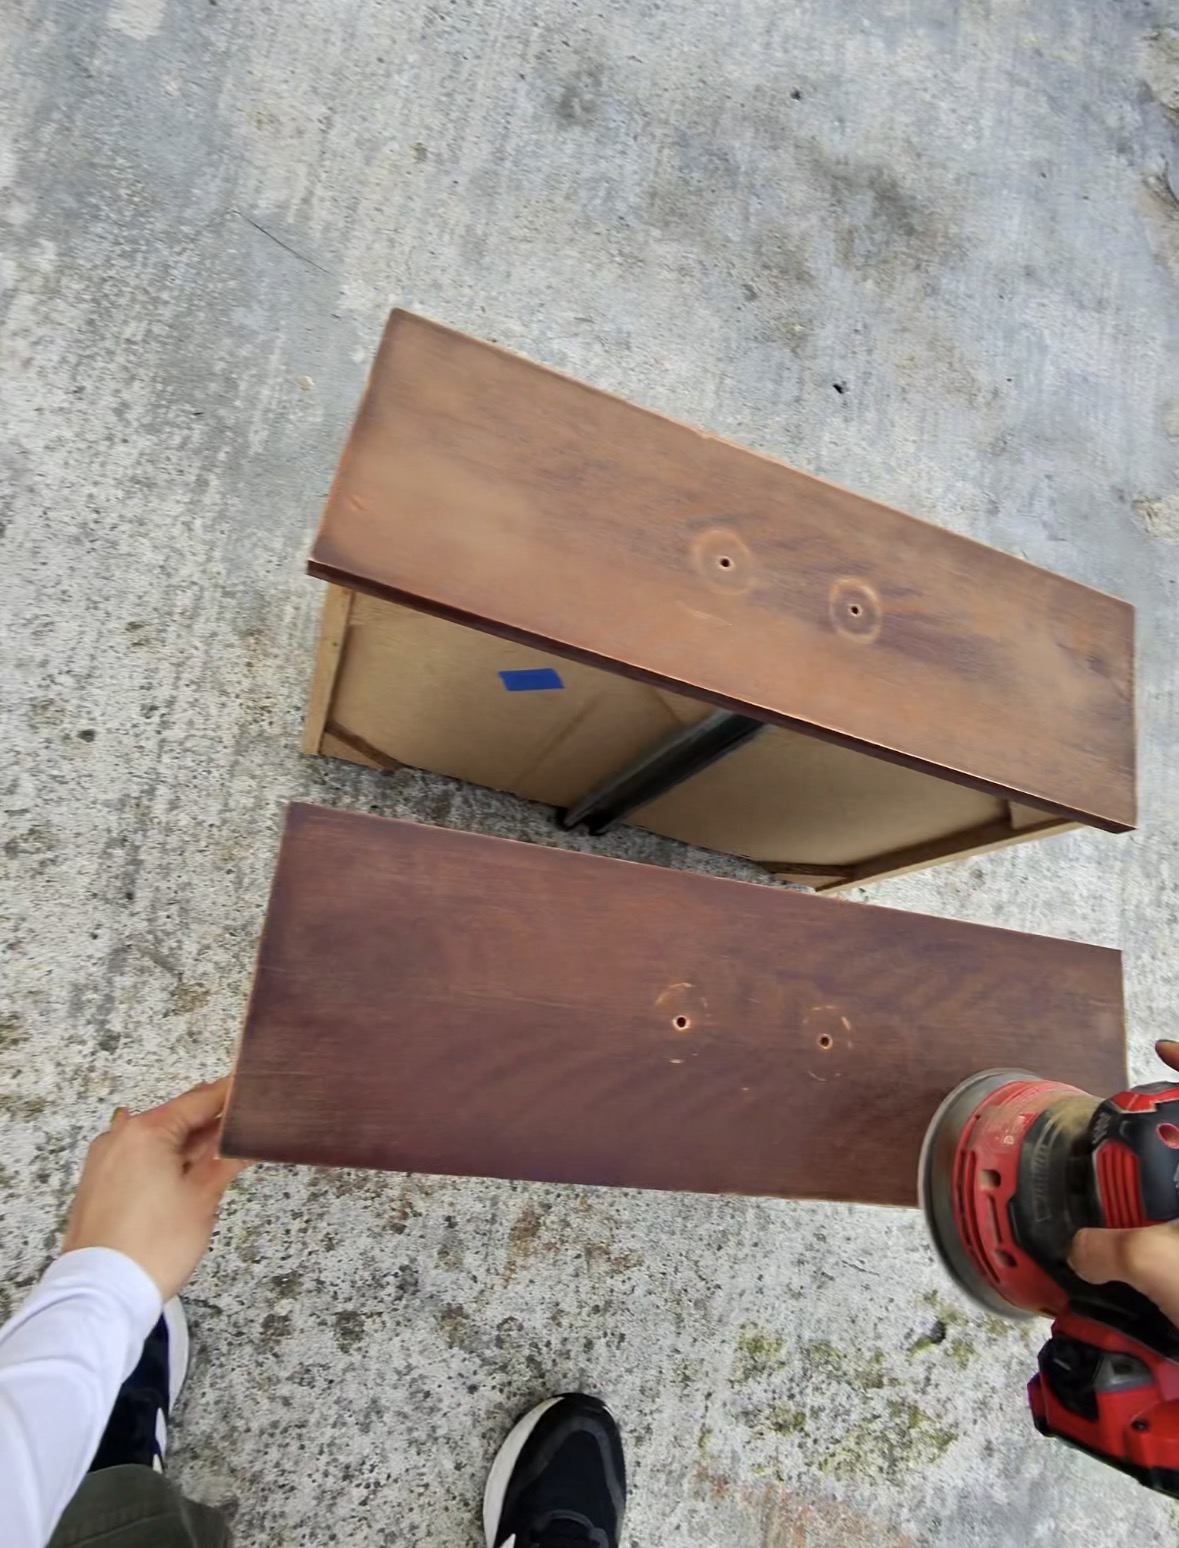

Important:
You do NOT need to strip the finish.
You just need to scuff sand so primer has something to grip onto.
Light, even sanding prevents future chipping and peeling.
Step 4: Fill Dings and Old Hardware Holes
This is one of the biggest differences between an amateur and polished painted nightstand makeover.
I:
Filled scratches and dents
Did multiple rounds of woo
Filled old hardware holes since my new hardware was wider
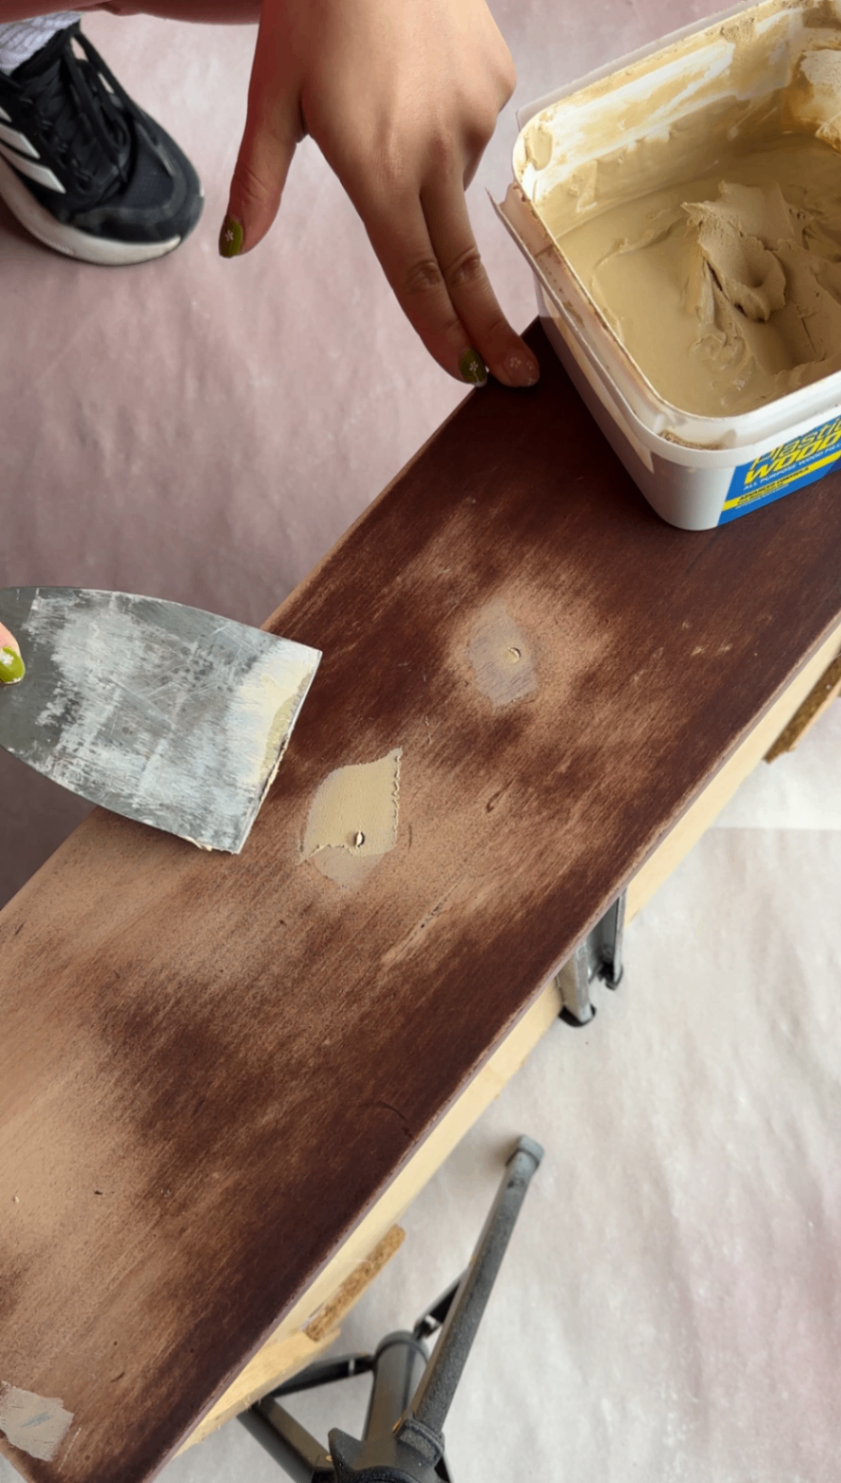
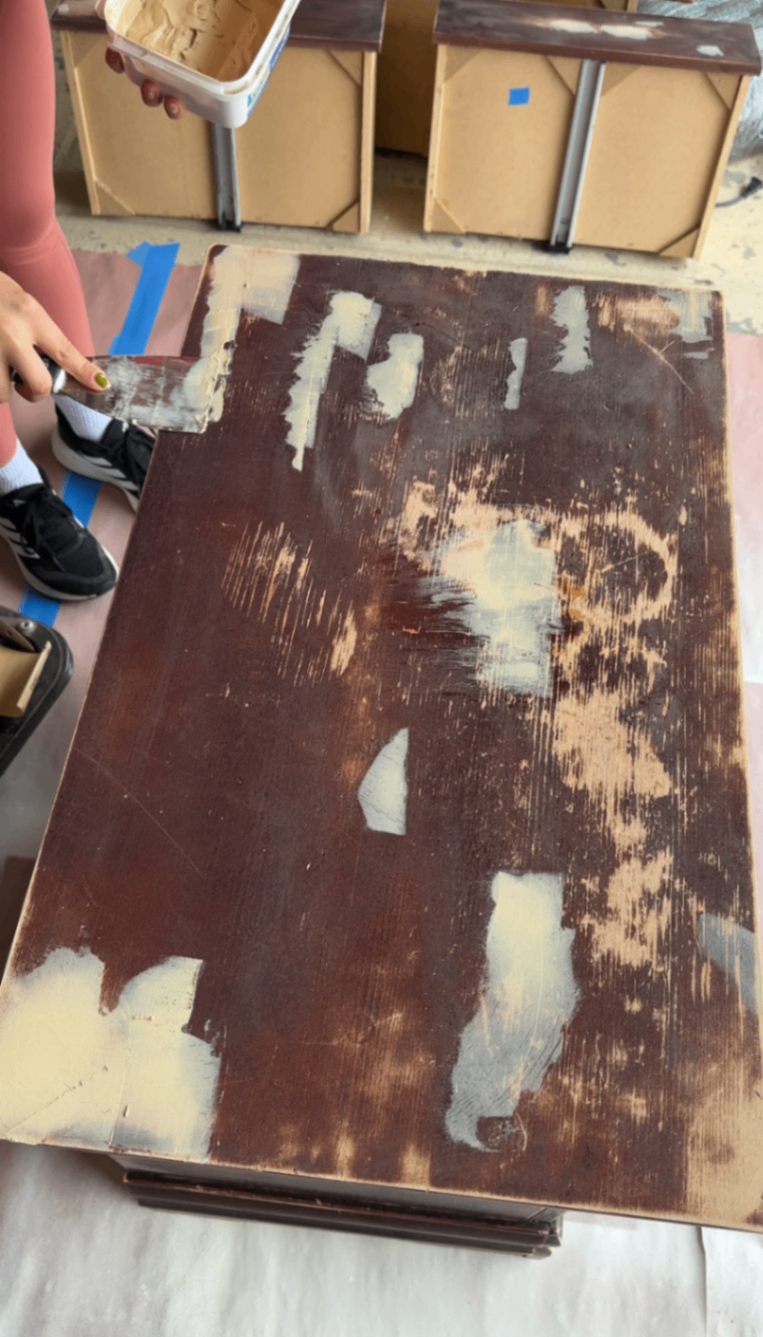
After priming, you’ll see even more imperfections — which is why I always do another round of filler after the first coat of primer.
It makes a HUGE difference in the final result.
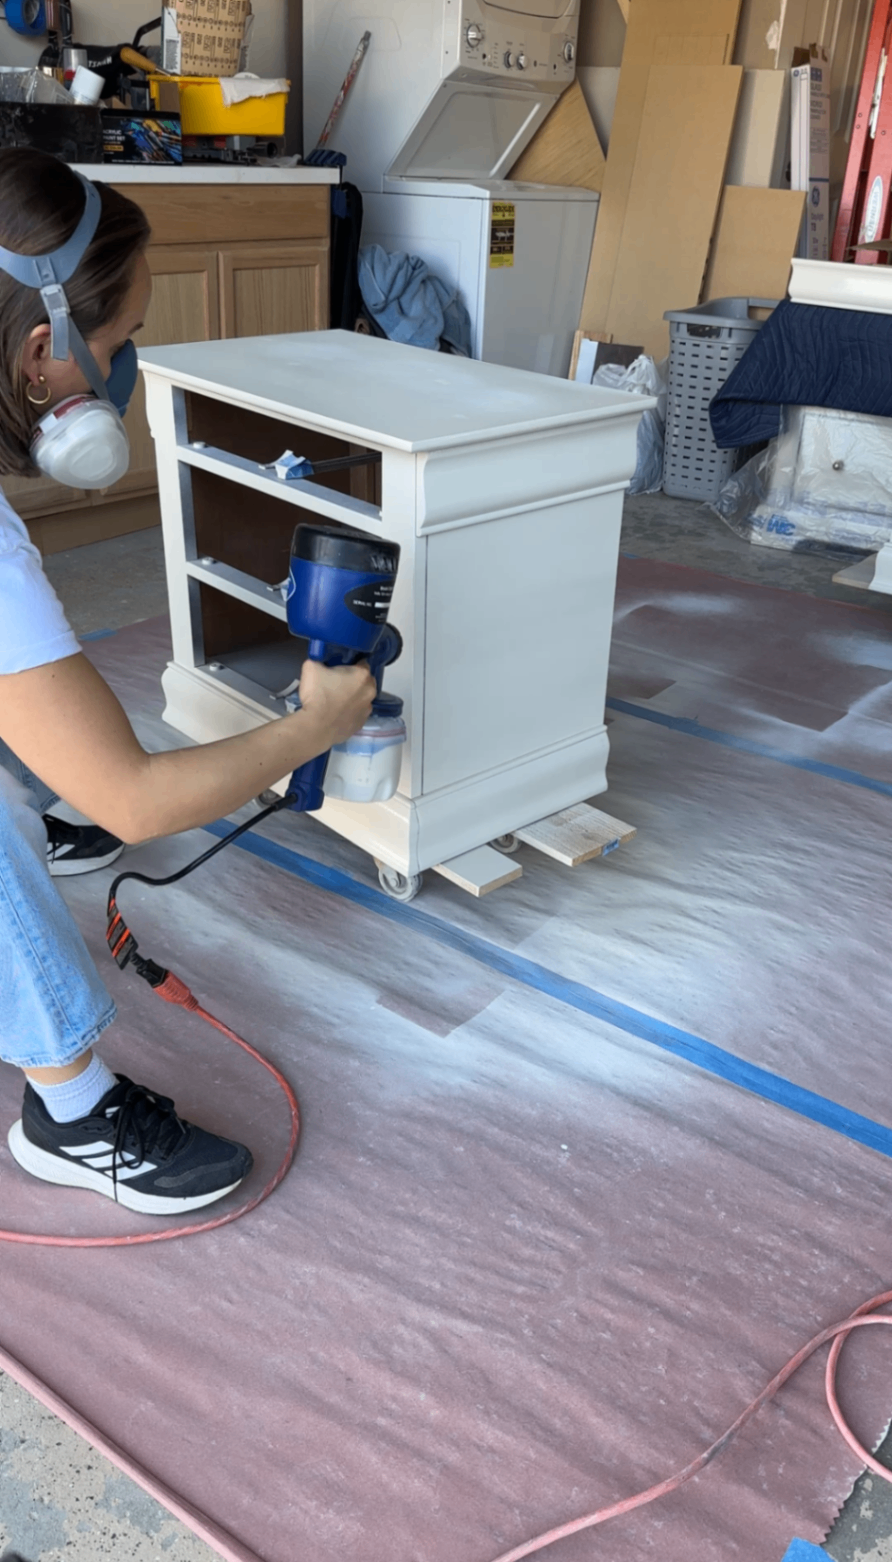
Step 5: Prime (Spray for Best Results)
For primer, I used a spray primer.
Why spray?
WAY faster
Smoother finish
More even coverage
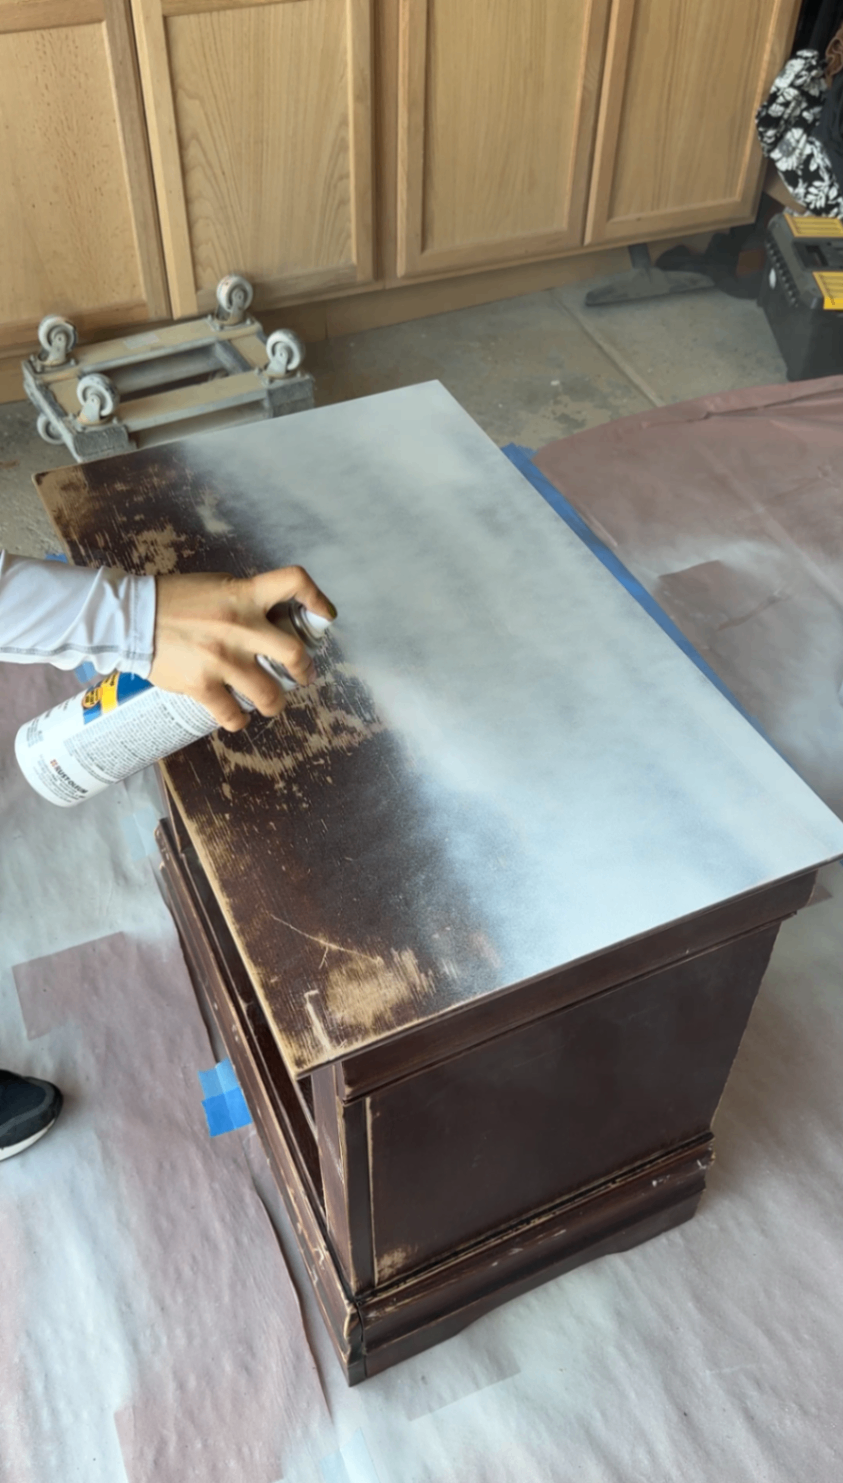
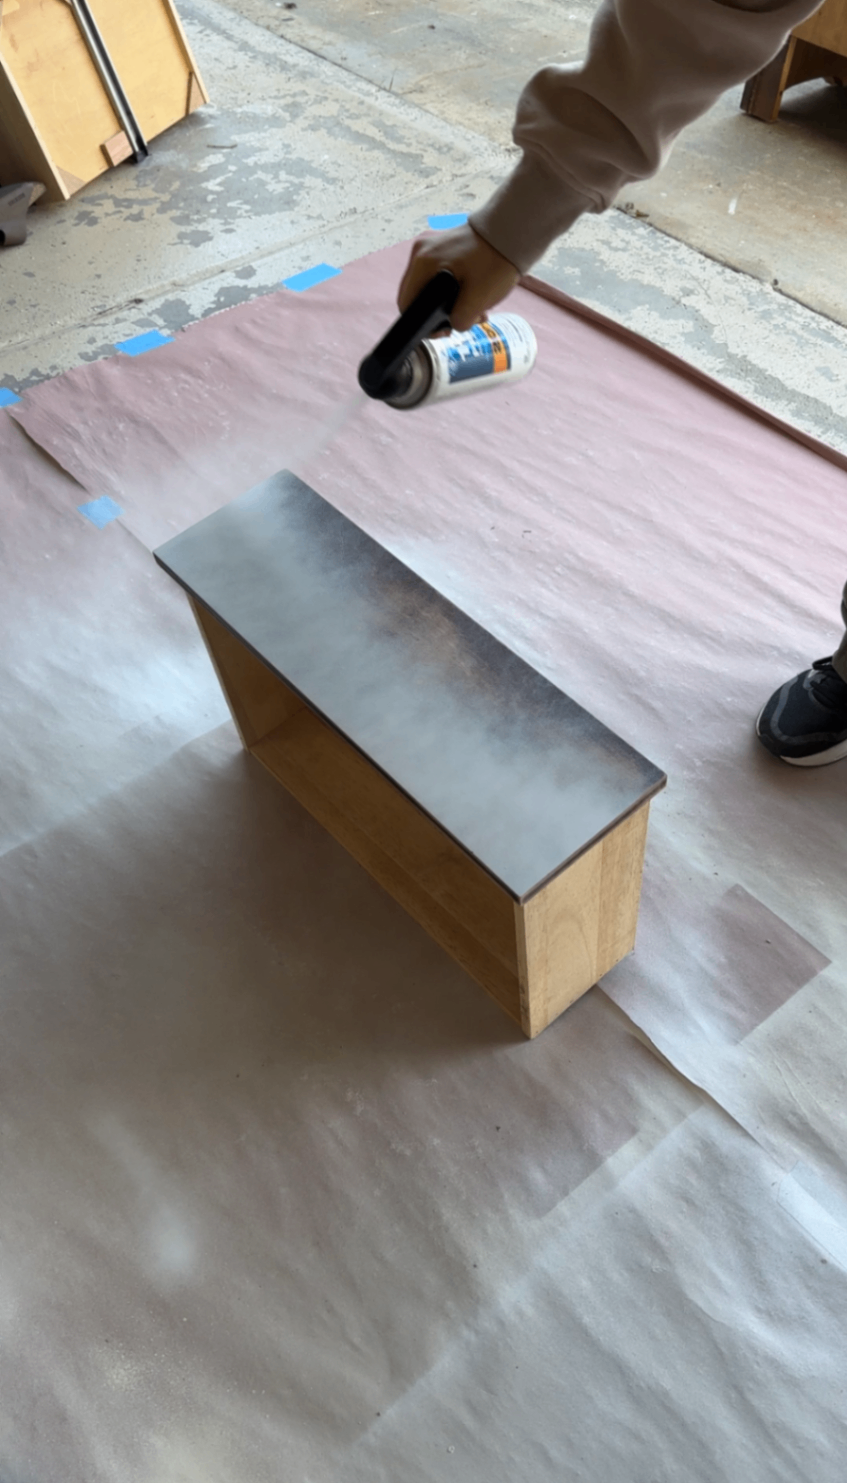
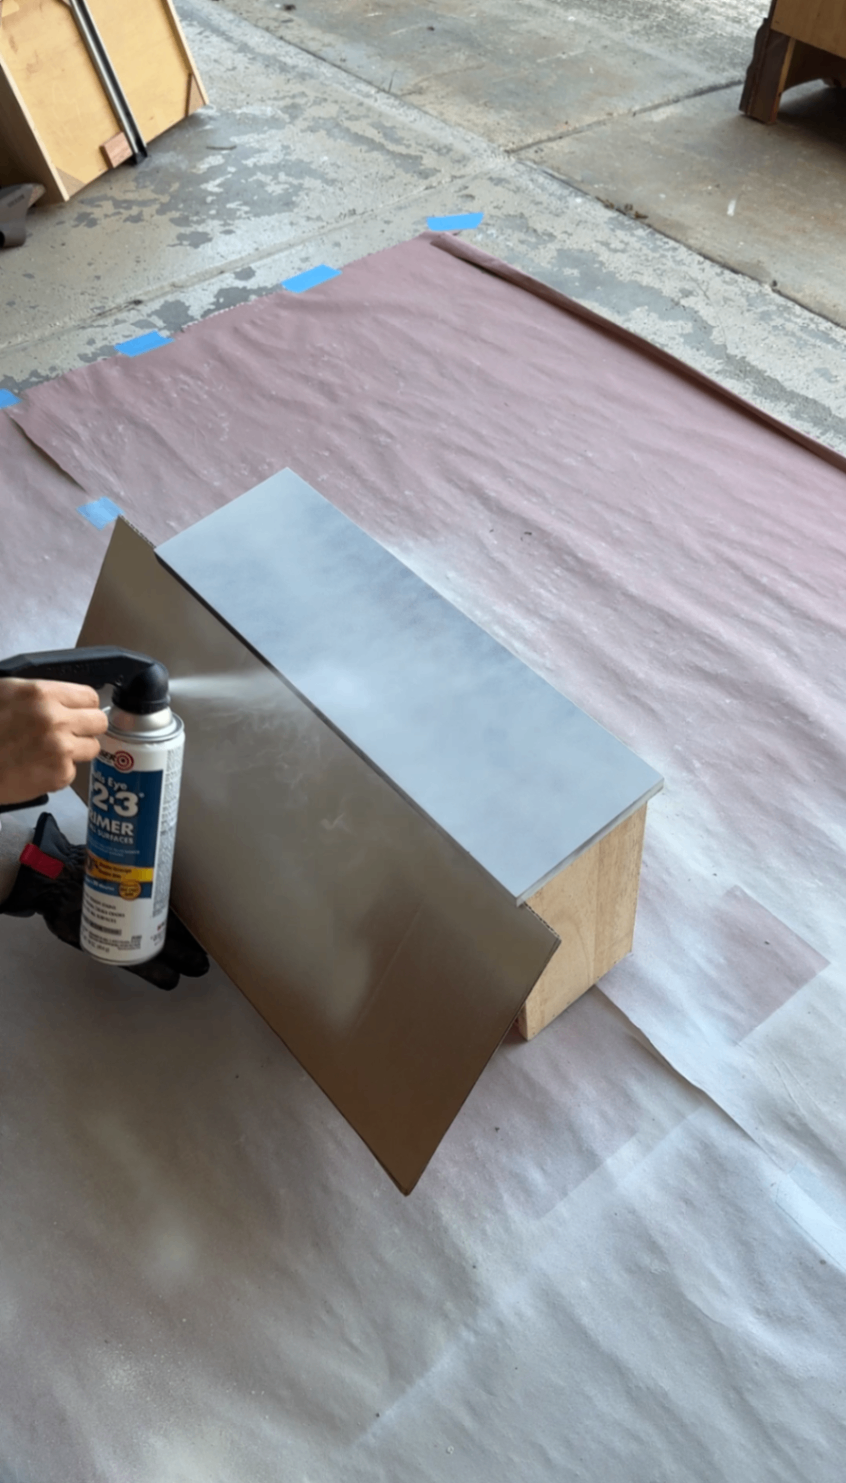
You can absolutely brush or roll primer, and it will be cheaper. But if you can spend the extra $10 on spray primer, it’s worth it.
I also taped off drawer tracks to prevent overspray.
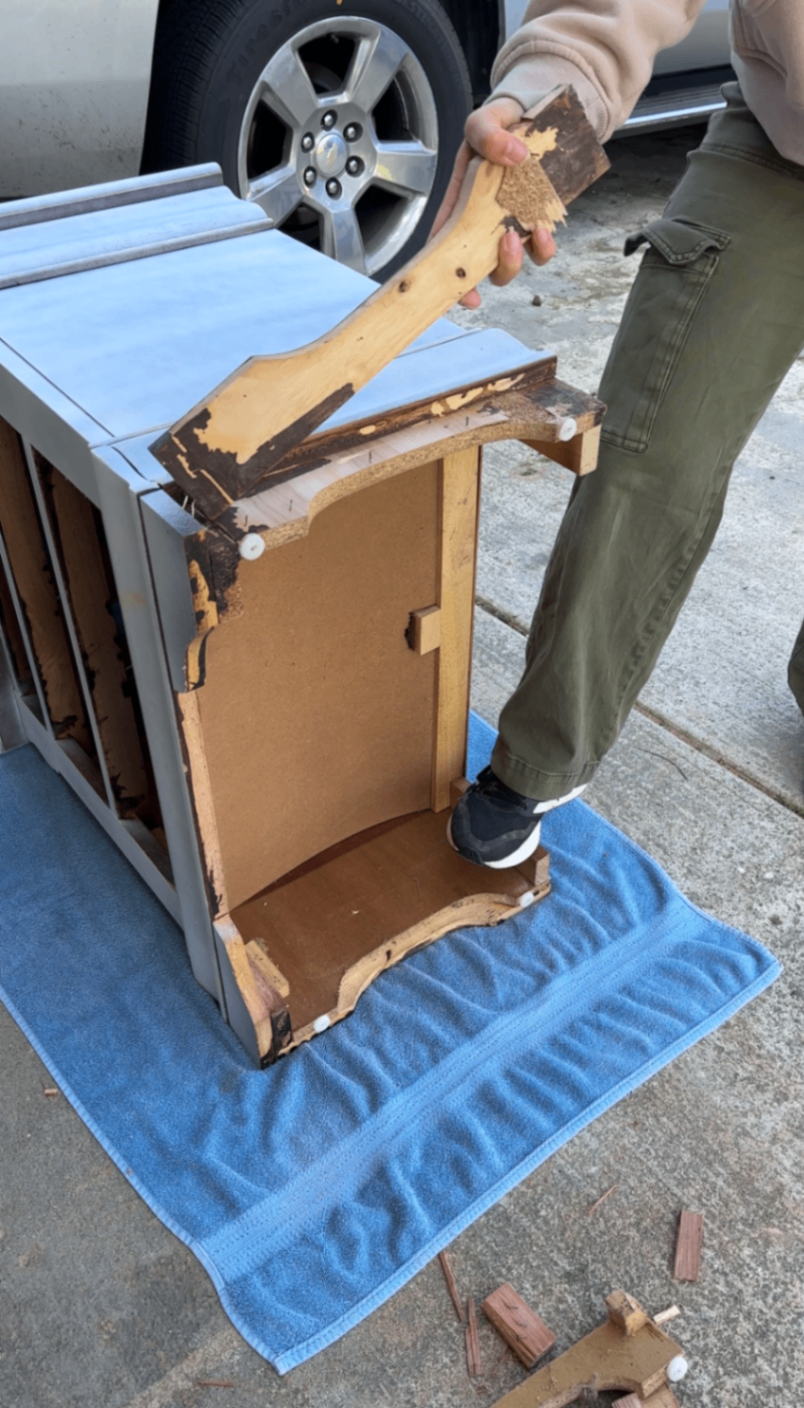
Step 6: Remove the Base (The Biggest Game Changer)
If you want to know the fastest way to modernize dated wood furniture, this is it:
Change the base.
These nightstands originally had that chunky, curvy attached base that instantly dated them. Even if I had only painted them, they still would’ve looked recognizable.
Once I removed the base, everything changed.
They immediately:
Felt taller
Looked lighter
Became completely unrecognizable from that bulky 90s style
Swapping the base for taller, clean-lined legs is what truly transforms the silhouette.
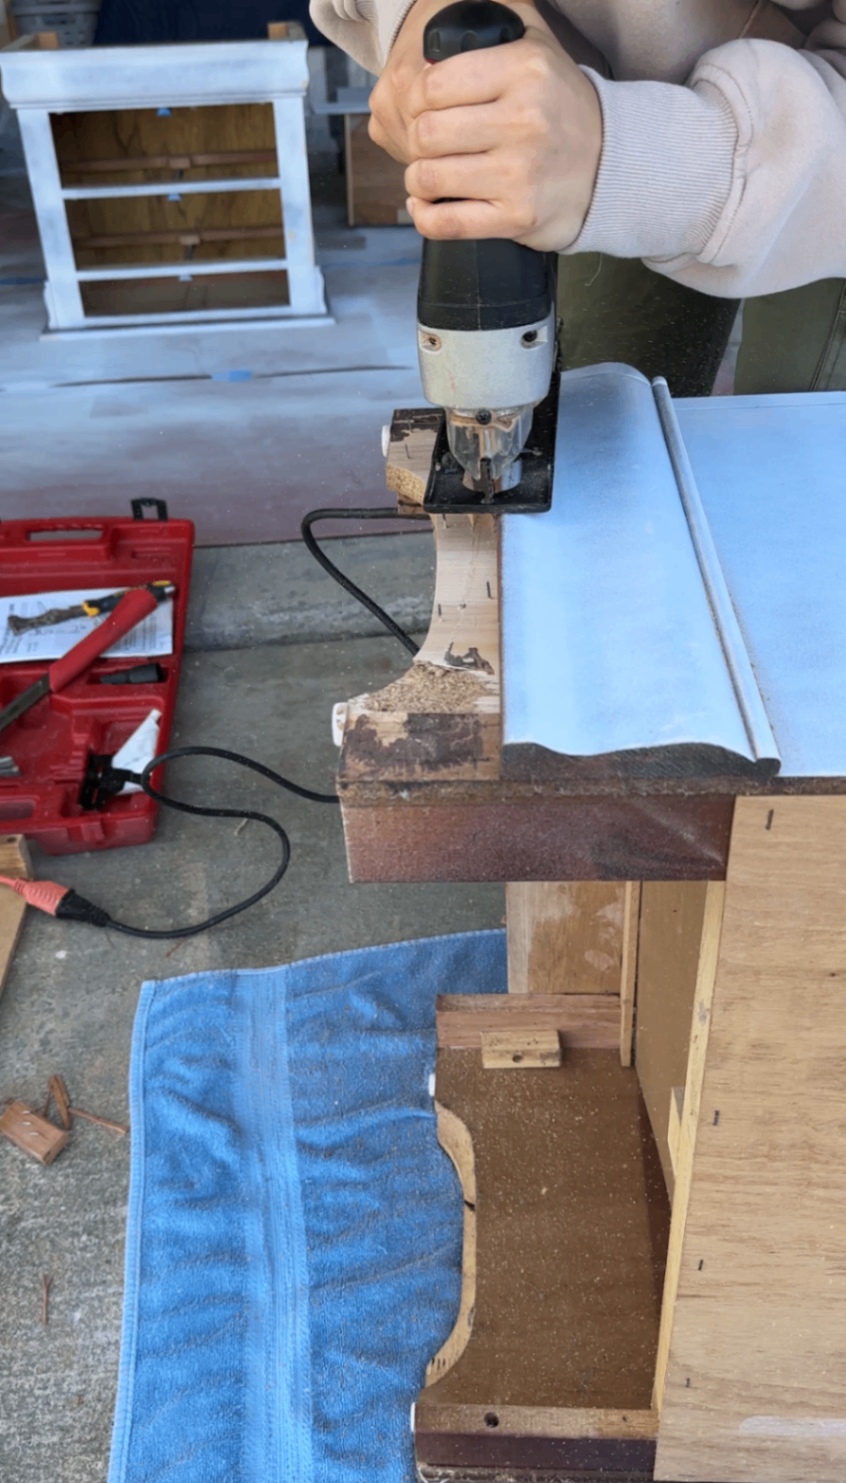
How I Removed It
I flipped the nightstands over, removed the screws holding the base on, pried off any glued sections, and cut the remaining pieces away with my jigsaw. Then I sanded the bottom smooth so the new legs would sit flush and secure.
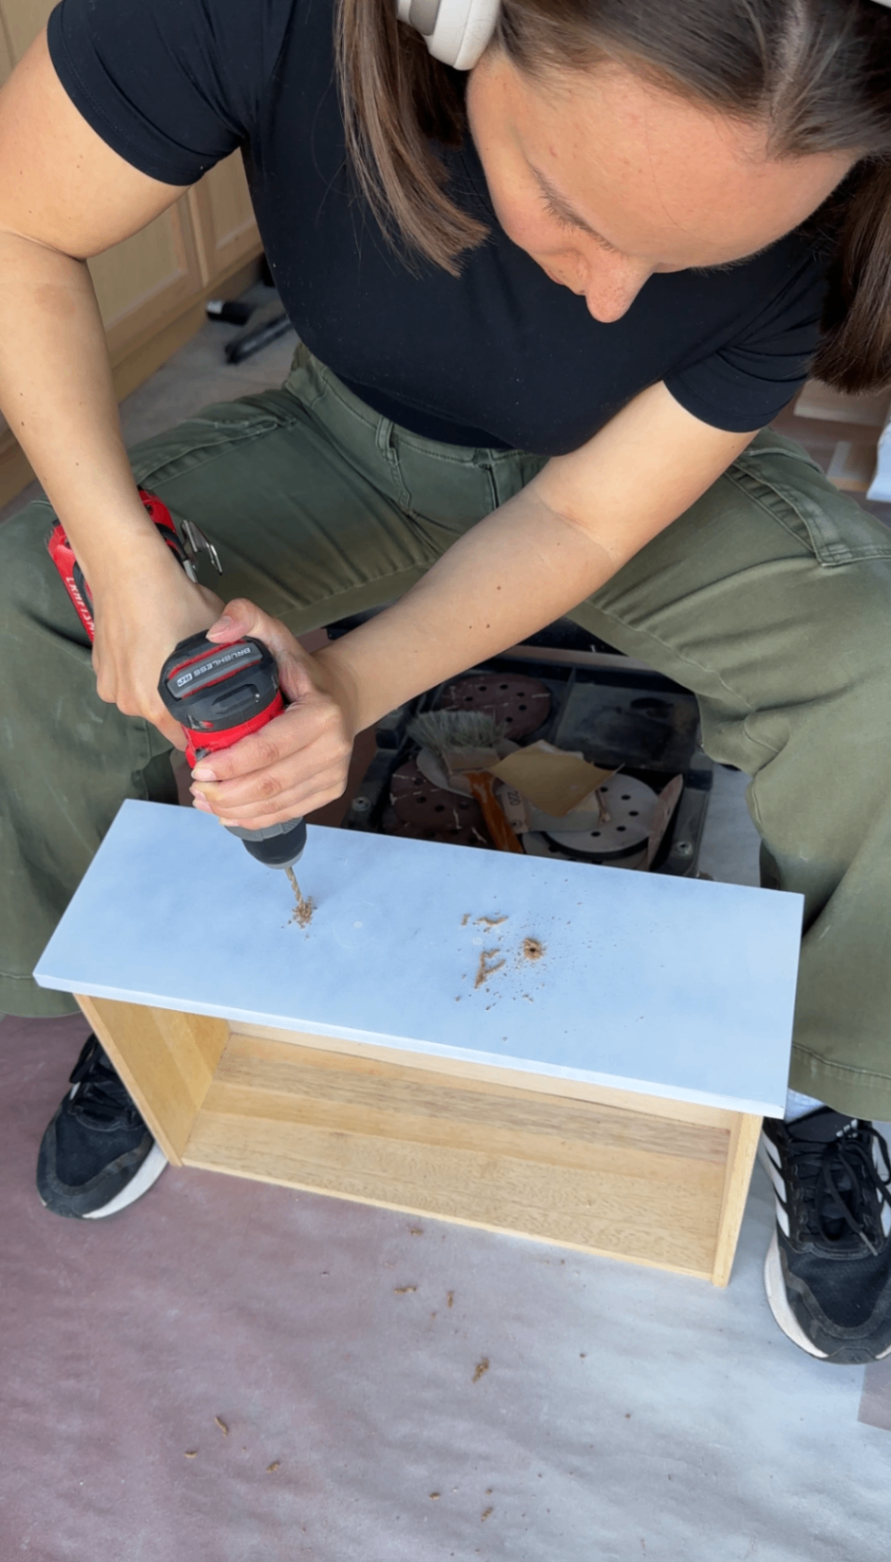
Step 7: Drill New Hardware Holes
I used a hardware jig to measure and drill new holes. I like doing this before painting (or at least before the final coat) so I'm not risking scratching a nice finish - just make sure to stick some tape over the holes inside the drawer so overspray doesn't get in.
Wider-set hardware instantly looks:
More modern
More high-end
Less “builder grade”
If you flip furniture regularly, a hardware jig is a must - this is my favorite that I use on every flip.
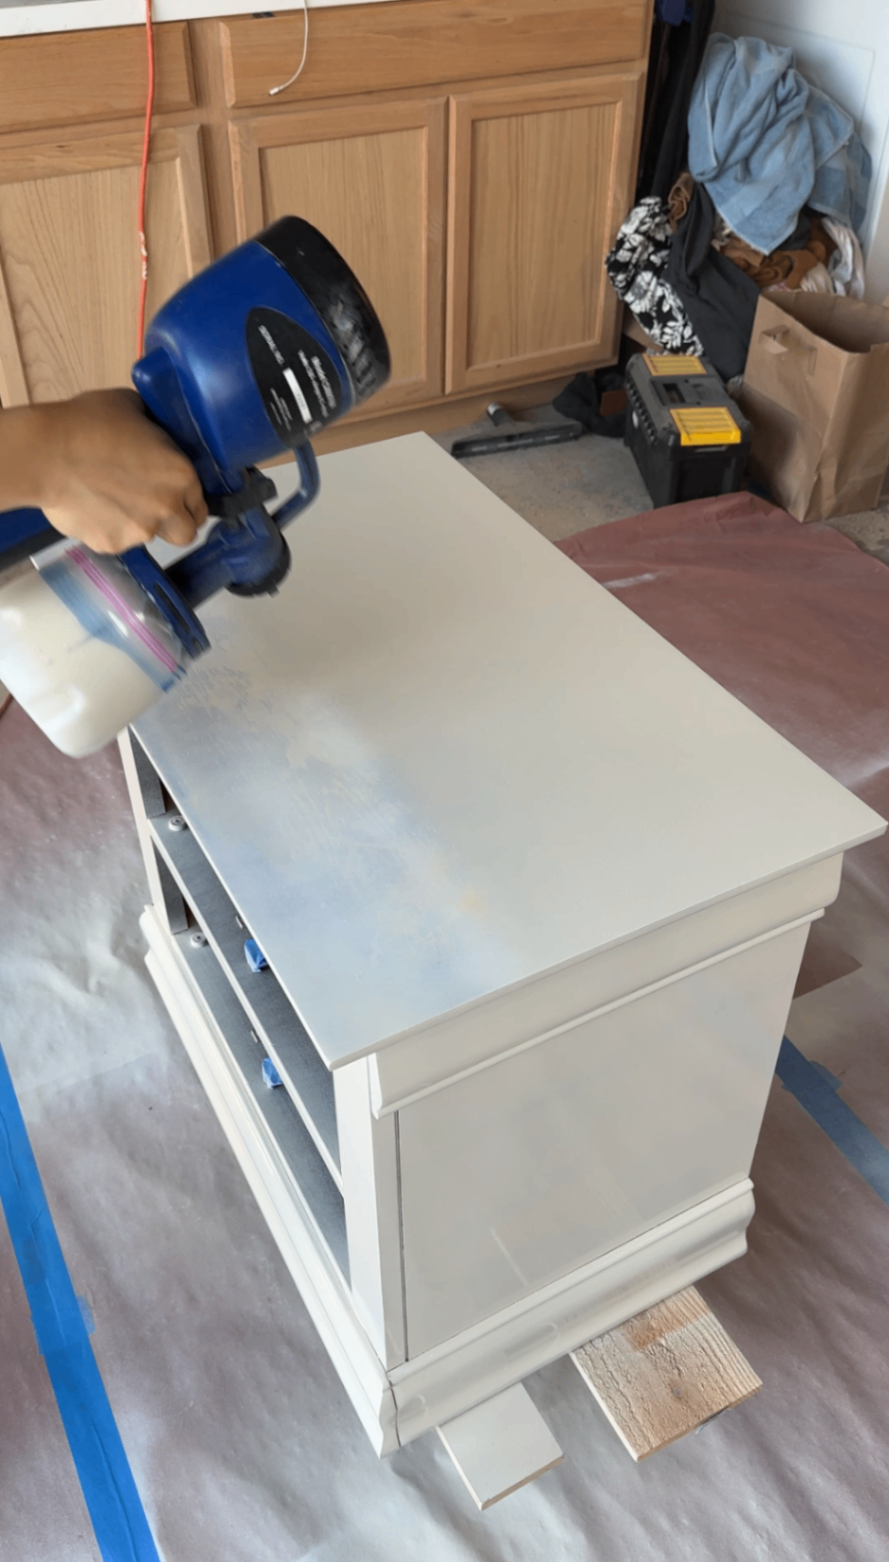
Step 8: Paint for a Modern, Neutral Finish
For this painted nightstand makeover, I used Even Better Beige by Behr. It’s a best-seller for me because it’s:
Neutral
Warm but not yellow
Timeless
When spraying paint:
Thin if needed
Always filter it
Remove drawers for fewer touch-ups (shield with cardboard to protect from overspray)
Use furniture dollies (game changer)
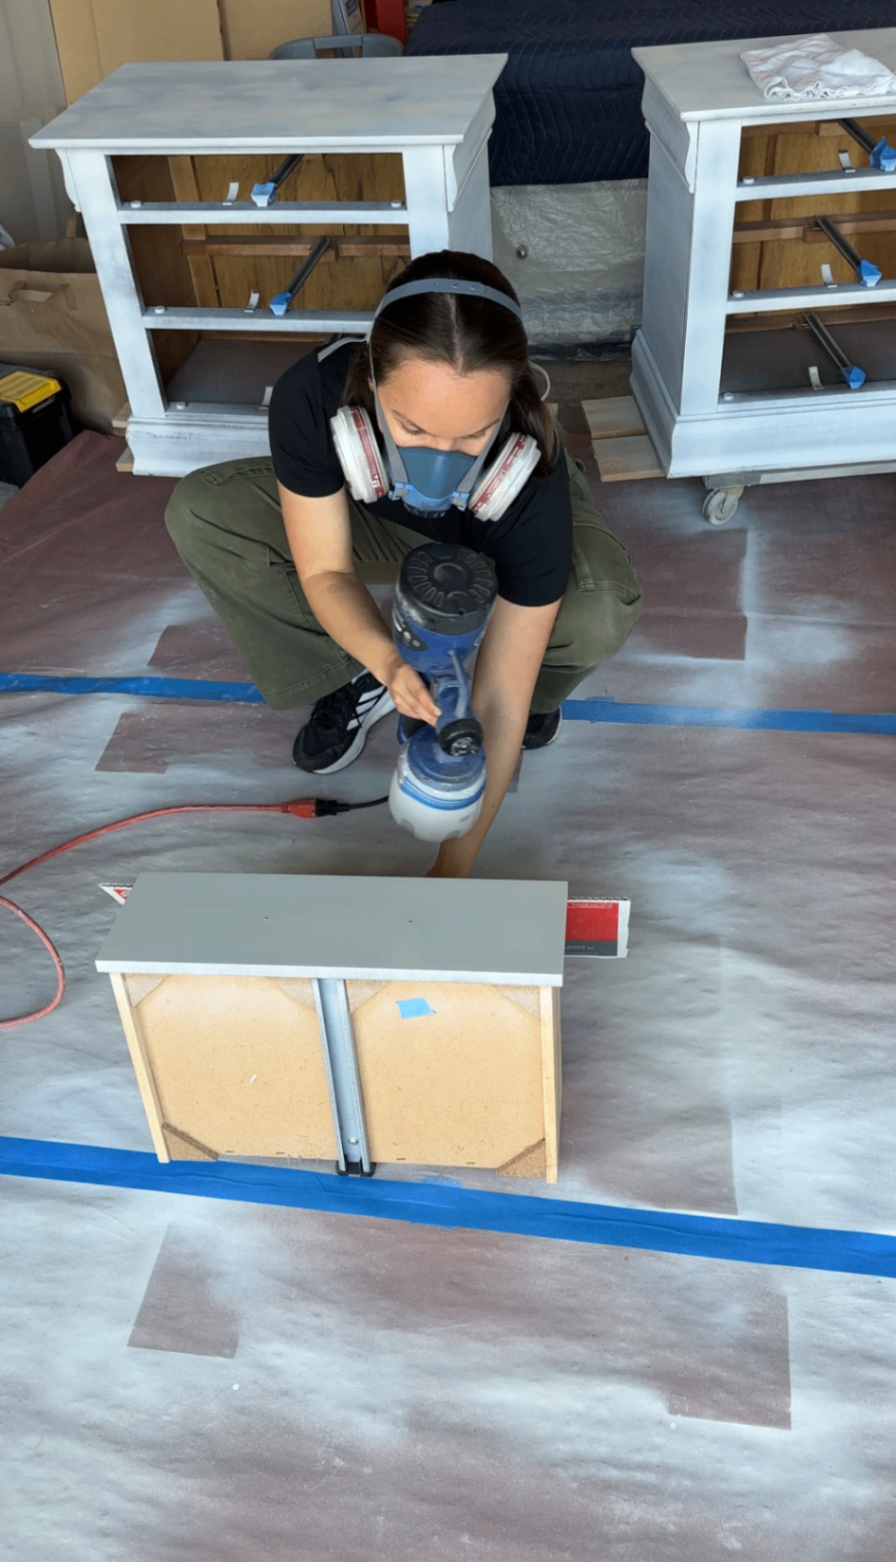
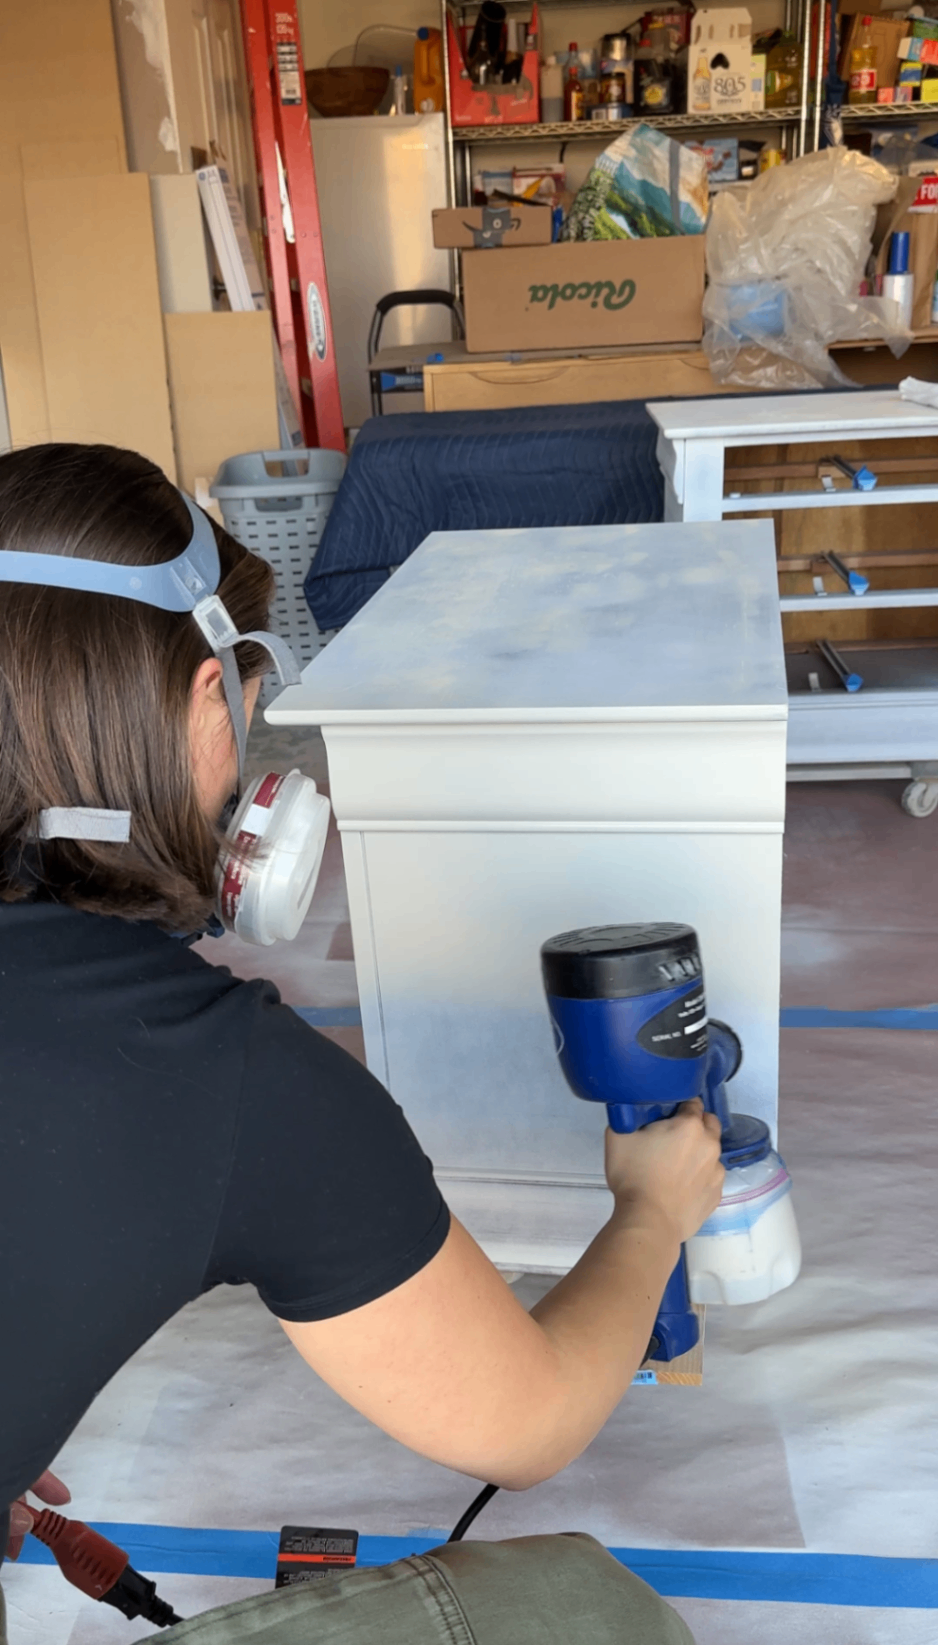
This is the sprayer I use, it gives such a gorgeous professional finish! I did multiple coats, sanding lightly between each coat. This makes the difference between a "DIY finish" and a professional sheen.
Step 9: My Favorite Time-Saving Poly Trick
One of my biggest pro tips — and a total time saver — is adding polyurethane (my top coat) directly into the paint.
Instead of spraying paint, cleaning the sprayer, and then switching over to a separate top coat, I mix them together to create a paint-and-topcoat-in-one formula. It saves so much time and eliminates constantly swapping out the sprayer cup.
For the earlier coats, I use a heavier paint-to-poly ratio so I’m focused on building solid color coverage.
For the final coats, I increase the poly ratio to build durability while still maintaining consistent color. That way I’m strengthening the finish without adding a separate topcoat step.
It’s faster, more efficient, and still gives you a durable result — especially for high-traffic pieces like nightstands.
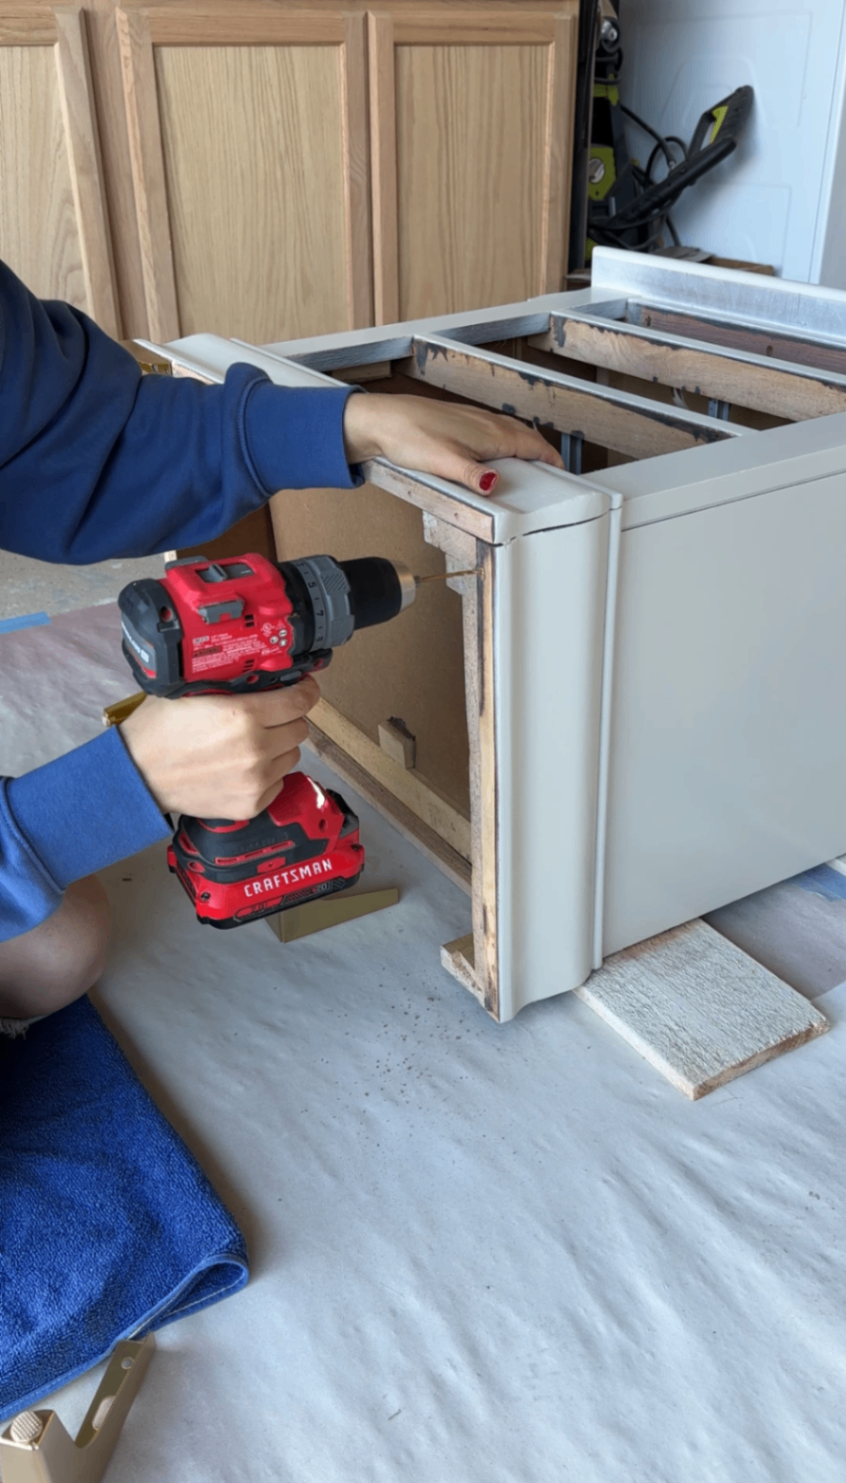
Step 10: Install New Legs + Hardware (The Game Changer)
This changes everything! I've used these countless times on my flips and they always make a huge impact. I like using the 7" legs for dressers and these 4" ones for nightstands.
To install these legs:
Mark holes
Attach with provided screws
Finish tightening by hand
Wider hardware + taller legs instantly modernized these nightstands.
This is the real secret to updating dated wood furniture by changing the silhouette itself.
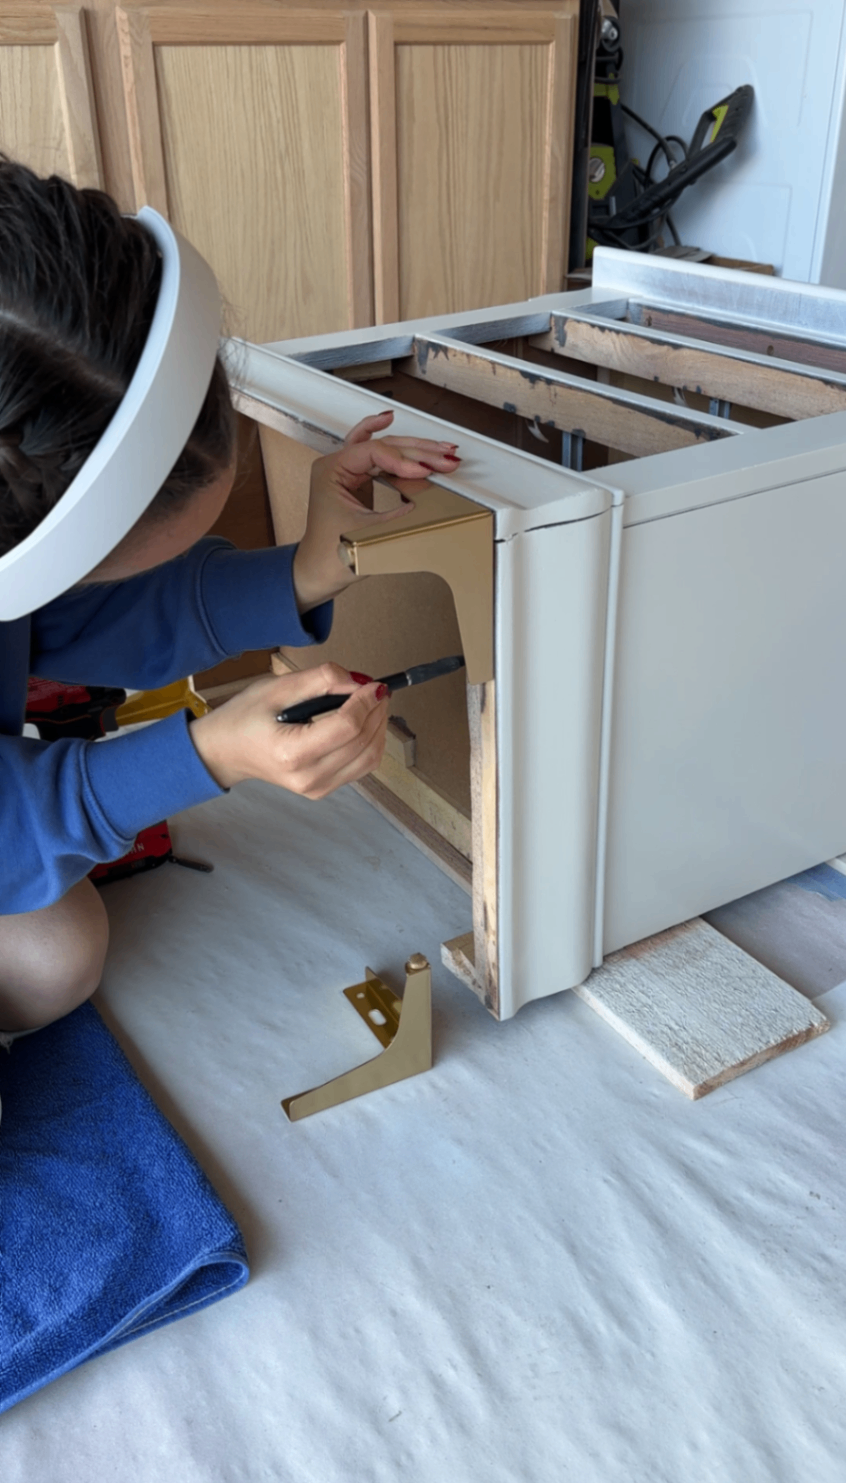
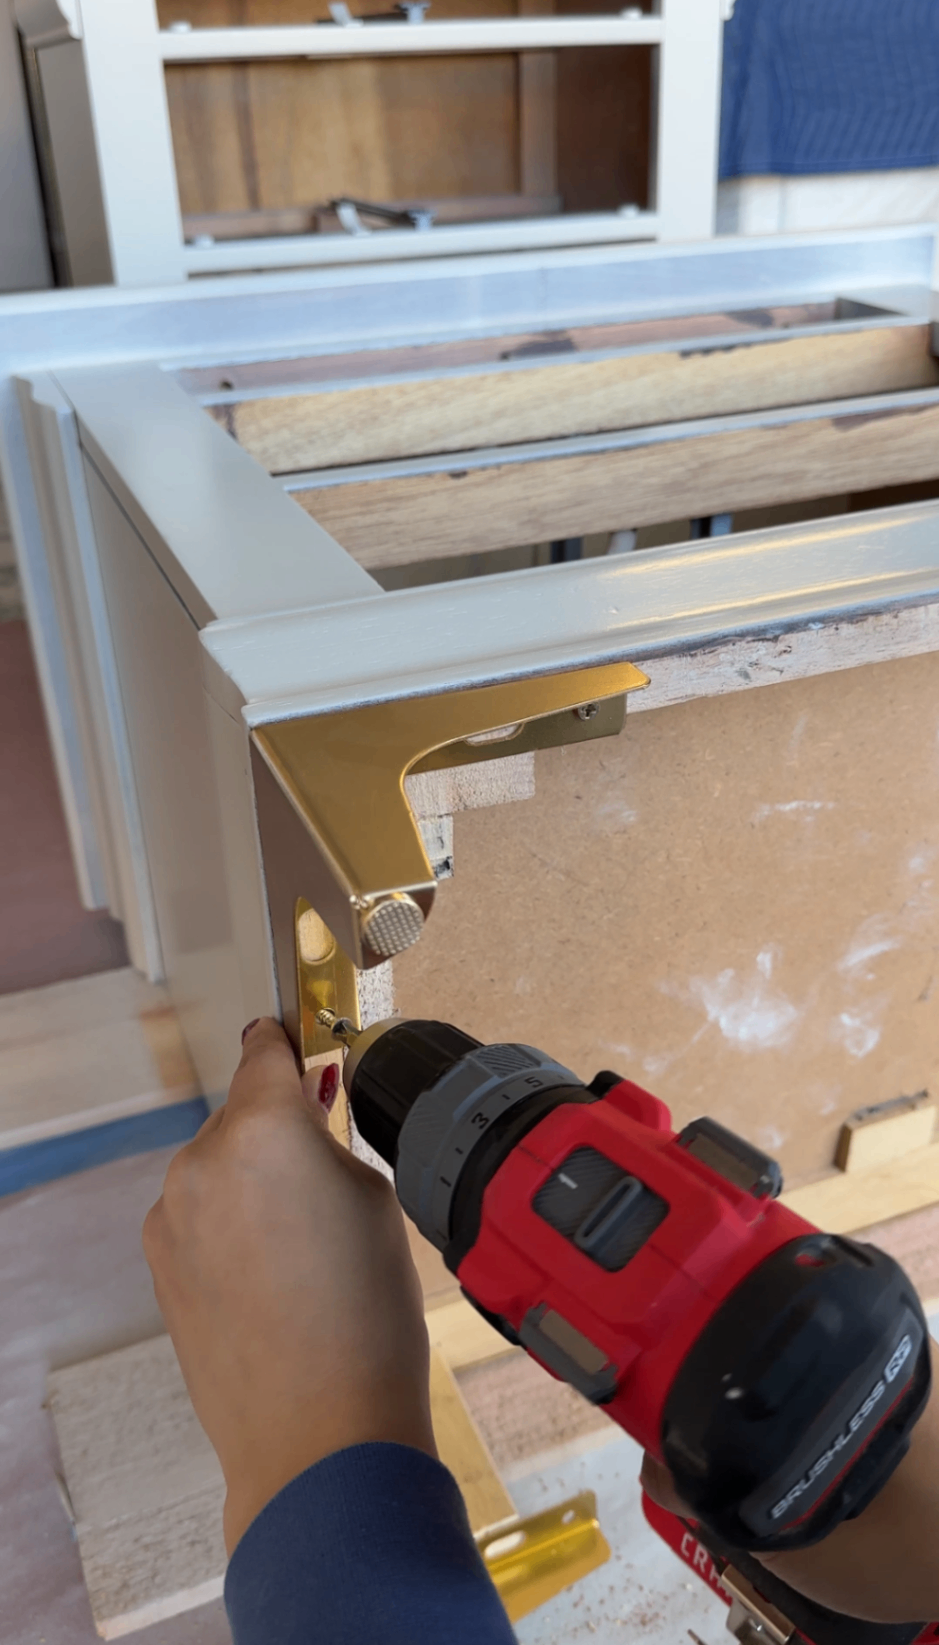
Quick tip: I always spray these legs before installing them. They usually come in a slightly yellow gold that can read a bit cheap, so I do a super light sand and spray them in a softer metallic gold instead.
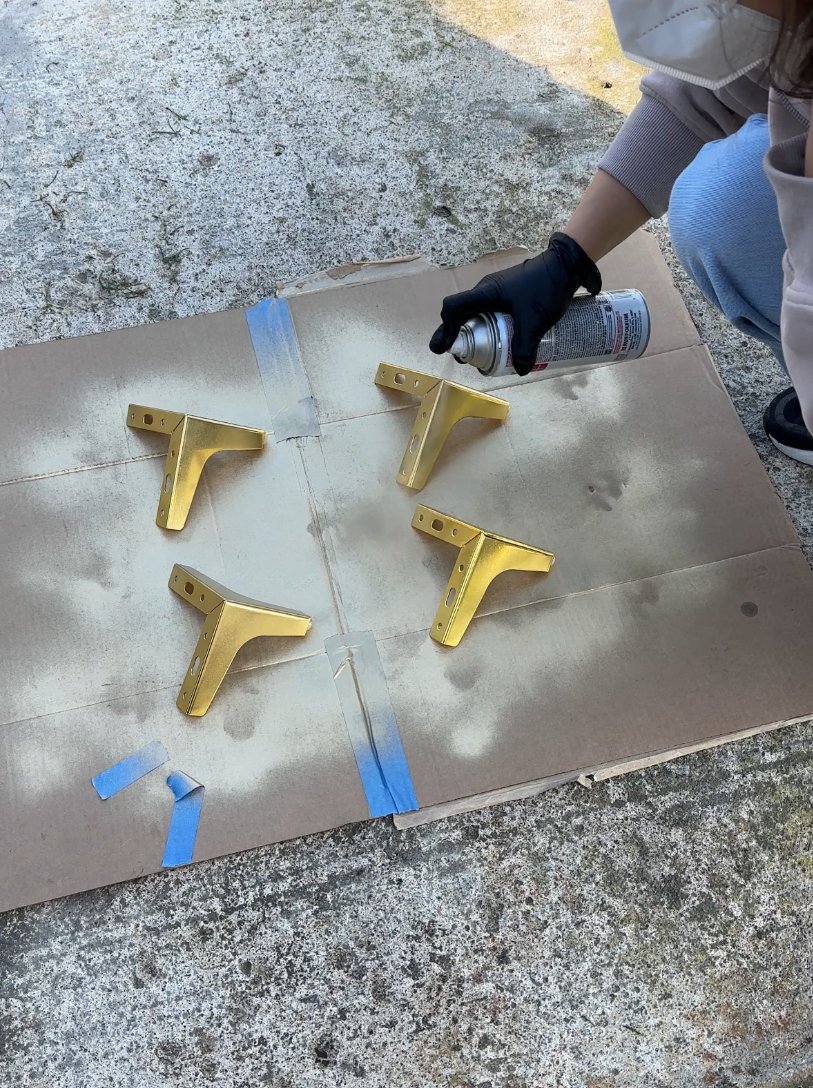
It only takes a few extra minutes, but it instantly makes the whole piece look more elevated and custom.
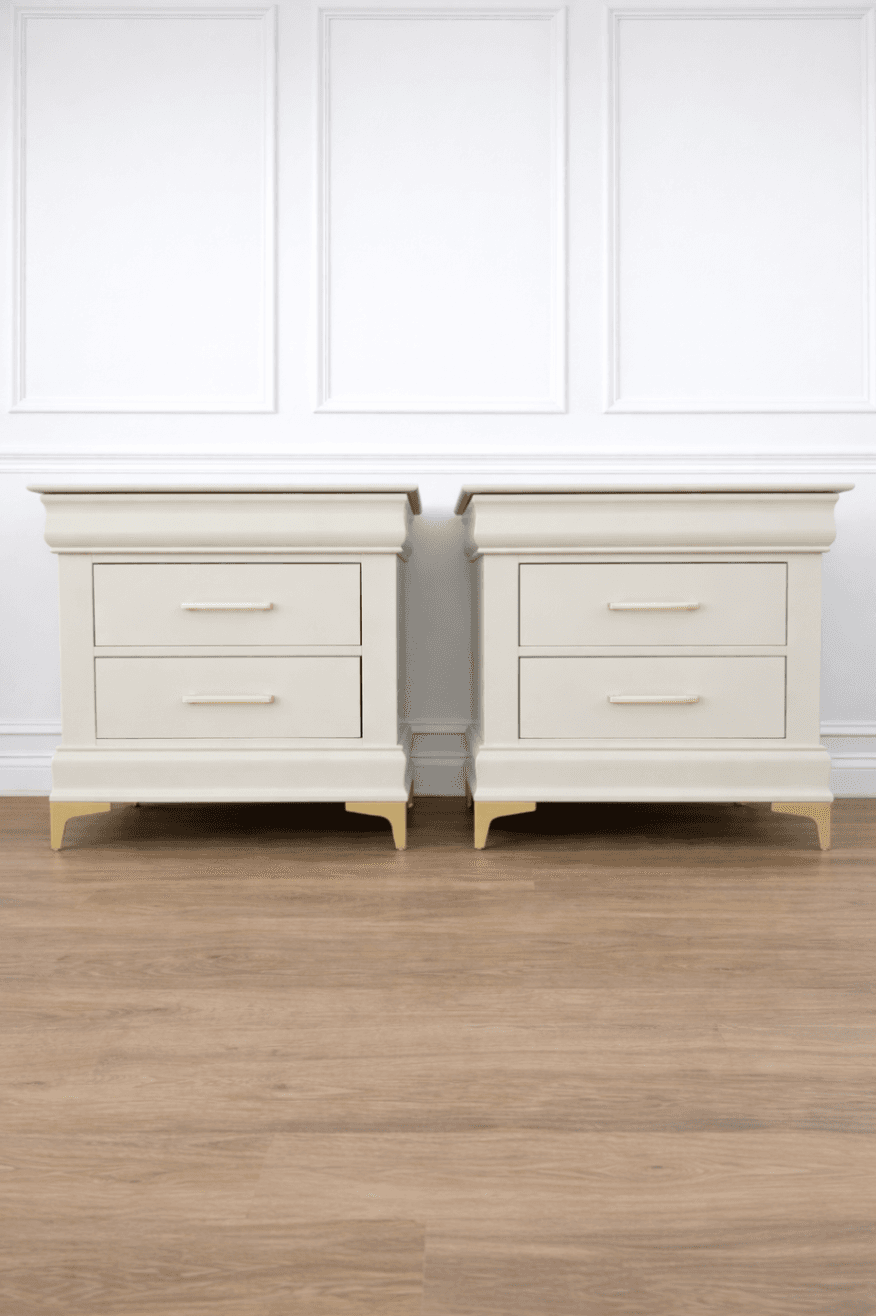
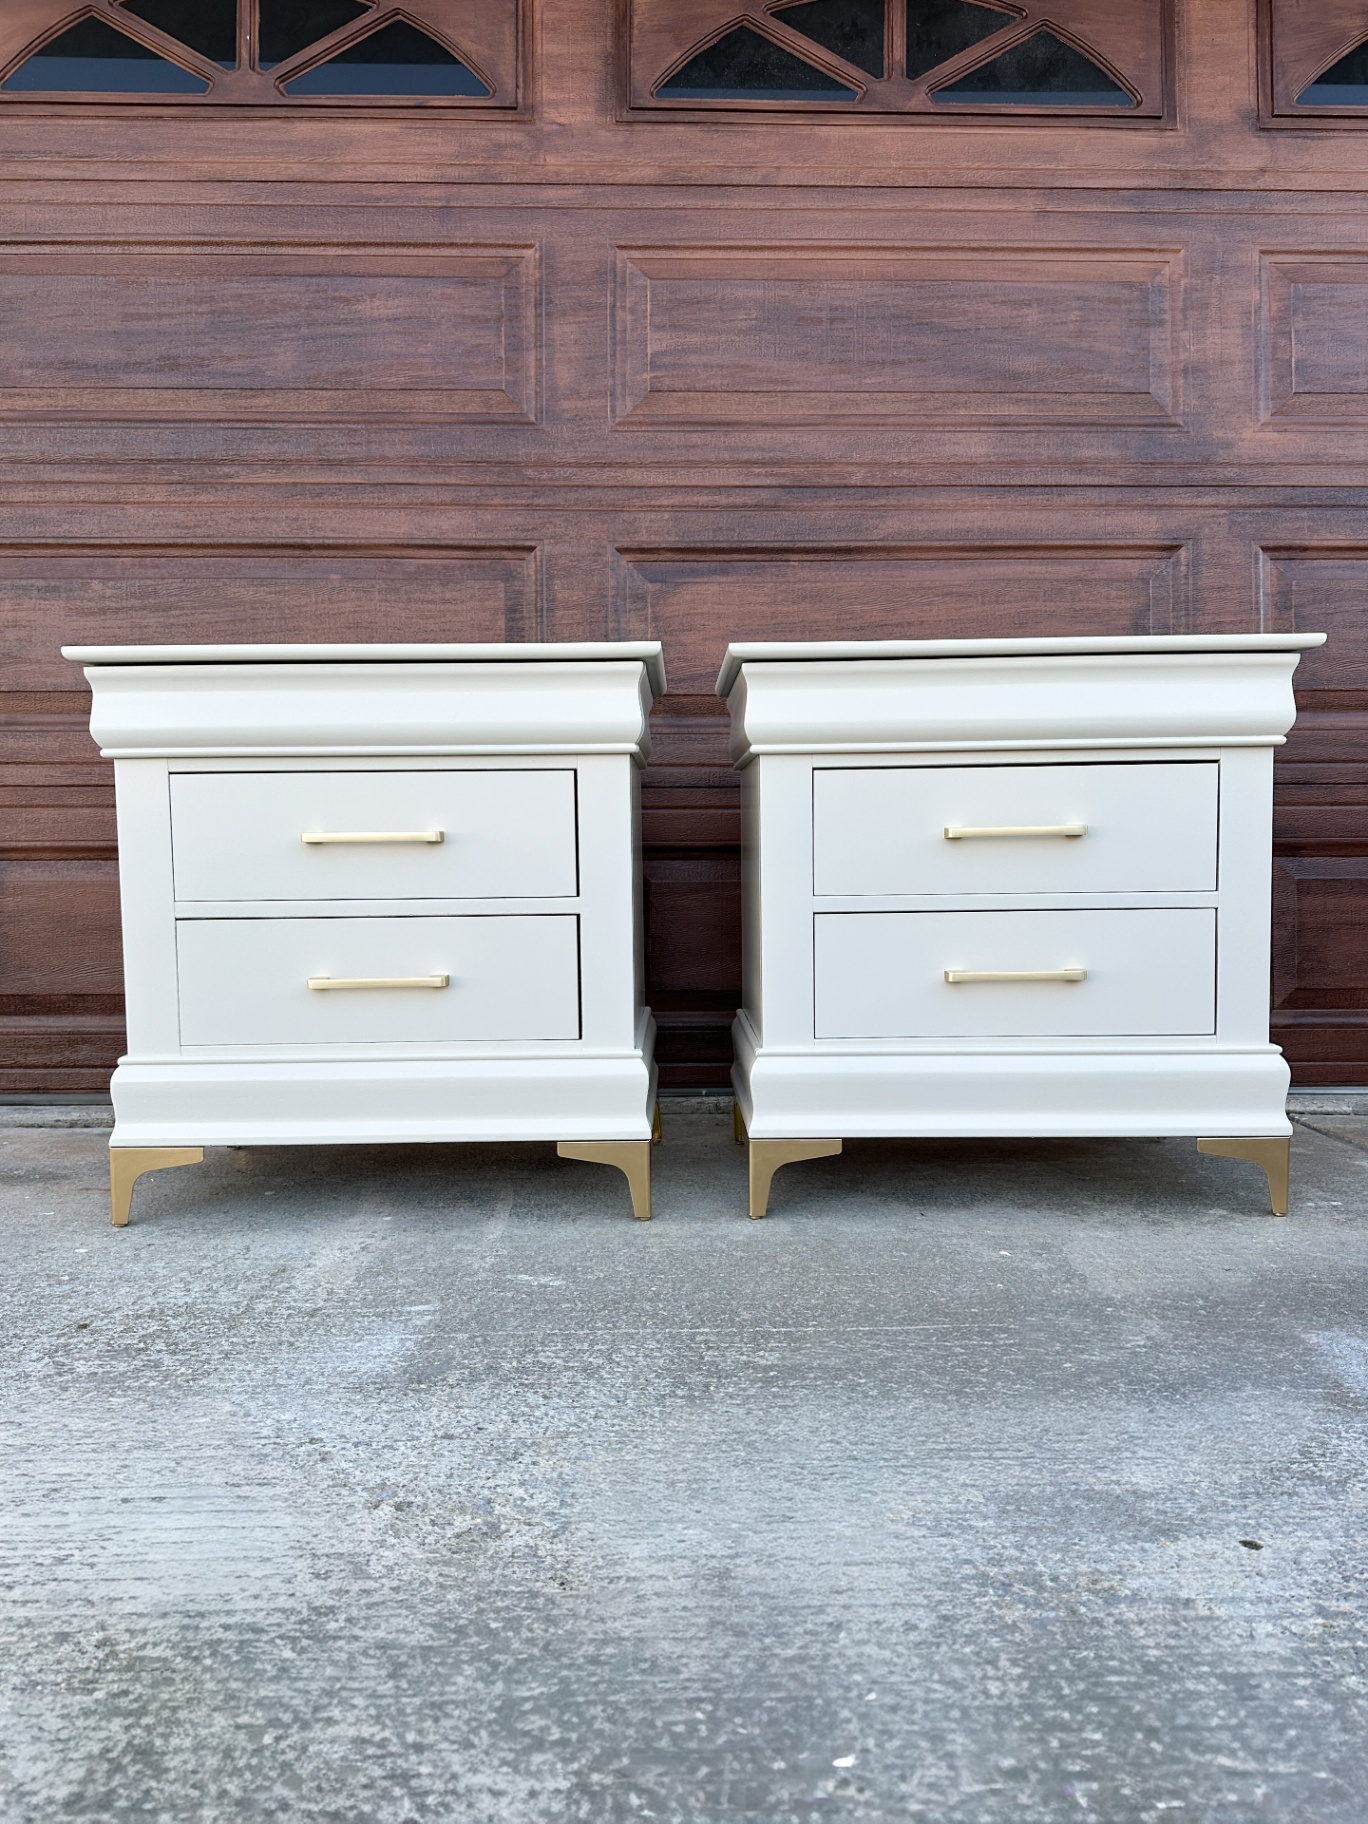
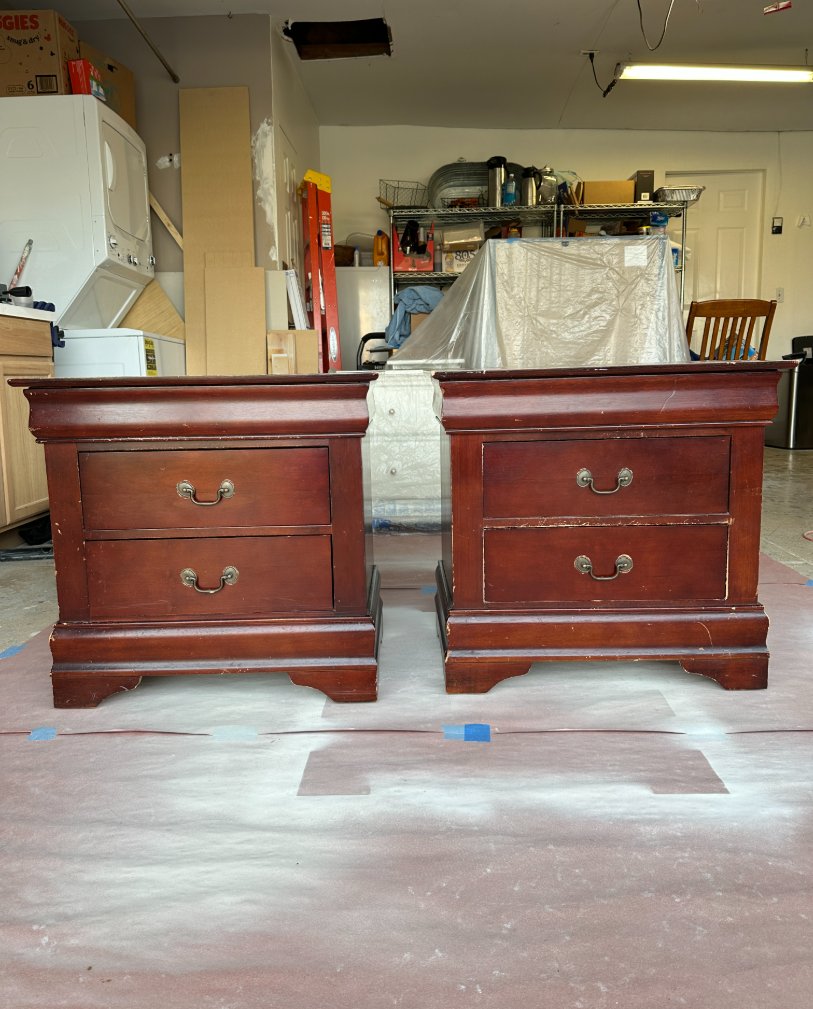
Final Result: From Faux Cherry to Modern Neutral
These nightstands went from:
Heavy
Dated
Faux cherry
Narrow hardware
Short base
To:
Neutral
Elevated
Modern
Custom-looking
And they’re still solid wood!
Cost Breakdown
Nightstands: $60
Primer/Paint/Poly: $15
Hardware: $12
Legs: $20
Misc: $5
TOTAL: $112
FAQ
Can you paint solid wood furniture?
Yes. If the wood isn’t rare or high-end hardwood, painting preserves structure while updating the finish.
Do you have to strip wood before painting?
No. Scuff sanding is enough for proper primer adhesion.
What’s the easiest way to modernize old nightstands?
Paint, add new hardware, and swap the base (if applicable) — it instantly updates the look.
📌 Save This for Later
If you found this helpful, make sure to pin it for your next furniture flip — or send it to someone who has a dated bedroom set they’ve been meaning to update!
More DIY Projects You Might Like
If you’re working on updating furniture, you might also like these:
French Provincial Dresser Makeover – the full tutorial on how I restored, paint-washed, and finished this beautiful vintage piece
Mid-Century Modern Dresser Restoration – full restoration on a genuine MCM tallboy dresser (just wait till you see the wood grain)
These are great inspiration options if you're looking to flip, refinish, and restore more second-hand furniture!