How to Paint a Faux Wood Garage Door
This DIY faux wood garage door makeover cost less than $50 and completely transformed my home’s curb appeal. I’m sharing the exact supplies, stain mix, and step-by-step process so you can recreate this wood-look finish in just one afternoon.
How to Paint a Faux Wood Garage Door (DIY Tutorial Under $50!)
Want the look of a beautiful wood garage door without the steep price tag? This DIY faux wood garage door tutorial will show you step-by-step how to transform a plain garage door into a wood-look finish for less than $50.
It’s fast, budget-friendly, and makes a huge difference in curb appeal. I finished mine in just one afternoon — and I’ll walk you through every detail so you can do the same!
Why Try a Faux Wood Garage Door?
Real wood garage doors can cost thousands of dollars.
A DIY faux finish gives you the same warm, rustic look for a fraction of the price.
It only takes a single day, some basic supplies, and a little elbow grease.
This project is perfect if you’re prepping to sell your home, upgrading your exterior, or just want to make your house stand out in the neighborhood!
Supplies You’ll Need
Here’s everything I used:
Power washer (or strong hose nozzle)
Exterior paint (I used Rustic Earth by Valspar)
Staining pads (get 4 — you’ll thank me later!)
Minwax Gel Stain (in the color Walnut)
Minwax Penetrating Stain (in the color Honey)
Step-by-Step Faux Wood Garage Door Tutorial
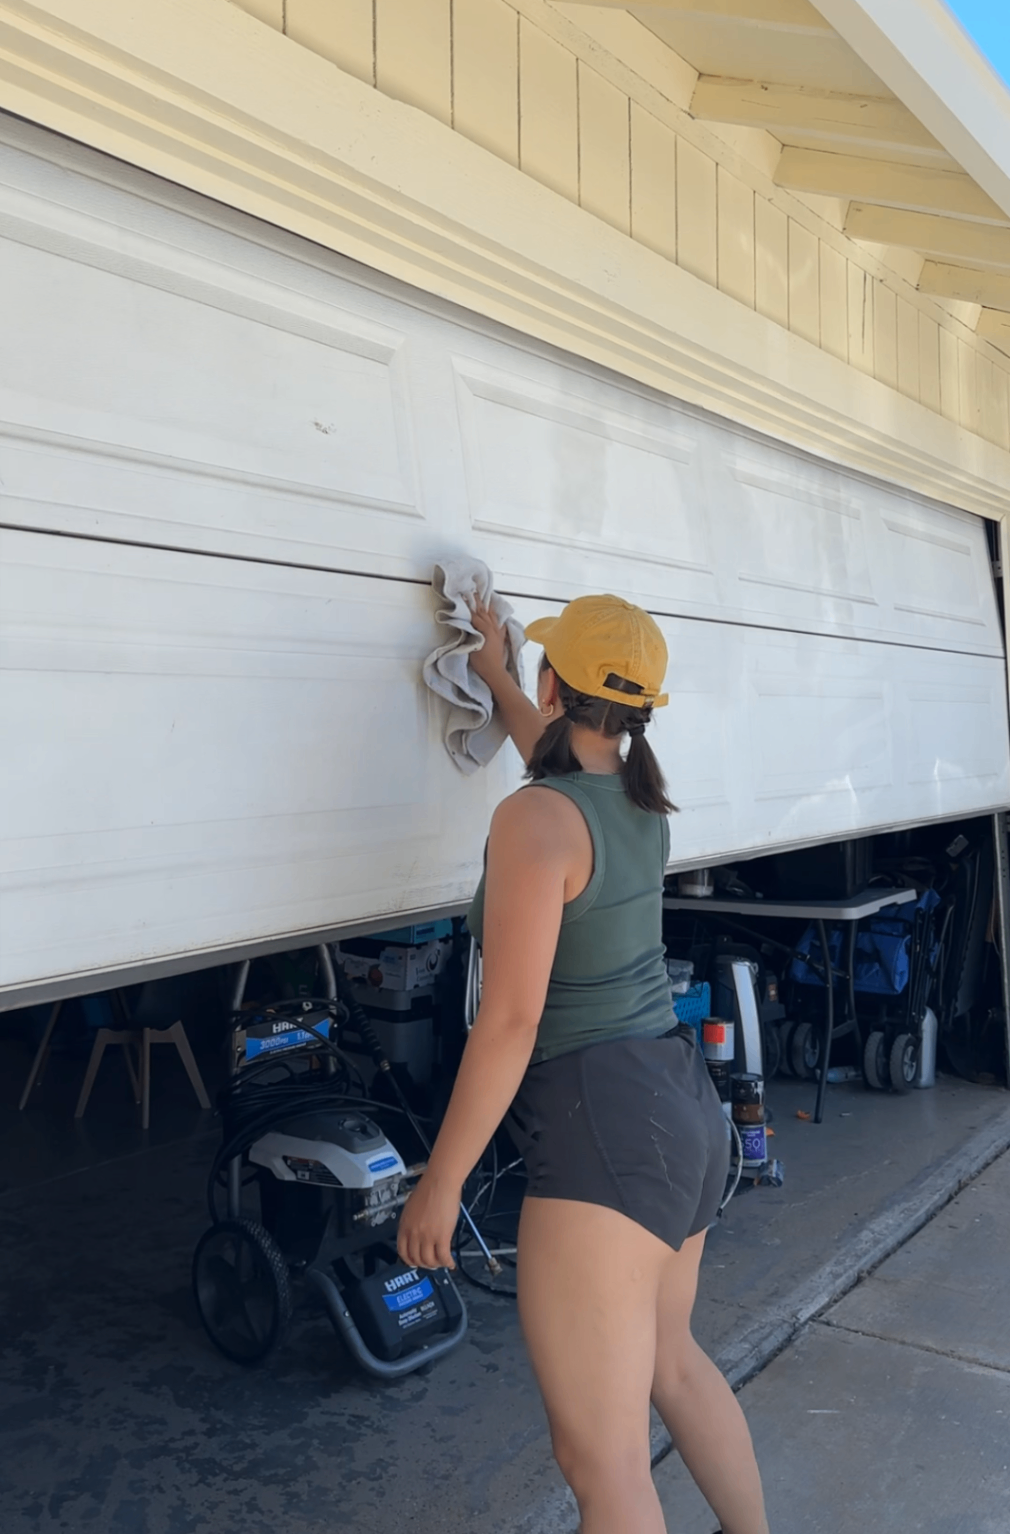
1. Prep the Garage Door
Start with a power wash to remove dirt, dust, and debris, and let the door dry completely before painting.
The timing worked out perfectly because we had just power-washed the garage door while painting the house (full project linked here), so it was already prepped and ready for its faux-wood glow-up.”
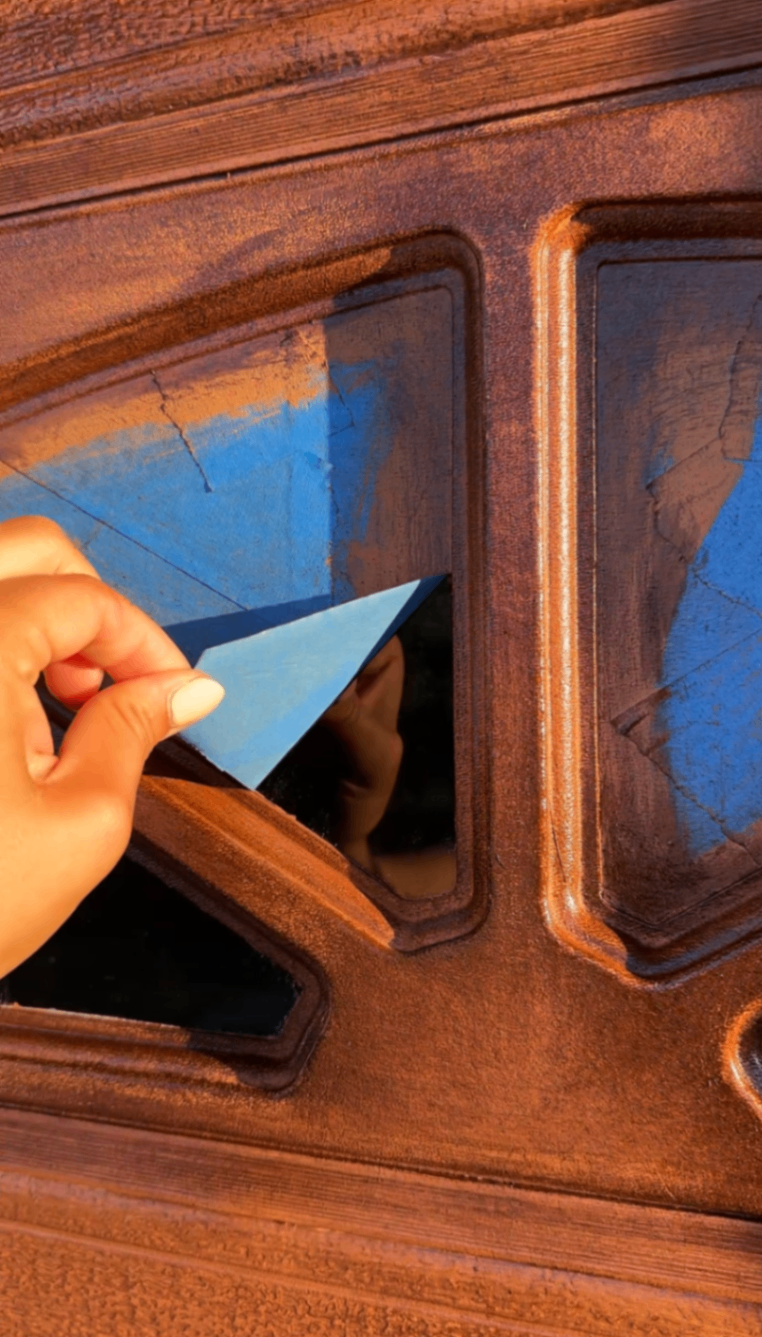
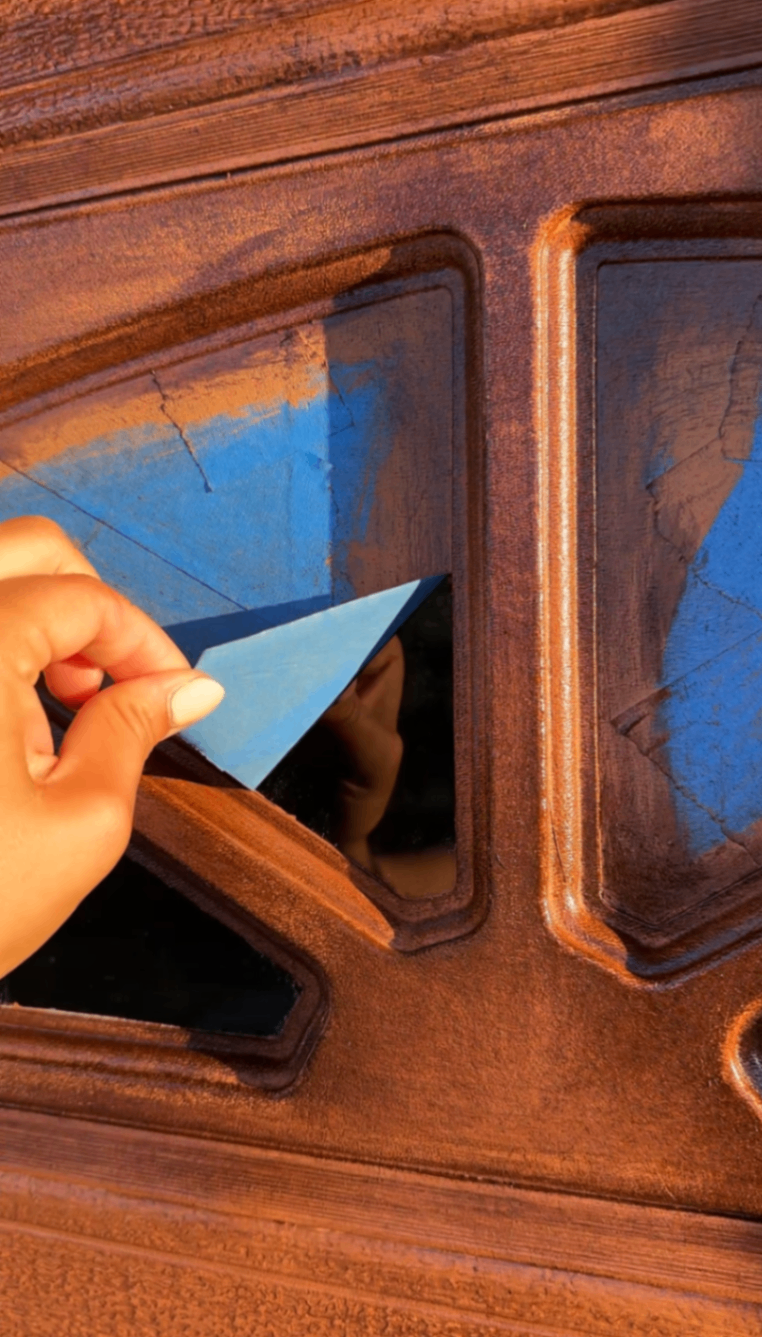
Apply painter’s tape to all trim and windows to ensure sharp lines! The windows are a bit tedious but I found it easiest to layer on the tape overlapping the edges and then using a utility knife to carefully cut off all the excess.
3. Apply the Base Coat
Paint on your base color! I used one quart of Valspar's Rustic Earth in their budget exterior line (and had some leftover) - no need to splurge here. Working in one horizontal section of the garage door at a time is definitely the way to go, and will also save your back (trust me).
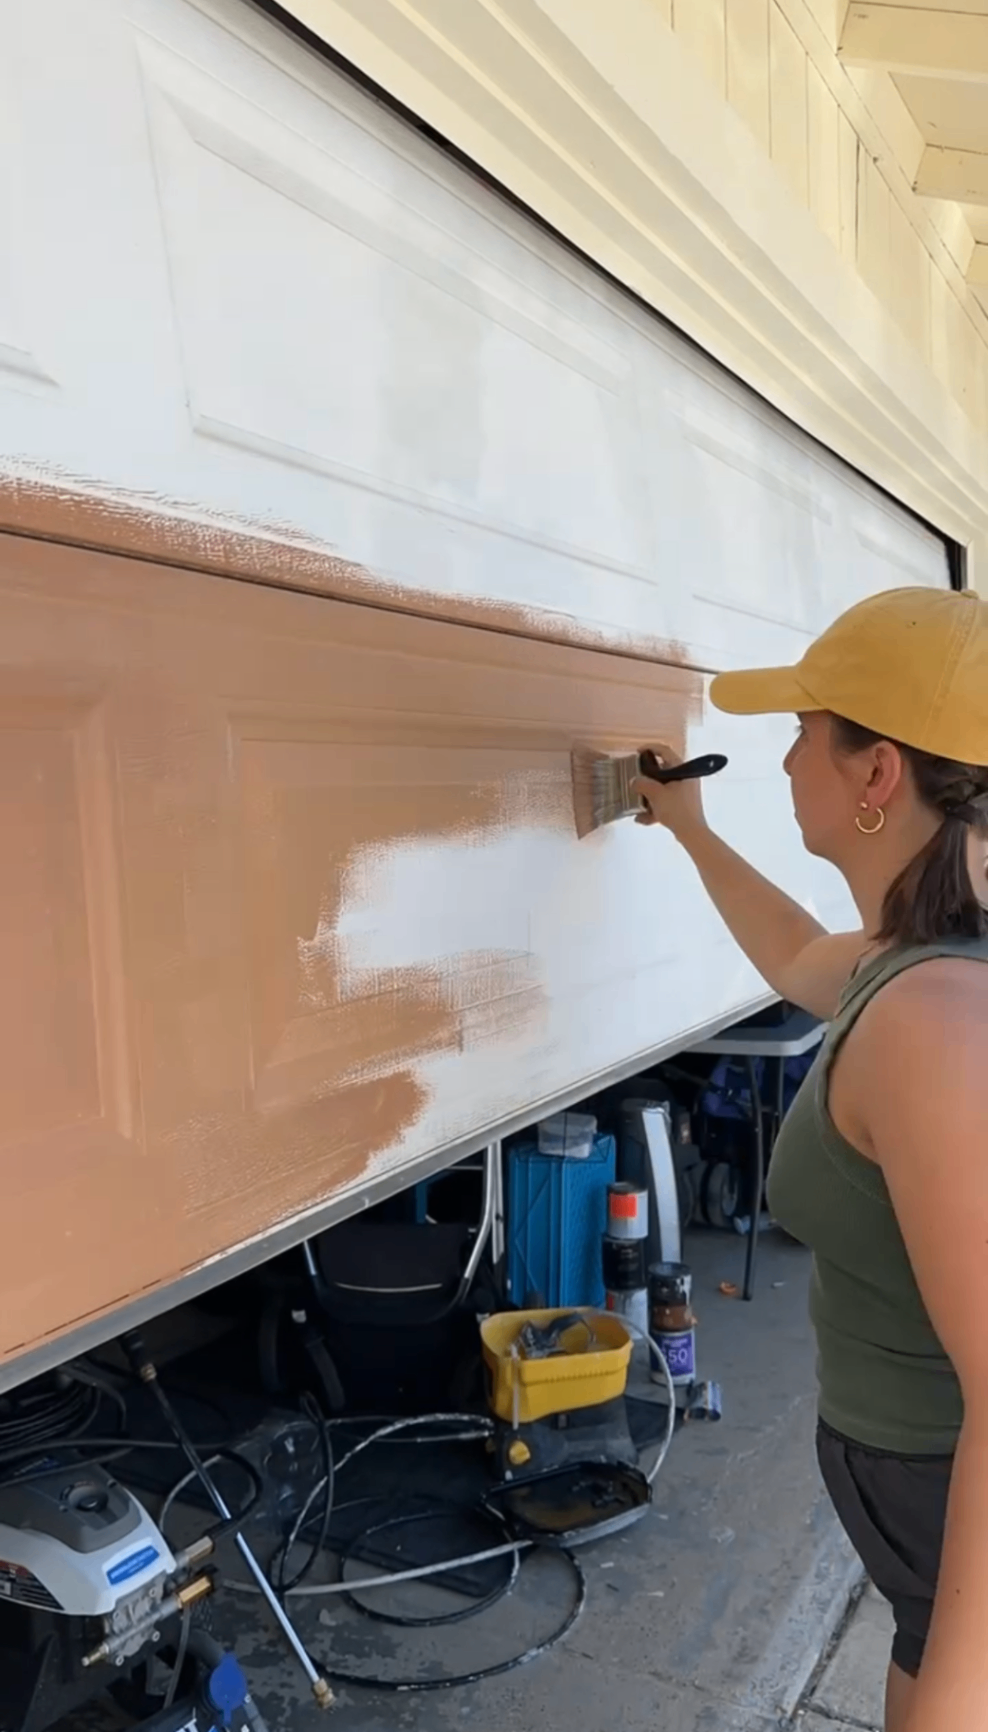
It's totally fine if it goes on a bit patchy, you won't even notice after the next step! Just apply one coat and move on to step 4...
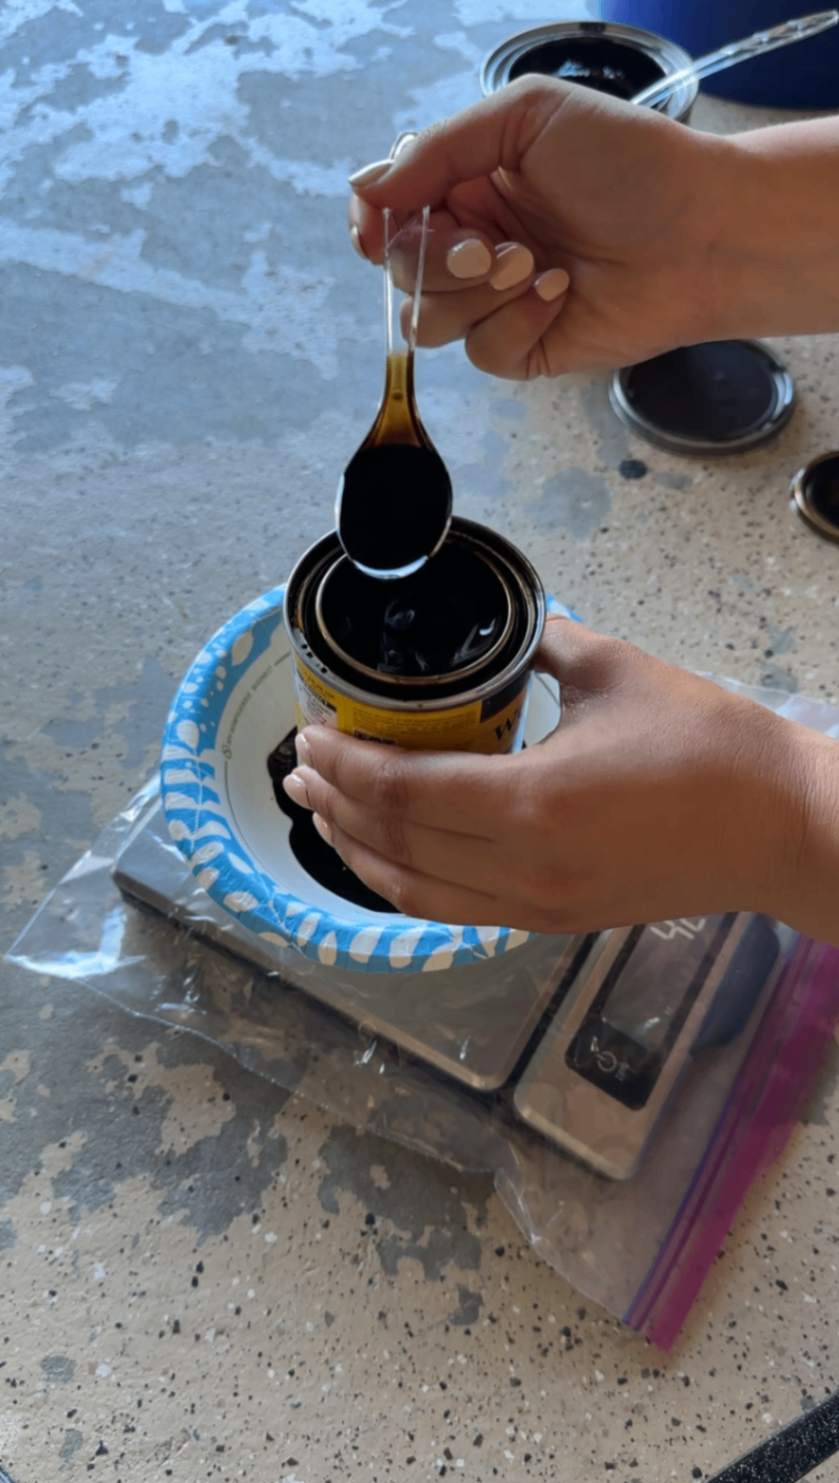
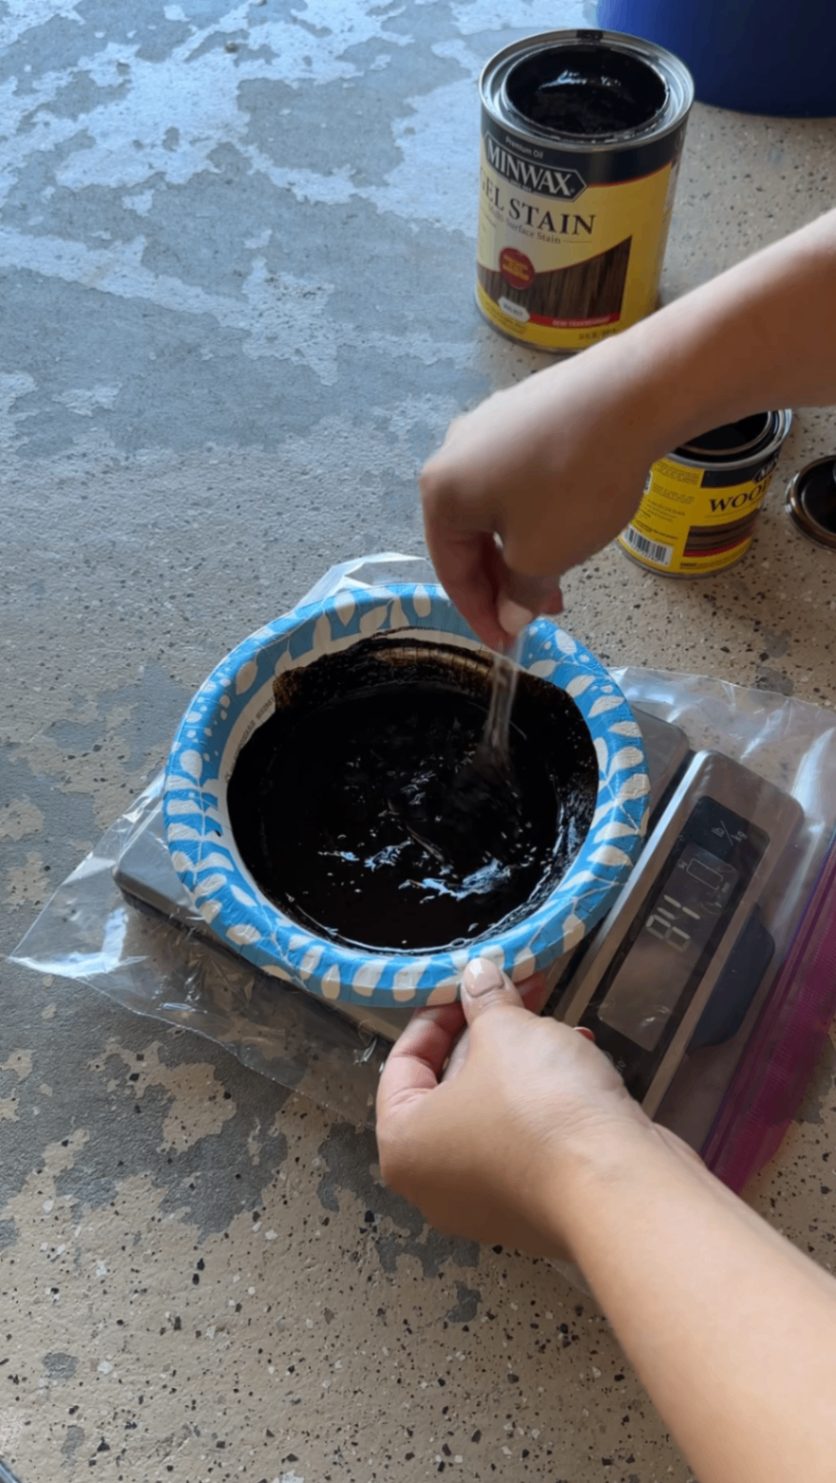
4. Mix and Apply the Stain
You can really play around here to find what works best for you! I liked a mixture of a gel stain to sit nicely on the surface and a penetrating stain to thin down the mixture and make it more workable on such a large area. I weighed the ratio so I could mix in small batches and repeat as necessary while ensuring the exact same finish:
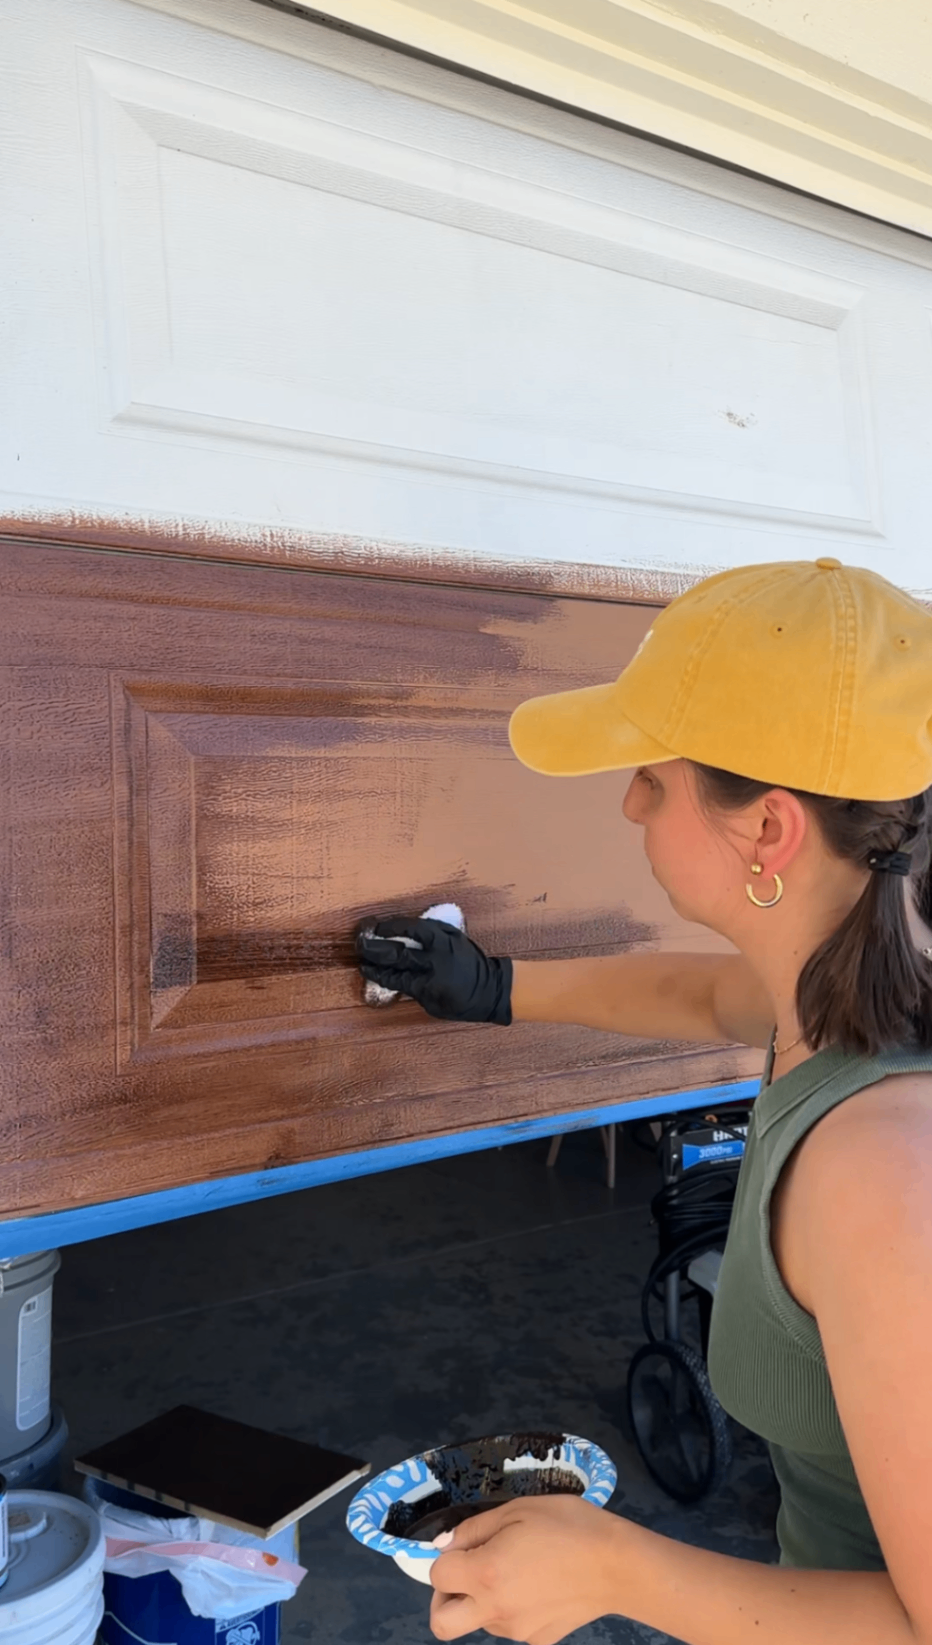
Apply the mix using a staining pad. I found it easiest to apply in the corners first (similar to how you'd cut in with a paintbrush on a door) and then blend out with long even strokes. Don't forget to move quickly! The stain dries fast and can get tacky if you wait too long.
In my opinion - less is more with the color variation! While some variation helps it look more like wood, if you go overboard in my opinion that's when it starts looking much more "DIY" and less natural.
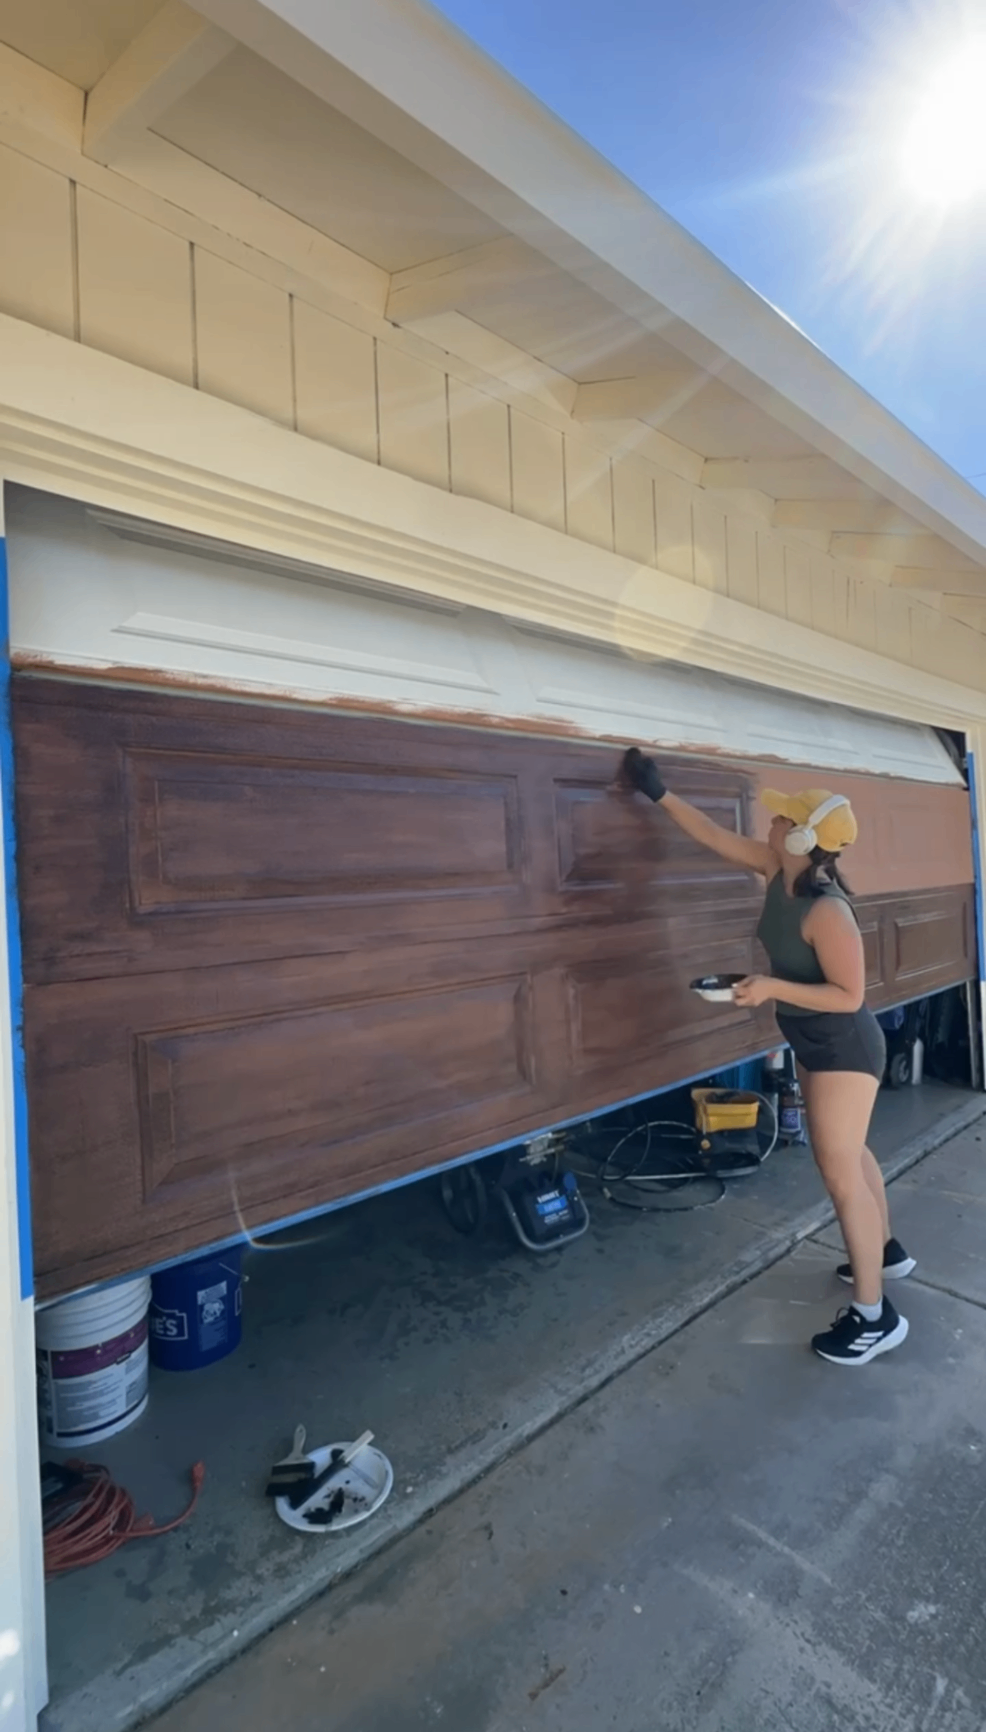
As you move from one horizontal panel to the next, you can simply lower the garage door one section at a time—this makes it much easier to reach each area and keep your brush strokes consistent.
💡 Pro Tip: Get more staining pads than you think you'll need! I only got two and they were WRECKED by the end of this (sweet spot would probably be 4).
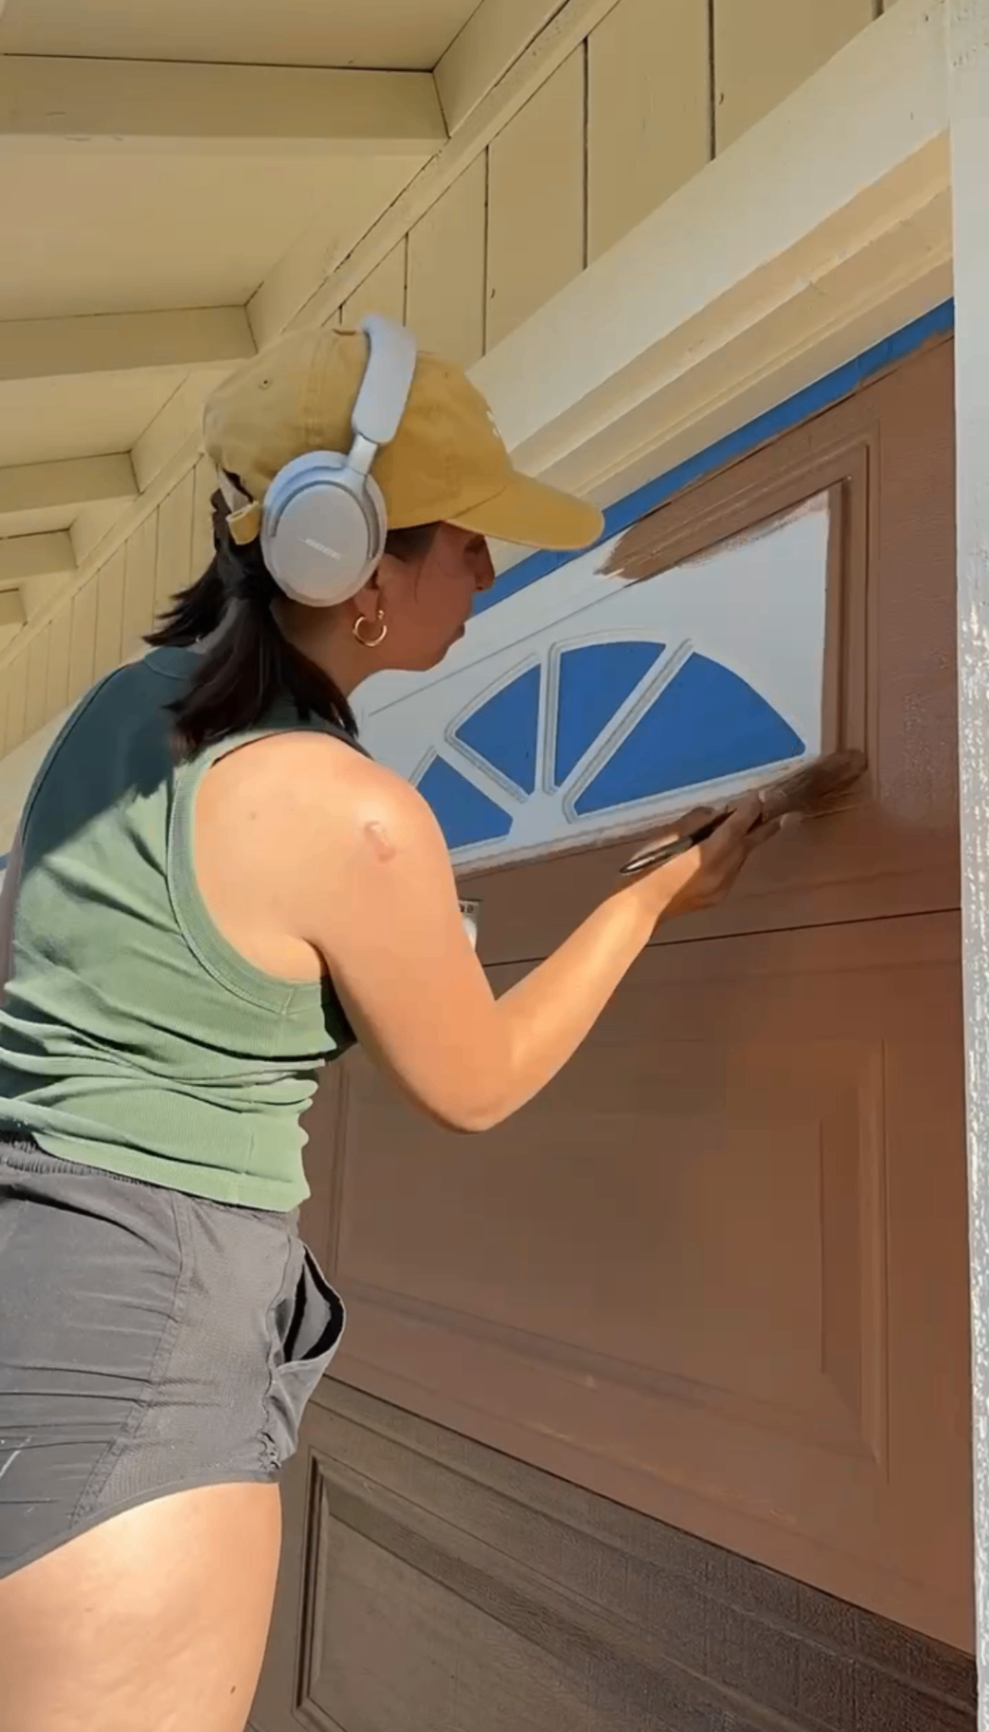

5. Brush the Grooves
Using a bristle brush to get stain into any grooves or details around the windows definitely made the upper section easier.


Then all you have to do is remove the tape carefully to reveal the crisp lines and a stunning faux wood finish!
3. Before & After: Faux Wood Garage Door Transformation
Want to see the difference this technique makes?
Here’s a quick look at the garage door before and after the faux-wood makeover:

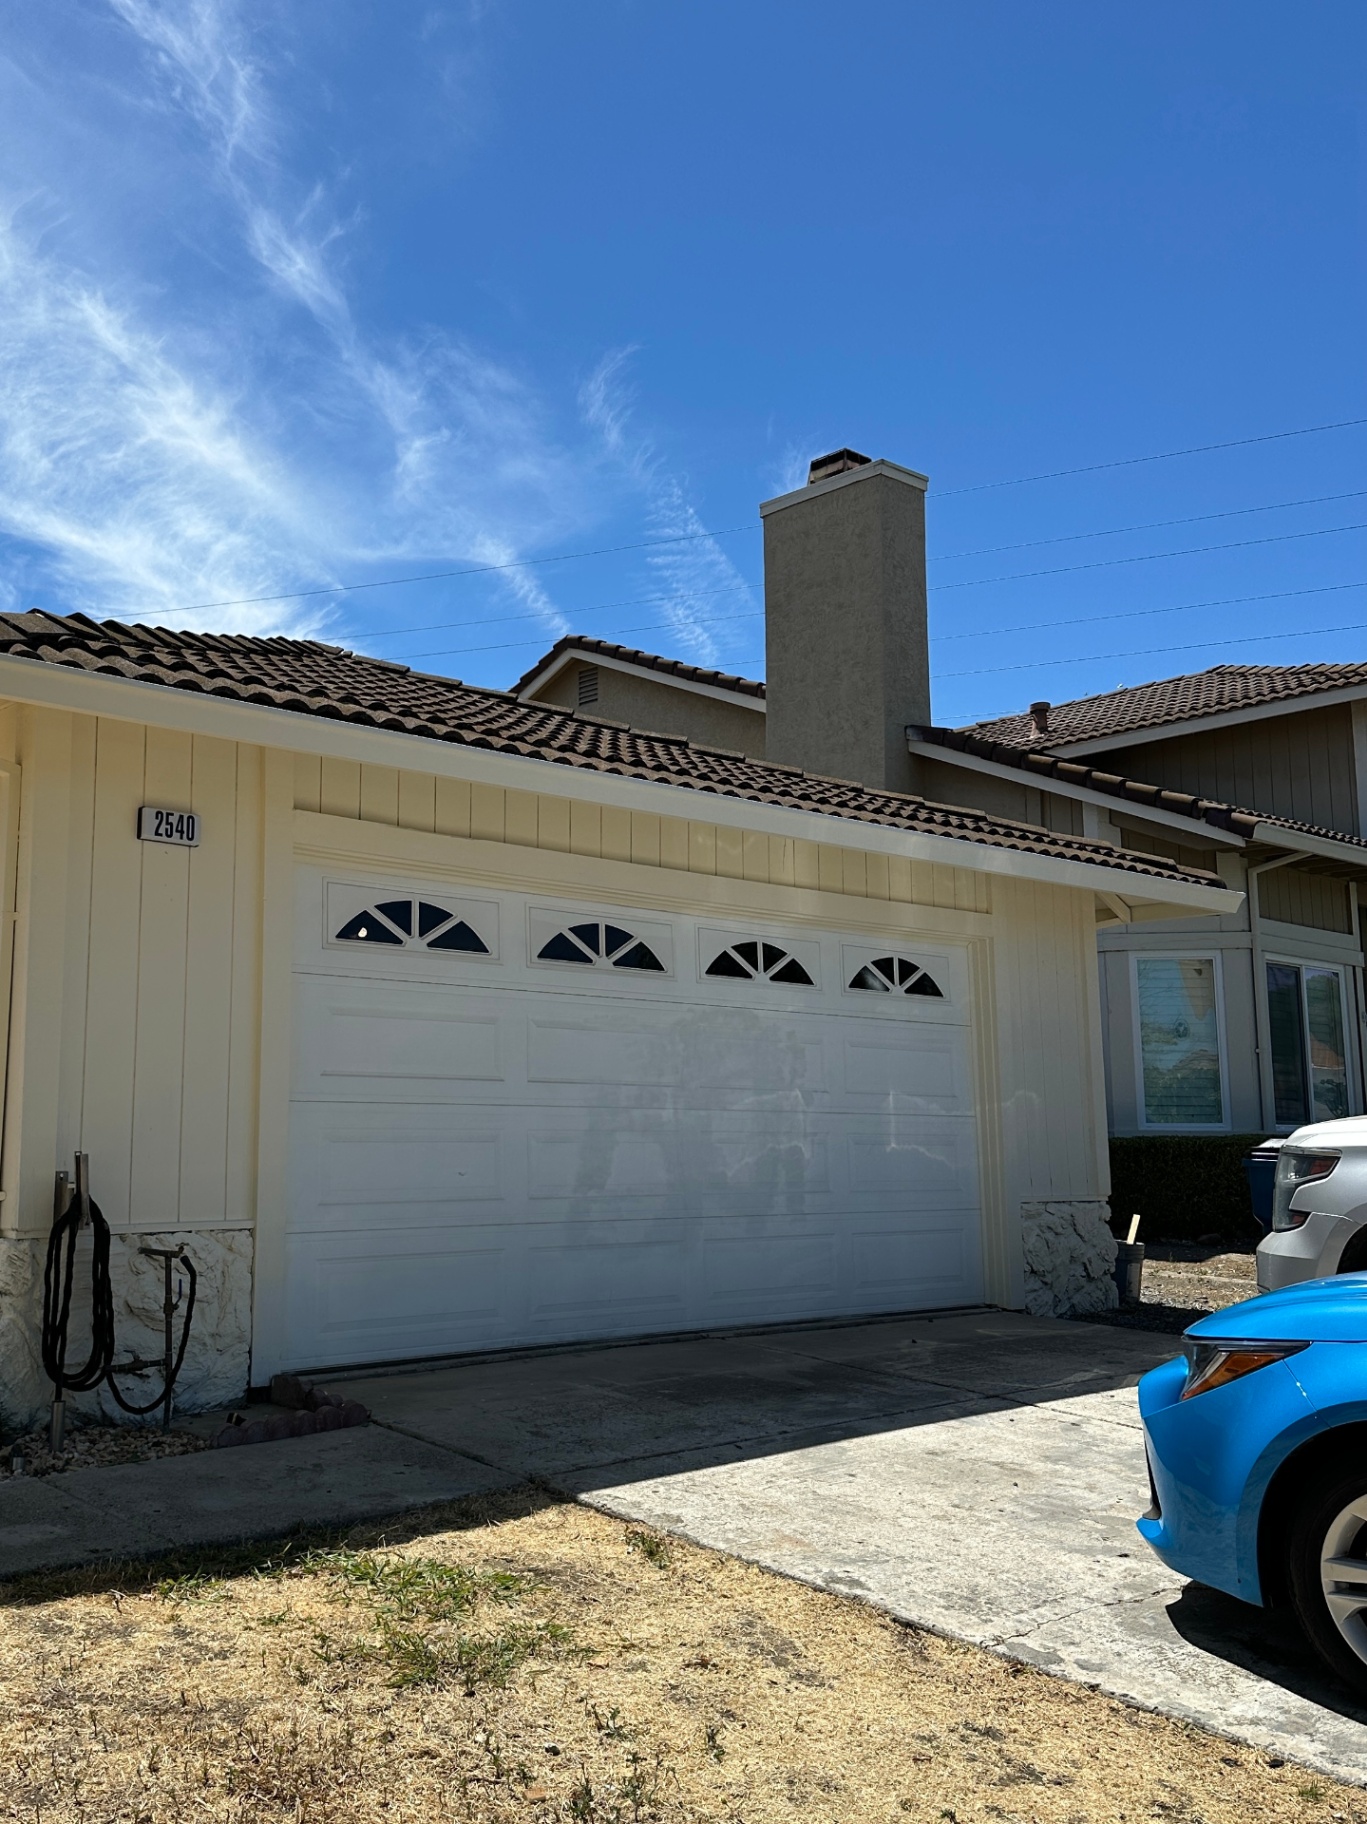
Before: The original painted garage door — clean and prepped after power-washing from our recent house-painting project.
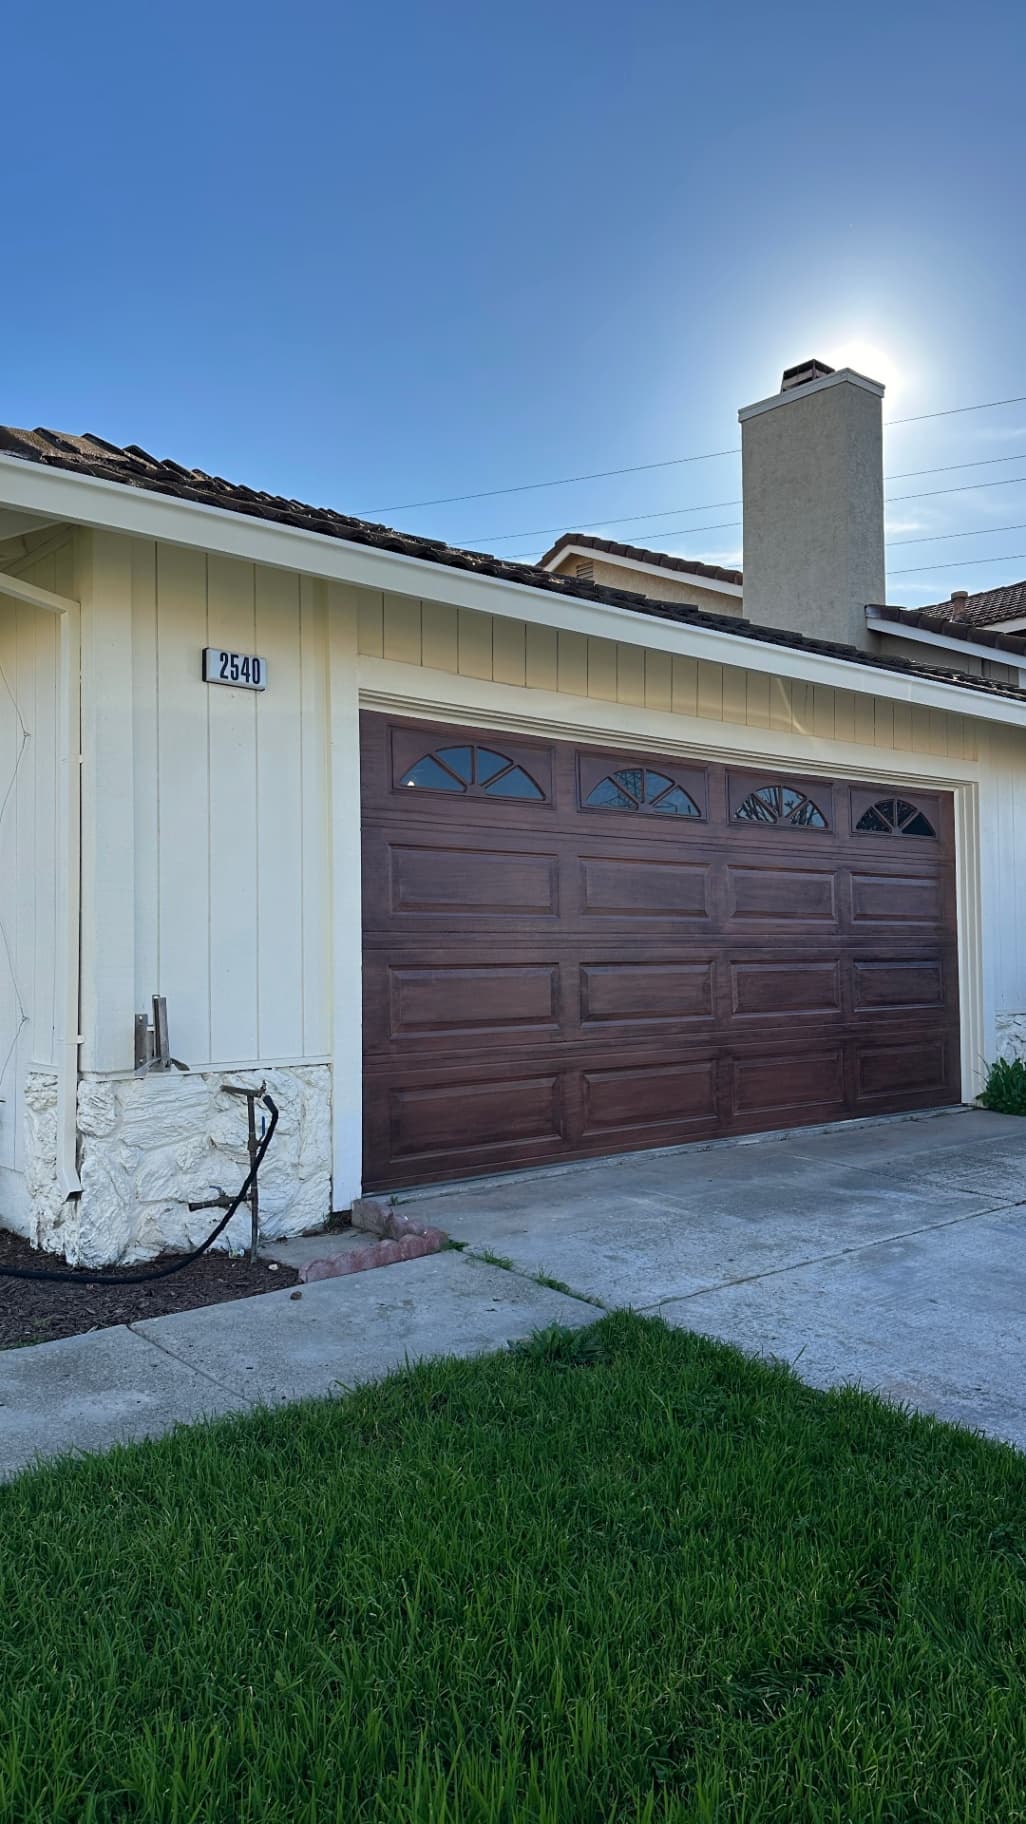
After: The warm, realistic faux-wood finish that completely upgrades the curb appeal.
Project Time & Cost
Time: 1 afternoon
Cost: Less than $50 for me (I already had gel stain, gloves, and painter's tape on hand)
That’s a massive savings compared to a brand-new wood door!
ITEM | COST |
|---|---|
Paint (a little less than 1 quart) | $22 |
Gel stain (~1/2 a can) | $12 |
Penetrating stain (~1/3 a can) | $3 |
Staining pads | $9 |
Brushes | $5 |
TOTAL: | ~$51 |
Final Thoughts: Budget Curb Appeal Made Easy
This DIY faux wood garage door project is one of the best ways to transform your home’s exterior without breaking the bank. In just a few hours, you can go from plain to polished with a warm, wood-look finish that elevates your curb appeal instantly.
📌 Pin this tutorial for later so you can come back when you’re ready to tackle your own garage door transformation!
✨ Have you tried a faux wood paint technique before? Let me know in the comments and drop any questions or feedback!